
Customization
Overview
The Kommunicate chat widget is where your users will chat and interact with your team. You can customize the theme, look, and feel of the chat widget to fit with your brand's theme. You can either do it through Kommunicate Dashboard or add your own customization code manually.
chat widget Customization
You can fully customize the theme, colors, launcher icon, and layout of your chat widget to seamlessly match your brand's identity.
To update these, navigate to the Settings > Chat Widget > Customization.
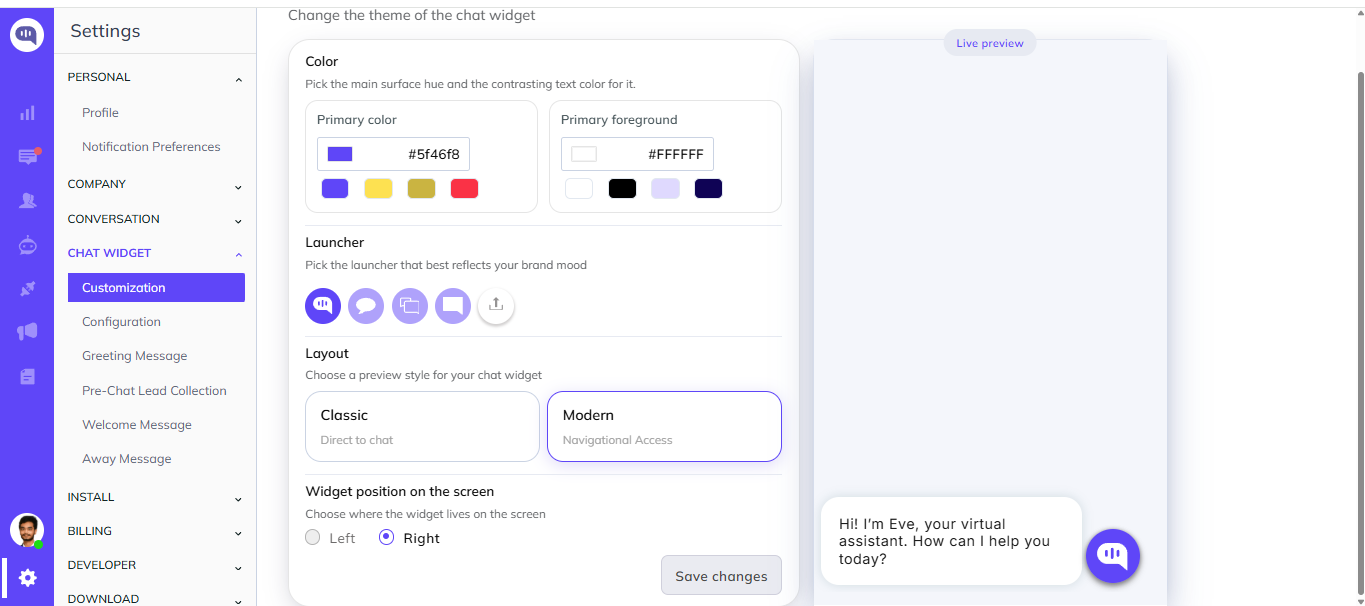
Color Customization
You can fine-tune your widget's color scheme to ensure elements remain highly visible and aligned with your branding:
Primary color: Pick the main surface hue of your widget (used for headers, background accents, and prominent buttons).
Primary foreground: Pick the contrasting text/icon color that sits on top of your primary color to ensure clear legibility (e.g., #FFFFFF for white text on a dark primary background).
Layout Styles
Kommunicate now offers two distinct preview and functional layout styles for your widget:
- Classic (Direct to chat): Opens straight into a conversation view, prioritizing a quick, direct messaging experience.
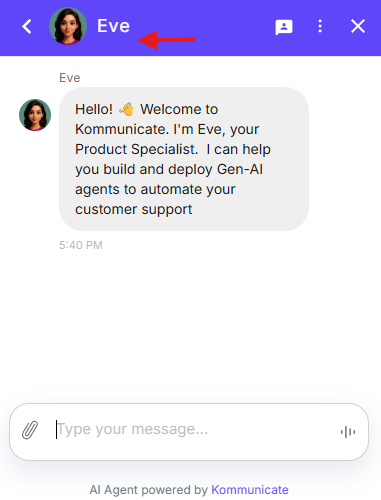
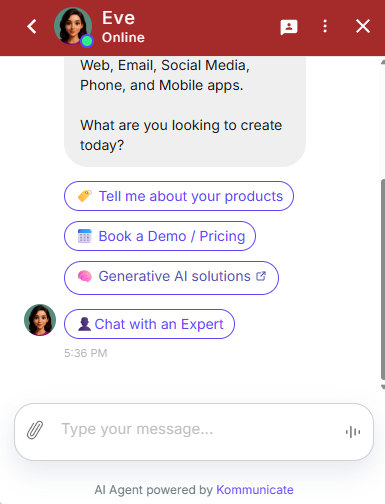
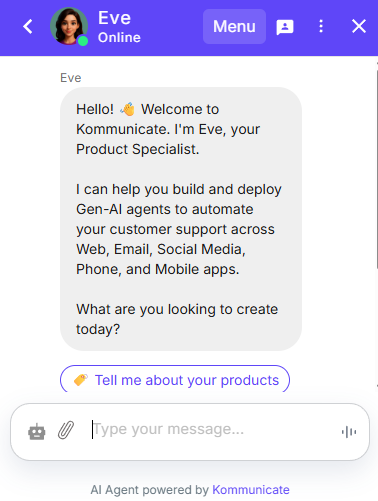
- Modern (Navigational Access): A dynamic layout featuring a welcoming home screen with quick-navigation options, FAQ search capabilities, and dedicated tabs like Chat and Voice.
Launcher
Pick a launcher icon that best reflects your brand's mood:
- Select from the predefined preset icon shapes.
- Click the Upload icon button (the tray with the upward arrow) to upload your own custom branding or business logo as the chat trigger.
Widget Position on the Screen
Choose exactly where the widget lives on your website:
- Select Left or Right depending on your webpage layout preferences.
Warning: Important: Once you are satisfied with the look in the Live preview panel on the right, make sure to click the Save changes button at the bottom of the card to apply the updates to your widget.
Customize chat widget by using CSS
Alternatively, you can pass custom CSS to customize the chat widget. Add a kommunicateSettings.onInit function and pass the CSS in Kommunicate.customizeWidgetCss() function as shown below and paste it right after declaring kommunicateSettings variable in the Kommunicate script code
kommunicateSettings.onInit = function() {
        var css = "<YOUR_CSS_CODE_HERE>"; // Replace <YOUR_CSS_CODE_HERE> with the CSS you want to override.
        Kommunicate.customizeWidgetCss(css); // use window.Kommunicate for ReactJs
    };
Note: If any Kommunicate functions need to be executed in the javascript libraries or framework, the
windowobject must be declared before the function. Because the 'window' is a global object in the browser environment and allows the Kommunicate script file to be accessed from the component.Example: For CSS customisation function, use
window.Kommunicate.customizeWidgetCss(css);
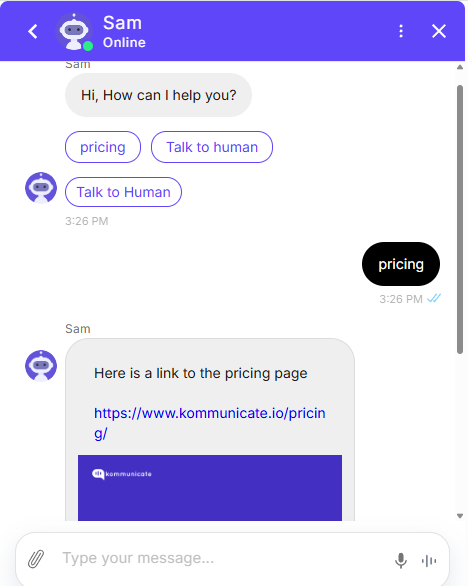
To change the color of sent messages
Example :

var cssChanges = ".mck-msg-right .mck-msg-box{background-color: blue!important;color:yellow!important;}";
Kommunicate.customizeWidgetCss(cssChanges);
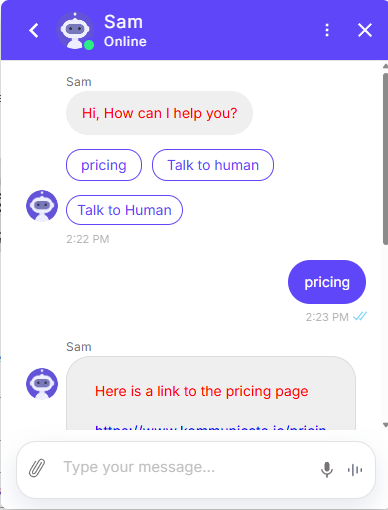
To change the received messages' color
Example :

var cssChanges = ".mck-msg-left .mck-msg-box{background-color: blue!important;color:yellow!important;}";
Kommunicate.customizeWidgetCss(cssChanges);
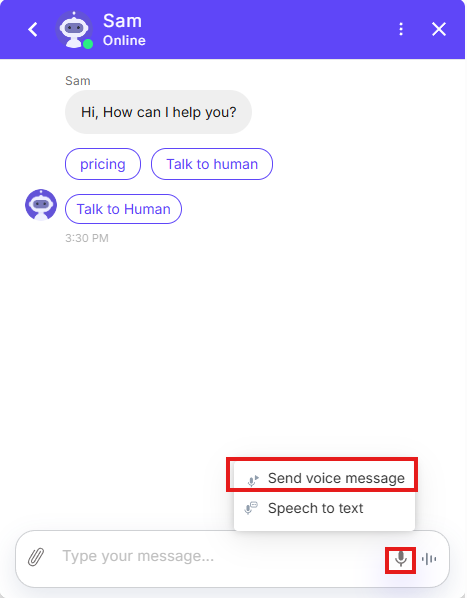
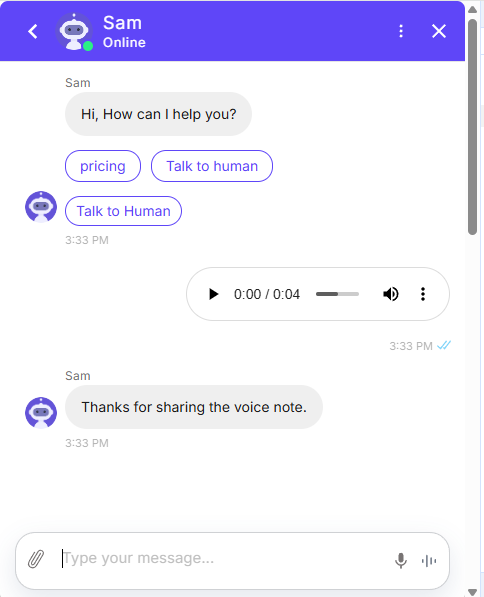
To add a Voice Note
To allow users to send voice notes from the chat widget, add "voiceNote": true in the kommunicateSettings of the install script.
(function(d, m){
        var kommunicateSettings =
          {"appId":"APP_ID","popupWidget":true,"automaticChatOpenOnNavigation":true,"voiceNote":true};
        var s = document.createElement("script"); s.type = "text/javascript"; s.async = true;
        s.src = "https://widget.kommunicate.io/kommunicate-widget-3.0.min.js";
        var h = document.getElementsByTagName("head")[0]; h.appendChild(s);
        window.kommunicate = m; m._globals = kommunicateSettings;
    })(document, window.kommunicate || {});
Once you click on the Voice Input (Mic) option, you need to select Send Voice message and speak to record the message and send it.
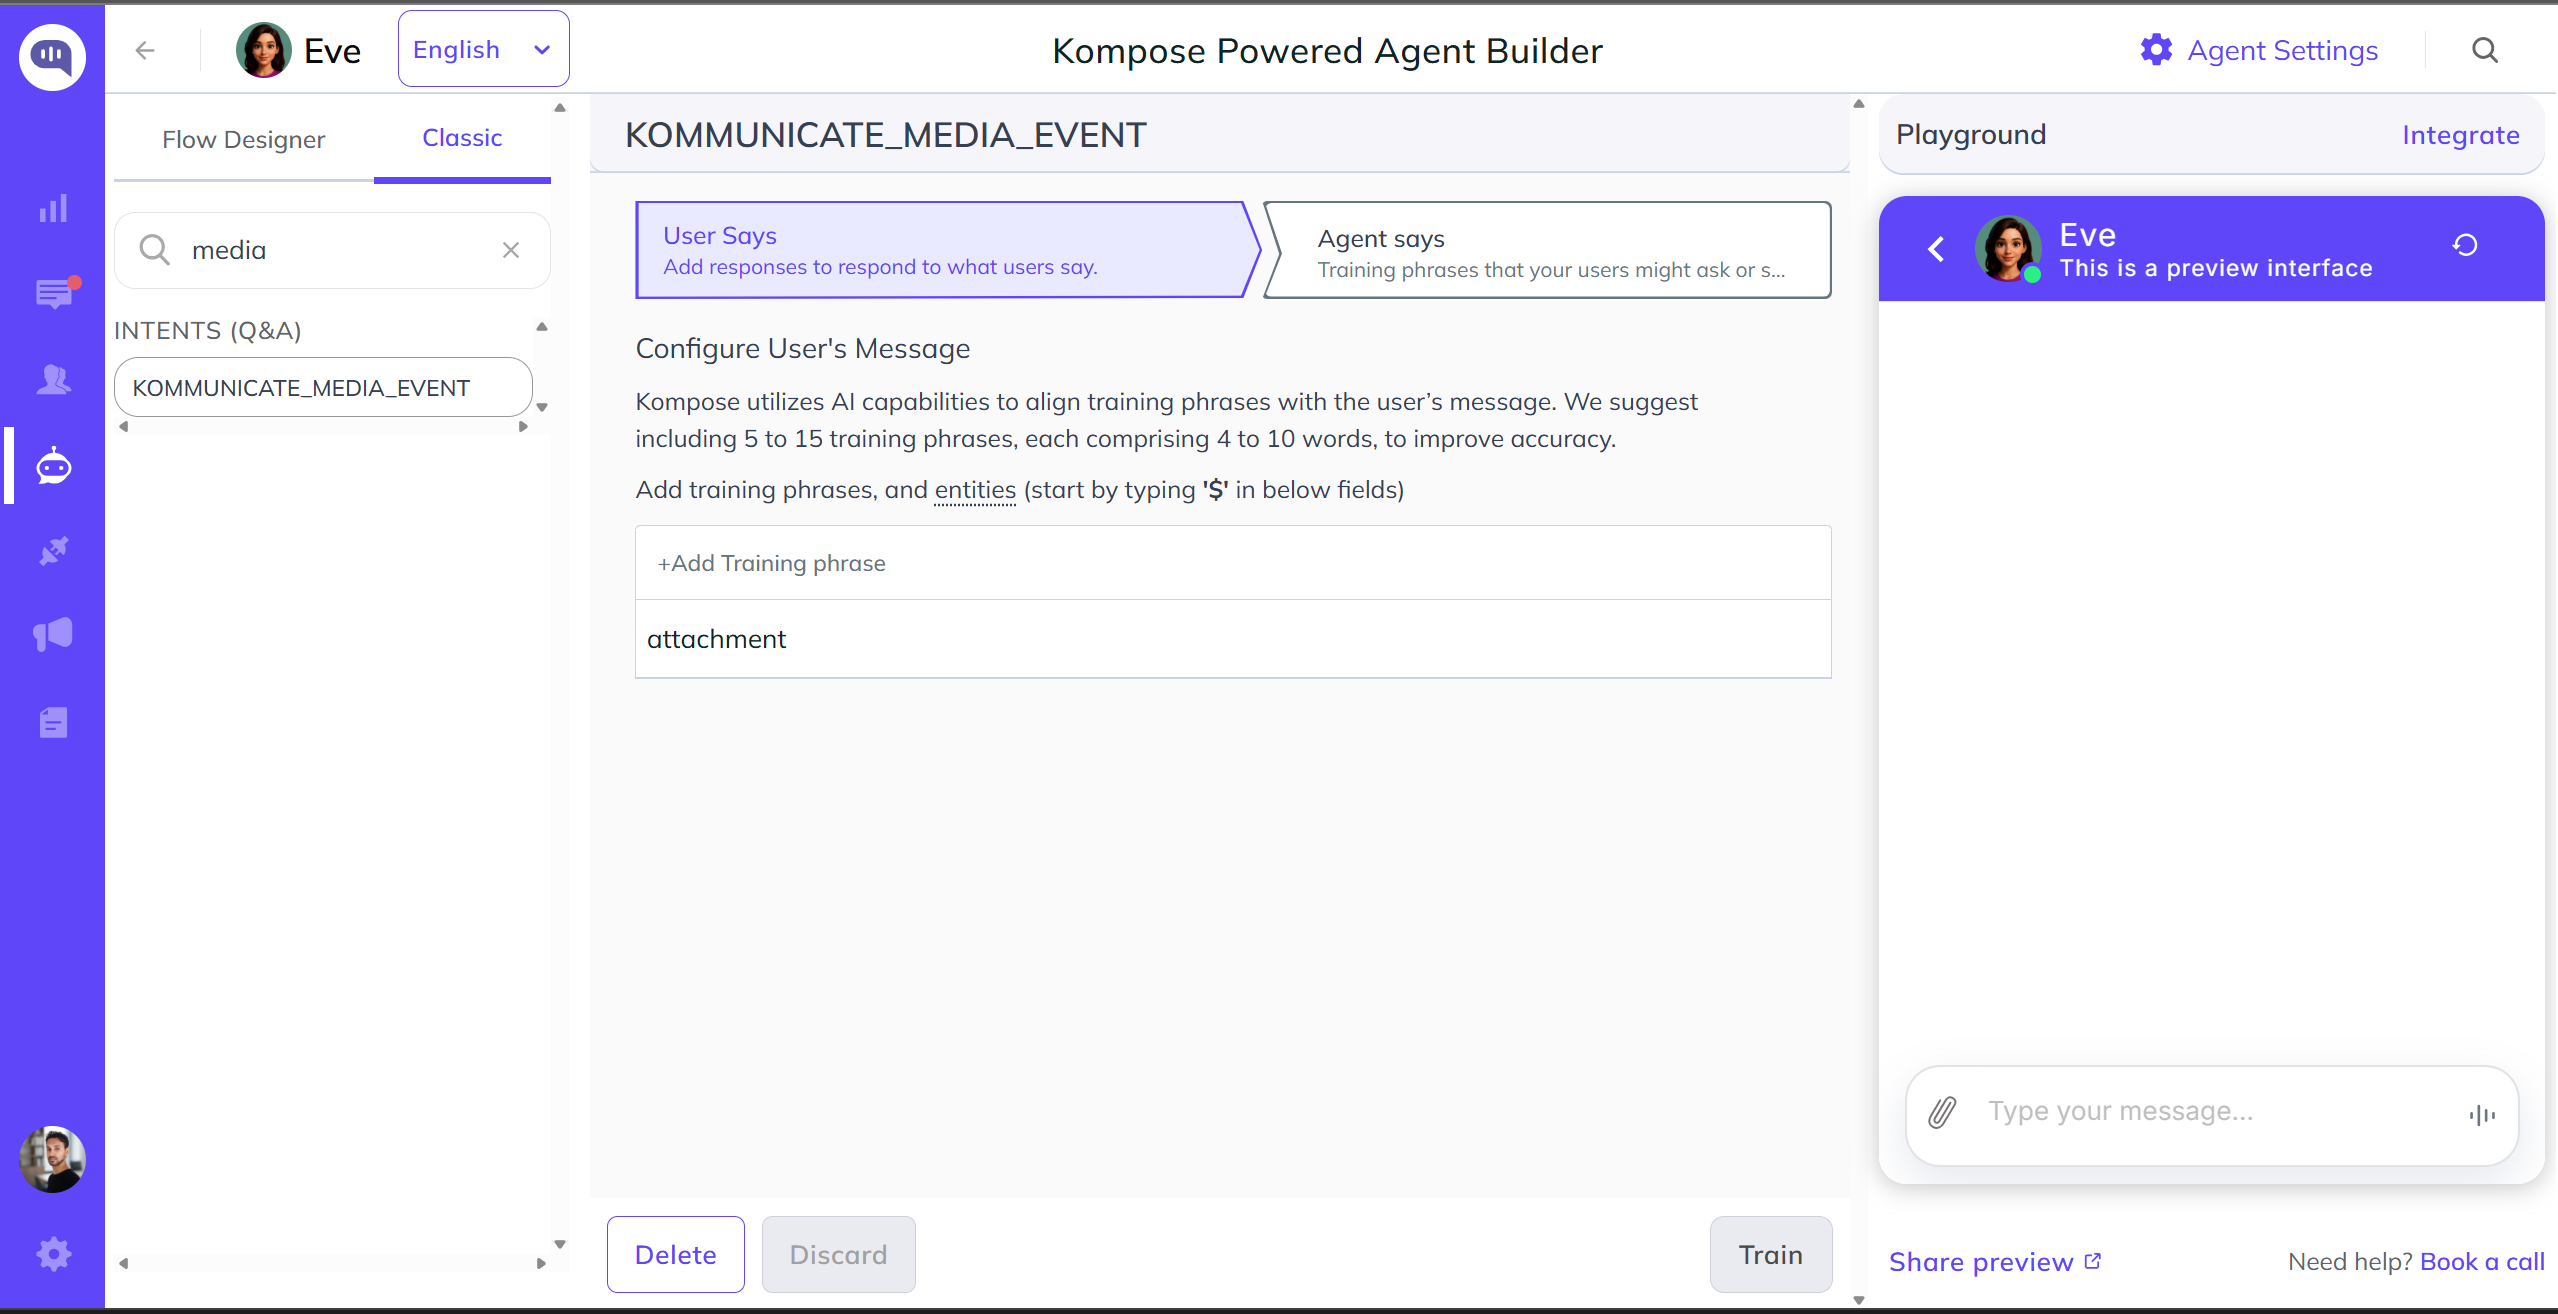
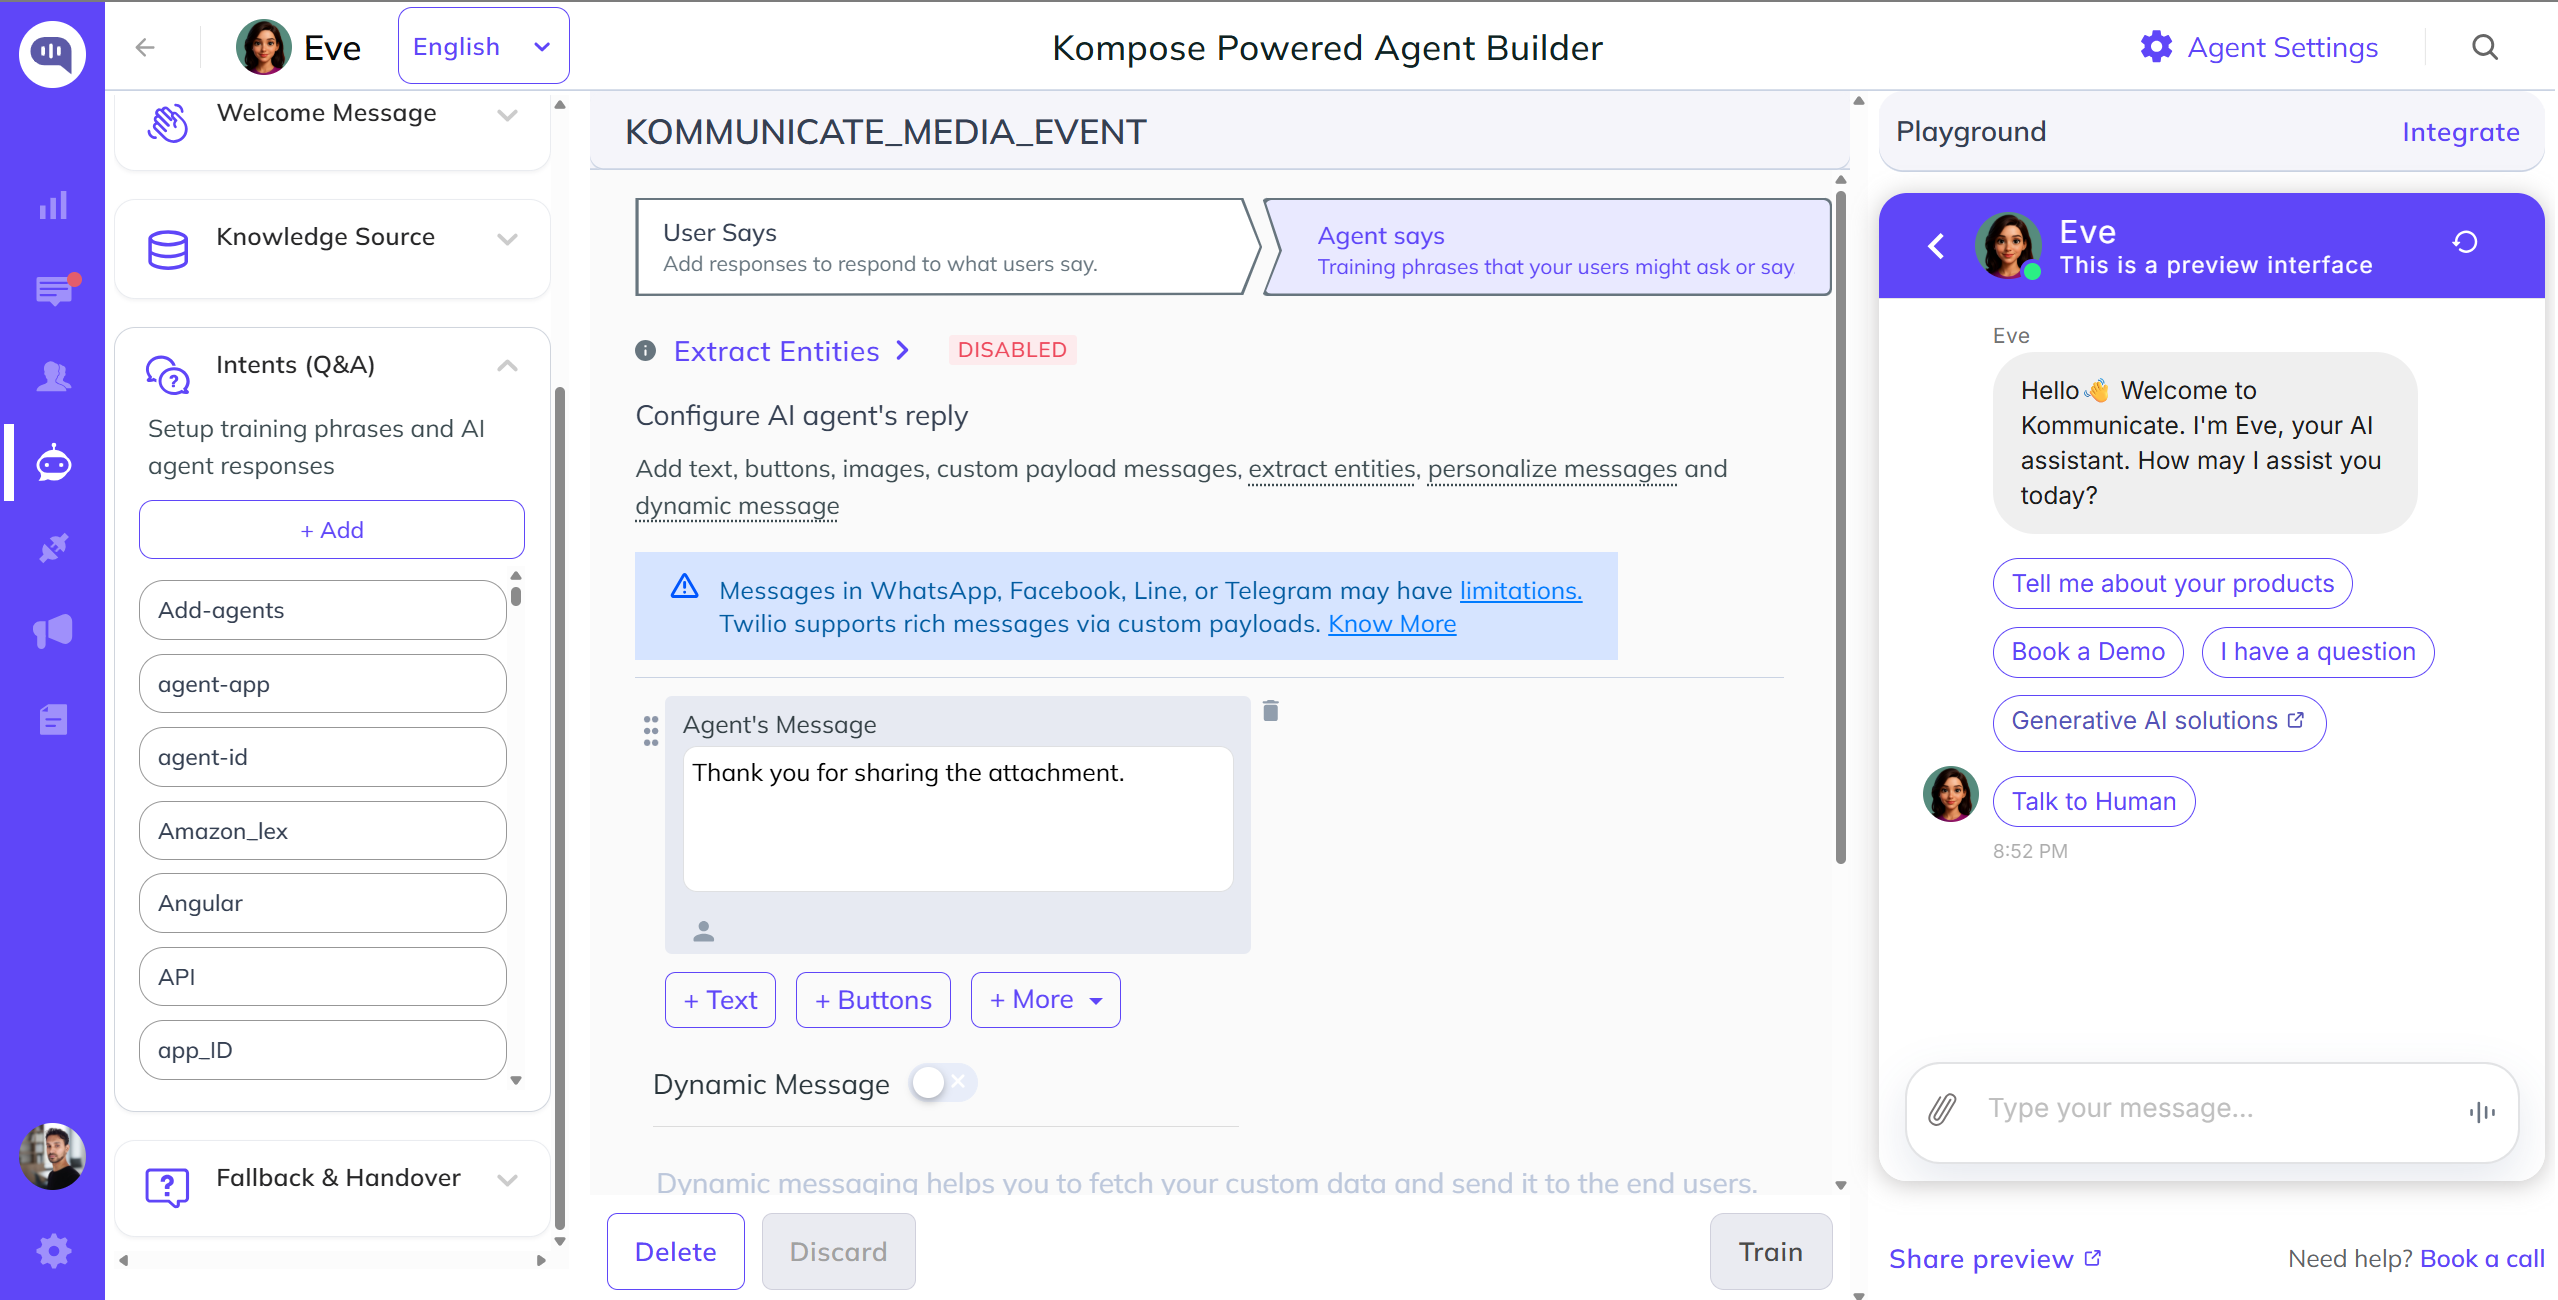
By default, the AI agent will transfer the chat to the human agent after an attachment is shared. To acknowledge from the AI agent, you can create a new intent and add an AI agent response.
To get the response from the AI agent when a media file is sent, you need to create an Intent with the name KOMMUNICATE_MEDIA_EVENT and add a relevant response in AI Agent Says.
Change quick replies background & text color
Example :

var css1 = ".km-cta-multi-button-container button.km-quick-replies{background-color:blue!important;}";
Kommunicate.customizeWidgetCss(css1);

var css2 = ".km-custom-widget-text-color{color:white!important;}";
Kommunicate.customizeWidgetCss(css2);
To Show/hide the chat widget
To hide the chat widget on page load, pass the following code inside the onInit function as given below:
"onInit": function () {
    Kommunicate.displayKommunicateWidget(false);
}
To disable the chat widget textarea
To hide the chat widget input textarea, pass the following code inside the onInit function as given below:
KommunicateGlobal.document.querySelector(".mck-box-form.mck-row").style.visibility="hidden";
KommunicateGlobal.document.querySelector(".mck-box-form.mck-row").style.display="none";
Example: To disable the chat widget textarea
    (function(d, m){
        var kommunicateSettings =
            {"appId":"APP_ID","popupWidget":true,"automaticChatOpenOnNavigation":true,
         "onInit": function (){
            KommunicateGlobal.document.querySelector(".mck-box-form.mck-row").style.visibility="hidden";
            KommunicateGlobal.document.querySelector(".mck-box-form.mck-row").style.display="none";
            }
          };
        var s = document.createElement("script"); s.type = "text/javascript"; s.async = true;
        s.src = "https://widget.kommunicate.io/kommunicate-widget-3.0.min.js";
        var h = document.getElementsByTagName("head")[0]; h.appendChild(s);
        window.kommunicate = m; m._globals = kommunicateSettings;
    })(document, window.kommunicate || {});
Hide rich message buttons on click
Add "hidePostCTA":true in the kommunicateSettings of the install script and the following customization to your install script
Example: To hide buttons on-click
(function(d, m){
        var kommunicateSettings =
            {"appId":"APP_ID","popupWidget":true,"automaticChatOpenOnNavigation":true,"hidePostCTA":true};
        var s = document.createElement("script"); s.type = "text/javascript"; s.async = true;
        s.src = "https://widget.kommunicate.io/kommunicate-widget-3.0.min.js";
        var h = document.getElementsByTagName("head")[0]; h.appendChild(s);
        window.kommunicate = m; m._globals = kommunicateSettings;
    })(document, window.kommunicate || {});
To Disable/grey Out the Form post submission
Add "disableFormPostSubmit": true in the kommunicateSettings of the install script to enable this feature. This feature will hide the button post the form is submitted although the form will be visible with the submitted data, and the form values are non-editable.
Example: To disable the form field post submission
(function(d, m){
        var kommunicateSettings =
            {"appId":"APP_ID","popupWidget":true,"automaticChatOpenOnNavigation":true};
        kommunicateSettings.disableFormPostSubmit = true
        var s = document.createElement("script"); s.type = "text/javascript"; s.async = true;
        s.src = "https://widget.kommunicate.io/kommunicate-widget-3.0.min.js";
        var h = document.getElementsByTagName("head")[0]; h.appendChild(s);
        window.kommunicate = m; m._globals = kommunicateSettings;
    })(document, window.kommunicate || {});
Restrict the user to give CSAT rating only once
To prevent users from giving multiple CSAT ratings, add "oneTimeRating":true to the kommunicateSettings variable in the chat widget installation script.
Example: Restricting the user's to CSAT rating
var kommunicateSettings = {
    ....
    "oneTimeRating": true
    ...
};
Hide the Widget on Specific Pages
Use the onInit callback within the kommunicateSettings to conditionally check the current URL and hide the widget on specific pages using Kommunicate.displayKommunicateWidget(false).
Example: To hide the widget on a specific URL
<script type="text/javascript">
  (function (d, m) {
    var kommunicateSettings = {
      // STEP 1: Replace this placeholder with your actual Kommunicate App ID
      appId: "YOUR_APP_ID",
      popupWidget: true,
      automaticChatOpenOnNavigation: true,
    };

    kommunicateSettings.onInit = function () {
      // STEP 2: Add the exact URL paths where you want to HIDE the chat widget.
      // CRITICAL: Each path MUST start with a forward slash '/' (e.g., '/pricing')
      // To hide on the homepage only, use: ["/"]
      const hiddenPages = ["/pricing", "/products"];

      // STEP 3: The script automatically checks if the current page matches your list
      const shouldHide = hiddenPages.includes(window.location.pathname);

      // STEP 4: If a match is found, the widget is hidden automatically
      if (shouldHide) {
        Kommunicate.displayKommunicateWidget(false);
      }
    };

    // Standard Kommunicate widget loading logic (Do not modify below this line)
    var s = document.createElement("script");
    s.type = "text/javascript";
    s.async = true;
    s.src = "https://widget.kommunicate.io/v2/kommunicate.app";
    var h = document.getElementsByTagName("head")[0];
    h.appendChild(s);
    window.kommunicate = m;
    m._globals = kommunicateSettings;
  })(document, window.kommunicate || {});
</script>
Hide (Online/offline) status of agents on the web plugin
add the following code under "onInit" function
Kommunicate.customizeWidgetCss("div#mck-agent-status-text { display: none !important; } span.mck-agent-status-indicator { display: none !important }");
Example: To hide status if agents
Note: Replace "APP_ID" with the application ID from https://dashboard.kommunicate.io/settings/install.
(function(d, m) {
    var kommunicateSettings = {
        "appId": "APP_ID",
        "popupWidget": true,
        "automaticChatOpenOnNavigation": true,
        "onInit": function() {
            Kommunicate.customizeWidgetCss("div#mck-agent-status-text { display: none !important; } span.mck-agent-status-indicator { display: none !important }");
        }
    };
    var s = document.createElement("script");
    s.type = "text/javascript";
    s.async = true;
    s.src = "https://widget.kommunicate.io/kommunicate-widget-3.0.min.js";
    var h = document.getElementsByTagName("head")[0];
    h.appendChild(s);
    window.kommunicate = m;
    m._globals = kommunicateSettings;
})(document, window.kommunicate || {});
To change chat Pop-up widget text color
Example :

var css = ".chat-popup-widget-text{color:red!important;}"
Kommunicate.customizeWidgetCss(css);
To change chat Pop-up background color
Example :

var css = ".chat-popup-widget-container{background-color: Thistle!important;}"
Kommunicate.customizeWidgetCss(css);

To change chatwidget top header color
Example :

var css = ".mck-box-top {background-color: red!important;}"
Kommunicate.customizeWidgetCss(css);
To add extra characters to the AI agent name
Example :

var css = ".mck-tab-title{max-width:170px!important}"
Kommunicate.customizeWidgetCss(css);
Change the close button color

var css = ".mck-box-close svg{fill: #0c0c0c}";
Kommunicate.customizeWidgetCss(css);
Change the font of the chat widget
kommunicateSettings.onInit = function() {
        var css = ".mck-box-title{font-family: 'Brush Script MT' !important;} .mck-box div{font-family: 'Brush Script MT' !important;}";
        Kommunicate.customizeWidgetCss(css); // use window.Kommunicate for ReactJs
    };
Show the chat widget on click of a button
Use the below mentioned code to show the chat widget on click of a button
<script type="text/javascript">
function openChat() {
    Kommunicate.displayKommunicateWidget(true); //This will show the widget
}
</script>

<!--
Assume the following button on your website and onClick of this button you need to call the openChat function(use the above javascript function to call the openChat())
-->
<input type="button" value="HELP" id="button" disabled="true" onclick="openChat()">
Example: to show the chat widget on click of a button
<html>
<body>
<script type="text/javascript">
function openChat() {
   Kommunicate.displayKommunicateWidget(true);
   Kommunicate.openWidgetPreview();
}
(function(d, m){
        var onInitRan = false;
        var kommunicateSettings = {"appId":"APP_ID","popupWidget":true,"automaticChatOpenOnNavigation":true,
        //The following settings will disable the widget on page load
        "onInit": function(){
            if (!onInitRan) {
               Kommunicate.displayKommunicateWidget(false);
               onInitRan = true
            }
            document.getElementById("button").disabled=false;
        }
       }
        var s = document.createElement("script"); s.type = "text/javascript"; s.async = true;
        s.src = "https://widget.kommunicate.io/kommunicate-widget-3.0.min.js";
        var h = document.getElementsByTagName("head")[0]; h.appendChild(s);
        window.kommunicate = m; m._globals = kommunicateSettings;
      })(document, window.kommunicate || {});
</script>
<input type="button" style="background-color:#5F46F8;color:white;width:250px;
height:70px;" value="CHAT SUPPORT" id="button" disabled="true" onclick="openChat()"/>
</body>
</html>
Open chat widget automatically on a page visit
<script type="text/javascript">
(function(d, m){
        var kommunicateSettings =
            {"appId":"APP_ID","popupWidget":true,"automaticChatOpenOnNavigation":true};
             kommunicateSettings.onInit = function () {
        Kommunicate.launchConversation();

      }
        var s = document.createElement("script"); s.type = "text/javascript"; s.async = true;
        s.src = "https://widget.kommunicate.io/kommunicate-widget-3.0.min.js";
        var h = document.getElementsByTagName("head")[0]; h.appendChild(s);
        window.kommunicate = m; m._globals = kommunicateSettings;
    })(document, window.kommunicate || {});
/* NOTE : Use web server to view HTML files as real-time update will not work if you directly open the HTML file in the browser. */
</script>
Option to trigger from a button in chat widget
  (function (d, m) {
      var kommunicateSettings = {
        appId: "APP_ID", // Replace your APP_ID here
        popupWidget: true,
        automaticChatOpenOnNavigation: true,quickReplies:["Hi","What's up","Hello"],
        onInit:function(){
          var faqButton = KommunicateGlobal.document.getElementById('km-faq');
          var menuButton = document.createElement('button');
          menuButton.setAttribute('id','km-menu-btn');
          menuButton.setAttribute('class','km-faq');
          menuButton.style.cssText='position: relative; right:68px;'
          menuButton.innerHTML='Menu';
          var span = document.createElement('span');
          span.appendChild(menuButton)
          span.style.cssText='position: absolute; display: flex;';

          if(faqButton){
            faqButton.insertAdjacentElement('beforebegin',span);
            menuButton.addEventListener('click',function(){
              KommunicateGlobal.document.getElementById('mck-text-box').innerHTML='menu'; // Replace 'menu' with what you have added in AI agent's training phase.
              KommunicateGlobal.document.getElementById('mck-msg-sbmt').click();
            });
          }

        }
      };
      var s = document.createElement("script");
      s.type = "text/javascript";
      s.async = true;
      s.src = "https://widget.kommunicate.io/kommunicate-widget-3.0.min.js";
      var h = document.getElementsByTagName("head")[0];
      h.appendChild(s);
      window.kommunicate = m;
      m._globals = kommunicateSettings;
    })(document, window.kommunicate || {});
Hide scrollbar in chat widget
(function (d, m) {
    var kommunicateSettings = {
        "appId": "APP_ID", "popupWidget": true, "automaticChatOpenOnNavigation": true, //general AI agent data id, opens chatwindow on page load
        "onInit": function () {
            Kommunicate.customizeWidgetCss(".mck-message-inner.mck-group-inner{overflow: hidden;}");
        }
    };
    var s = document.createElement("script");
    s.type = "text/javascript";
    s.async = true;
    s.src = "https://widget.kommunicate.io/kommunicate-widget-3.0.min.js";
    var h = document.getElementsByTagName("head")[0];
    h.appendChild(s);
    window.kommunicate = m;
    m._globals = kommunicateSettings;
})(document, window.kommunicate || {});
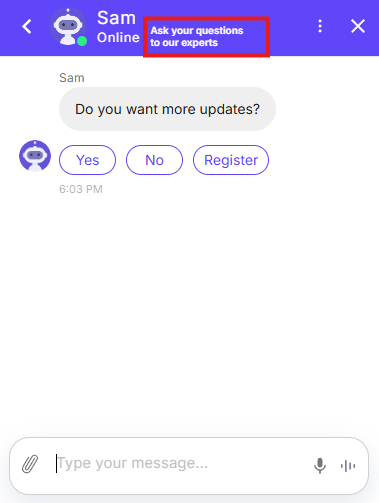
Add Subtitle in the chat widget
<!DOCTYPE html>
<html>
<body>
<div id="custom" style="
    font-size: 10px;
    line-height: normal;
    margin: 5px 0 5px 55px;
">
    <span style="
    font-size: 13px;
"> Ask your questions to our experts</span>
<br>
    <span style="
    font-weight: 300;
"> Ask us and find your perfect solution</span>
</div>
<script type="text/javascript">
    (function(d, m){
        var kommunicateSettings =
            {"appId":"APP_ID","popupWidget":true,"automaticChatOpenOnNavigation":true,
            "onInit": function() {
                let target = KommunicateGlobal.document.querySelector('.km-conversation-header-title-container');
                let customHeaderExtension = document.getElementById('custom');
                target.appendChild(customHeaderExtension);
                console.log(KommunicateGlobal.document.querySelector('.km-conversation-header-title-container'))
            }};
        var s = document.createElement("script"); s.type = "text/javascript"; s.async = true;
        s.src = "https://widget.kommunicate.io/kommunicate-widget-3.0.min.js";
        var h = document.getElementsByTagName("head")[0]; h.appendChild(s);
        window.kommunicate = m; m._globals = kommunicateSettings;
    })(document, window.kommunicate || {});
</script>
</body>
</html>
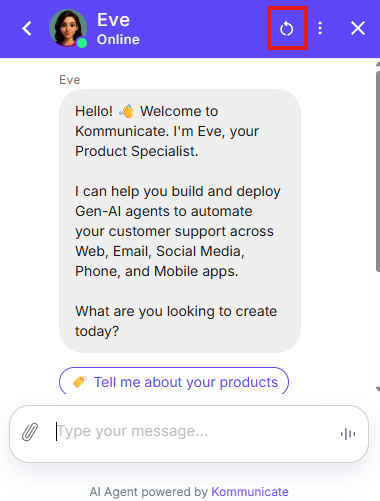
Add Reset Conversation button on the chat widget
To add Reset Conversation button to more menu on the chat widget include kommunicateSettings.restartConversationByUser = true; method right after declaring the kommunicateSettings variable in the chat widget installation script.
When the user clicks on Reset Conversation, it will trigger the welcome message without clearing the chat history.
var kommunicateSettings = { {"appId":"YOUR APP_ID","popupWidget":true,"automaticChatOpenOnNavigation":true};
    ....
    kommunicateSettings.restartConversationByUser = true;
    ...
Using the above method, send a custom event to the AI agent platform on reseting the conversation, This will display a new Welcome intent or custom intent message to the user.
(function (d, m) {
    var kommunicateSettings = {appId: "YOUR_APPID",popupWidget: true,automaticChatOpenOnNavigation: true};
    kommunicateSettings.restartConversationByUser = true;
    kommunicateSettings.onInit = function () {
    var defaultSettings = {
            "customWelcomeEvent": "customEvent",
        };
          Kommunicate.updateSettings(defaultSettings);
    };
    var s = document.createElement("script");
    s.type = "text/javascript";
    s.async = true;
    s.src = "https://widget.kommunicate.io/kommunicate-widget-3.0.min.js";
    var h = document.getElementsByTagName("head")[0];
    h.appendChild(s);
    window.kommunicate = m;
    m._globals = kommunicateSettings;
})(document, window.kommunicate || {});
Greeting message for different web pages
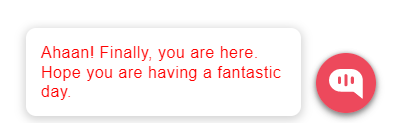
To override the message of the greeting pop up and to enable or disable it via code, use the following app options.
<script type="text/javascript">
  ...
    /*---------------- Kommunicate settings start ----------------*/

     var kommunicateSettings = {
      "appId": "<APP_ID>",
      ...
      "appSettings": {
        "chatWidget": {
          "popup": false           // To enable or disable the pre-chat popup (boolean)
        },
        "chatPopupMessage": [{
          "message": "Overridden message", // Message to be displayed in the pre-chat popup (string)
          "delay": 5000                    // Delay interval of pre-chat popup (number in milliseconds)
        }]
      },
      ...
    };

    /*----------------- Kommunicate settings end ------------------*/
  ...
</script>
warning
The limit for Greeting message for option 1 and option 2 are 35 characters and 150 characters respectively.
Welcome message for different web pages
The following code snippet will help you in setting the welcome message for different web pages.
        var pagelist = {
            "PAGE URL1": "WELCOME MESSAGE FOR PAGE-1",
            "PAGE URL2": "WELCOME MESSAGE FOR PAGE-2"
        }

        //Add the PAGE URL and respective welcome message in the above section


                var defaultSettings = {
                    "WELCOME_MESSAGE": pagelist[window.location.pathname]
            //add the above line in defaultSettings as shown in the screenshot
                }

                if (pagelist[window.location.pathname]) {
                    Kommunicate.updateSettings(defaultSettings);
                }
            }
Check the complete sample code in our repository. This will help you with placing the above code in the right section.
Note: Do not forget to add your APP_ID, page URL, and welcome message before using the sample code mentioned in the repository.
Full-screen chat widget
To make the chat widget full screen, follow the steps below:
- Create a
<div>on your page and assign it an ID (e.g., widget-container) - Set the desired width and height on that div
- Pass the div ID into the Kommunicate settings via the containerId parameter and replace App-Id with your actual app ID
- The chat widget will automatically take the dimensions of the div and open on page load
<!DOCTYPE html>
<html>

<head>
    <meta charset="UTF-8" />
    <title>Kommunicate Container Test</title>
</head>

<body>

    <!-- Custom Container -->
    <div id="widget-container" style="width: 700px; height: 600px; border: 1px solid #ccc;">
    </div>
    <script type="text/javascript">
        (function (d, m) {
            var kommunicateSettings =
                { "appId": "App-Id", "popupWidget": true, "containerId": "widget-container","automaticChatOpenOnNavigation": true };
            var s = document.createElement("script"); s.type = "text/javascript"; s.async = true;
            s.src = "https://widget.kommunicate.io/kommunicate-widget-3.0.min.js";
            var h = document.getElementsByTagName("head")[0]; h.appendChild(s);
            window.kommunicate = m; m._globals = kommunicateSettings;
        })(document, window.kommunicate || {});
        /* NOTE : Use web server to view HTML files as real-time update will not work if you directly open the HTML file in the browser. */
    </script>
</body>

</html>
Default metadata
You can pass on additional information as metadata with every message. Add defaultMessageMetaData parameter in kommunicateSettings variable. Below is an example of how you can send metadata:
var kommunicateSettings = {
    ...
    "defaultMessageMetaData":{"key1":"value1", "key2":"value2", ...}
    ...
};
Note: You can also update metadata using KM_CHAT_CONTEXT.
Events
To get real-time updates of users' activity on the Kommunicate chat widget, subscribe to the following events:
| Event | Description |
|---|---|
| onMessageSent | Triggered when the message is sent by the user. |
| onMessageReceived | Triggered when a new message is received by the user. |
| onChatWidgetOpen | Triggered when chat widget opens. |
| onChatWidgetClose | Triggered when the user clicks on the close button in the chat widget. |
| onRichMessageButtonClick | Triggered when user clicks on rich messages in the chat widget. |
| onFaqClick | Triggered when the user clicks on the FAQ button in chat widget. |
| onRateConversationClick | Triggered when the user clicks on Rate this conversation button in the chat widget. |
| onRateConversationEmoticonsClick | Triggered when the user clicks on emoticons that are available on the feedback dialog in chat widget. |
| onSubmitRatingClick | Triggered when the user submits the ratings in the chat widget. |
| onShowResolvedClick | Triggered when the user clicks on Show resolved in the chat widget. |
| onStartNewConversation | Triggered when a new conversation gets started in the chat widget. |
| onGreetingMessageNotificationClick | Triggered when the user clicks on the greeting message in the chat widget. |
| onRestartConversationClick | Triggered when the user clicks on the restart conversation button in the chat widget. |
| onLocationIconClick | Triggered when the user clicks on the location icon in the conversation. |
| onAttachmentClick | Triggered when the user clicks on the attachment icon in the conversation. |
| onVoiceIconClick | Triggered when the user clicks on the voice icon in the conversation. |
| onNotificationClick | Triggered when the user clicks on the notification message, which is along with the chat widget icon. |
Example on how to subscribe to events
Subscribe to the events by calling Kommunicate.subscribeToEvents(events) function and pass the events object in it.
var kommunicateSettings = {
    ...
    "onInit": function () {
        var events = {
            'onMessageReceived': function (resp) {
            console.log(resp);
            //called when a new message is received
            },
            'onMessageSent': function (resp) {
            console.log(resp);
            //called when the message is sent
            }
            'onChatWidgetOpen': function (resp) {
            console.log(resp);
            //called when chat widget gets open
            }
        };
        Kommunicate.subscribeToEvents(events);
    },
    ...
}
Collecting User Location
Kommunicate allows you to capture and view user location data directly on the conversation page of your dashboard. There are two ways to set this up: via the Dashboard Settings (Recommended) or via Custom Code.
Option 1: Enable via Dashboard (Recommended) The easiest way to capture user location is by enabling it directly from your Kommunicate dashboard. No coding required.
- Navigate to Settings > Chat Widget >Configuration.
- Toggle on Capture Location.
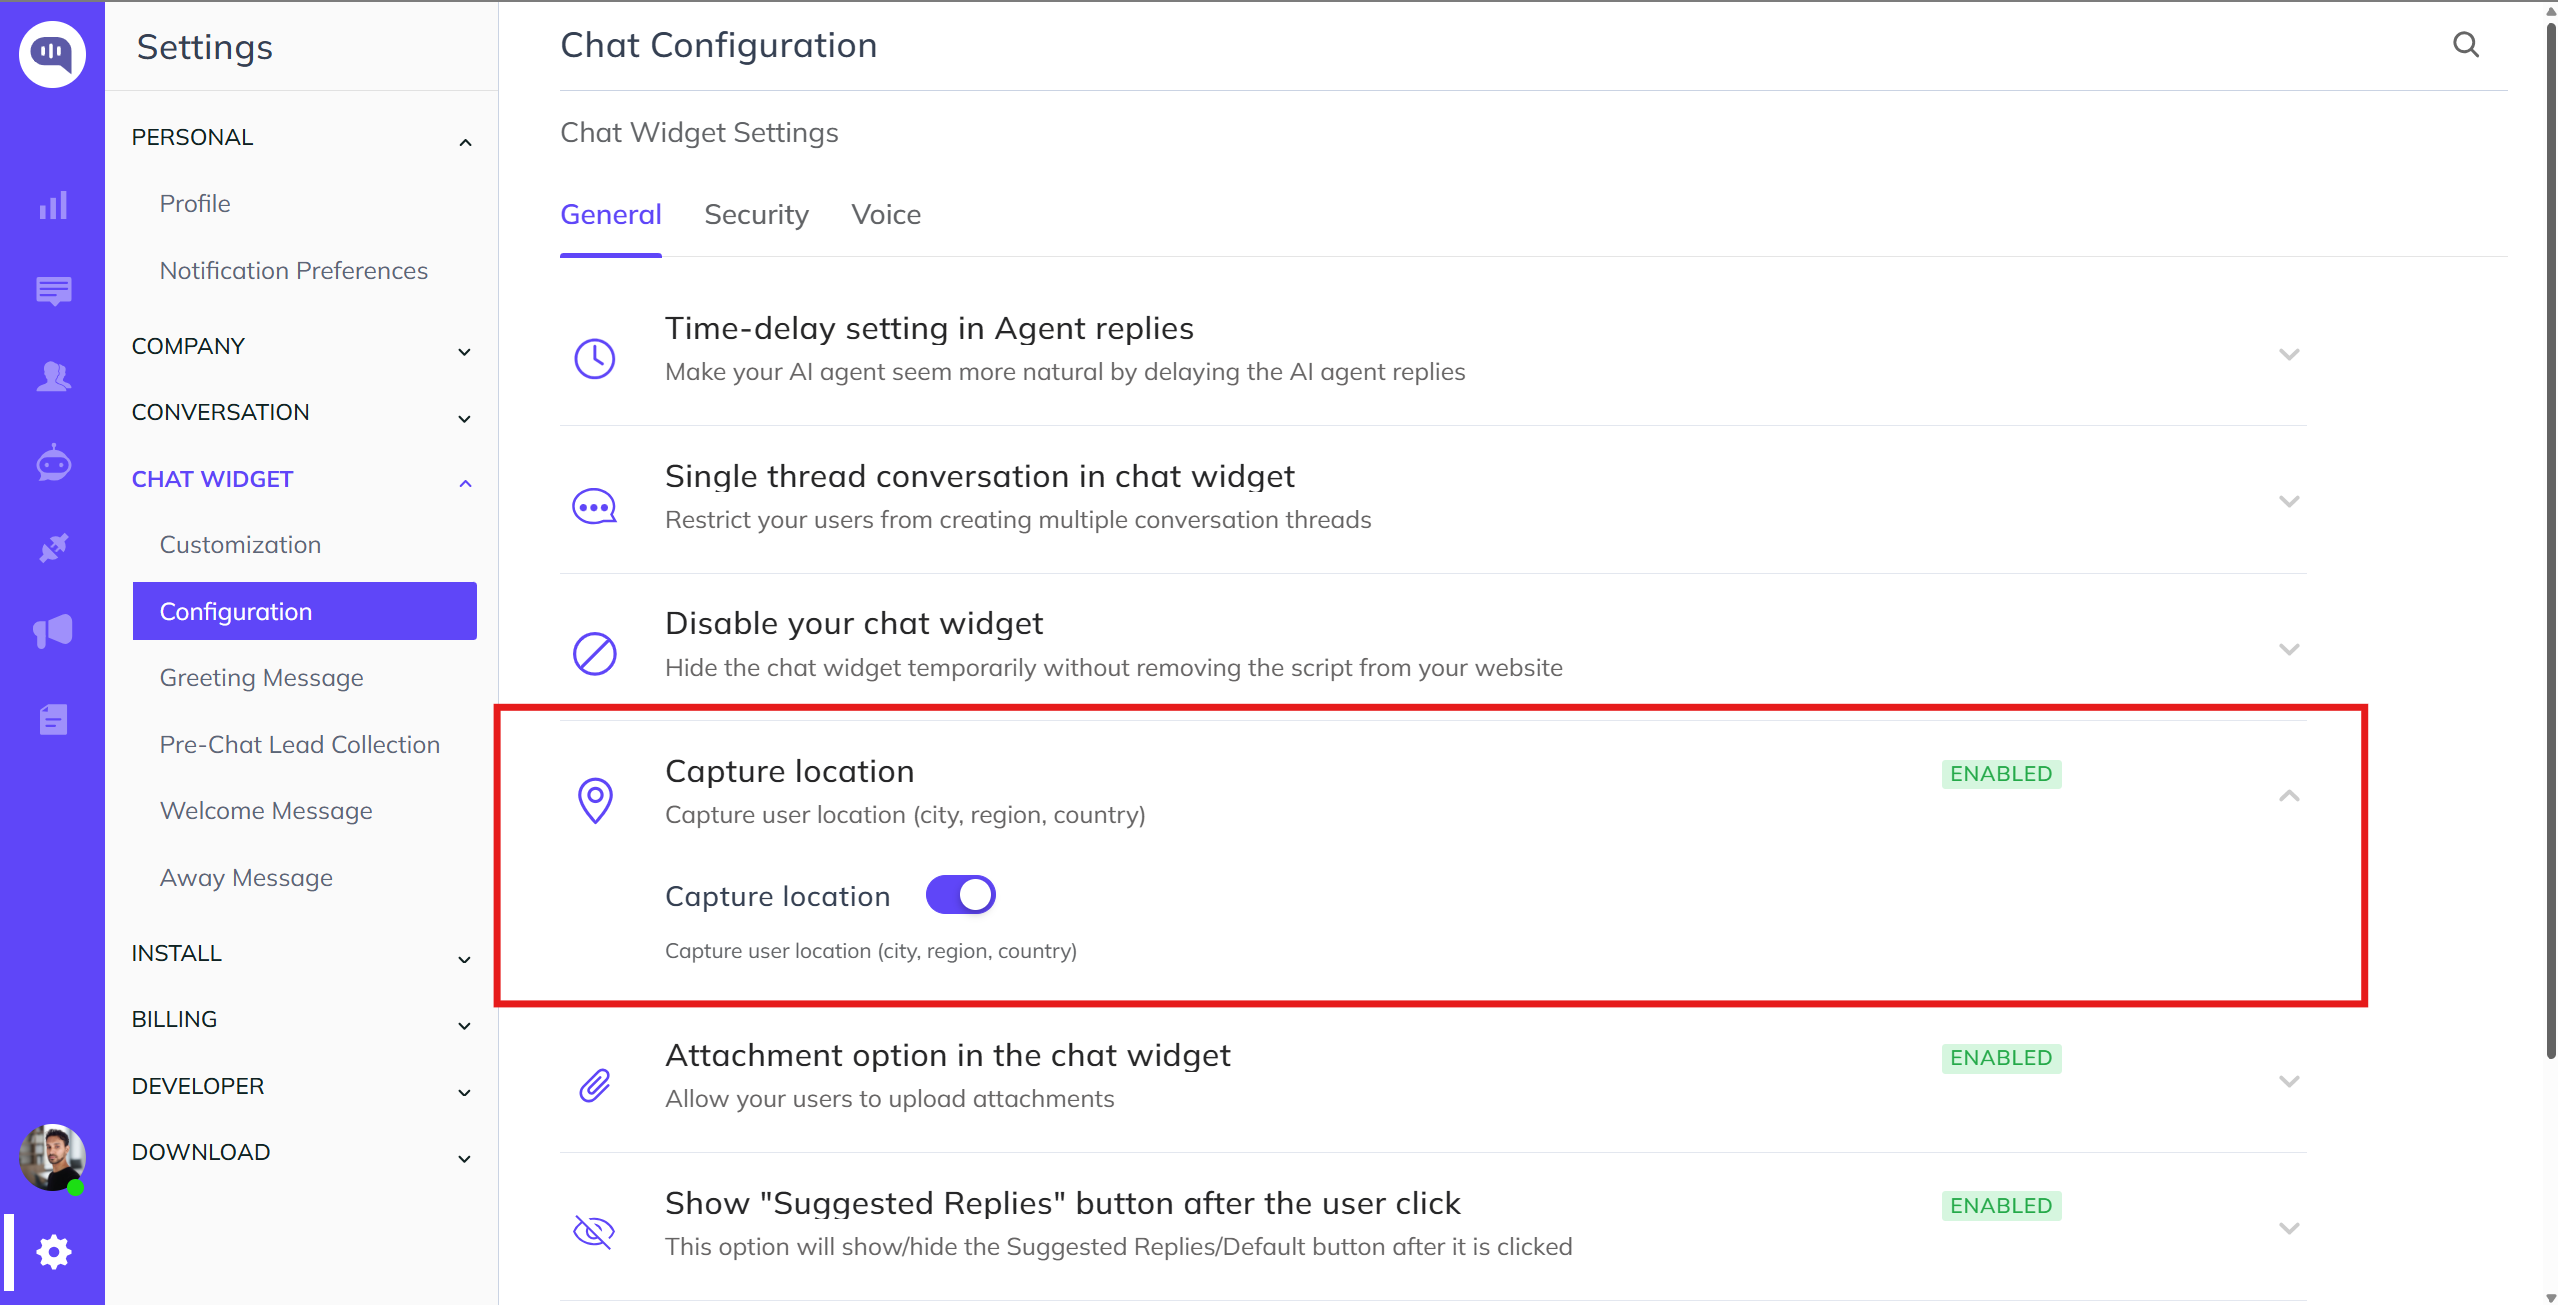
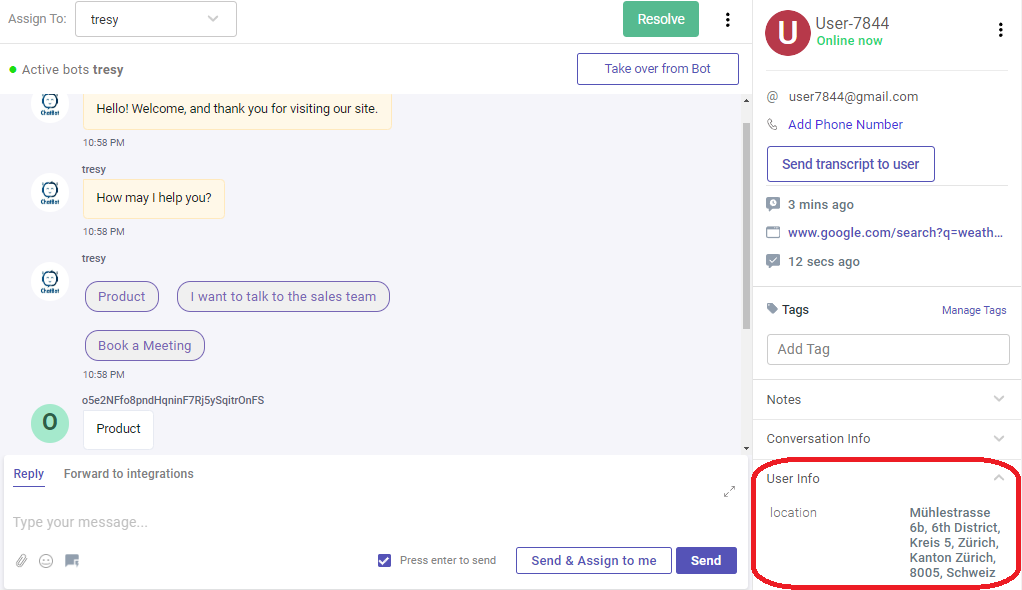
Once enabled, the user's location will automatically appear in the top-right corner of the conversation page.

Option 2: Enable via Custom Script (Alternative) If you need advanced control or want to handle the location data manually within your application setup, you can pass the location using the Kommunicate tracking script.
To retrieve and update this information, use the Kommunicate.getUserLocation() function inside your initialization settings:
Note that providing a Google API key is optional. However, if your application exceeds 20,000 calls per month, integrating your own Google API key is mandatory.
var kommunicateSettings = {
    ...
    "googleApiKey":"<GOOGLE_API_KEY>",
    "onInit": function () {
        Kommunicate.getUserLocation().then((position)=>{
                        userdetail = {
                        "metadata": {
                                "location": position
                                }
                        };
                        Kommunicate.updateUser(userdetail);
                      });
    },
    ...
}
To obtain a Google Maps API key, follow these steps:
- Go to the Google Cloud Console:
- Open your browser and go to Google Cloud Console.
- Create a New Project:
- If you don't already have a project, click on the project dropdown in the top-left corner and select "New Project".
- Fill in the necessary details like Project Name and Organization, then click on "Create".
- Enable APIs:
- Once your project is created, go to the "Navigation Menu" (three horizontal lines) on the top-left corner and select "APIs & Services" > "Library".
- Search for "Maps JavaScript API" and click on it.
- Click on the "Enable" button to enable the API for your project.
- Get Your API Key:
- Go back to the "APIs & Services" > "Credentials" page.
- Click on "Create Credentials" at the top and select "API key".
- A dialog box will appear with your new API key. You can copy this key and use it in your application.
These steps should help you obtain and secure a Google Maps API key for your project.
Note: User location information will only be visible on the dashboard if the user has explicitly granted location-sharing permission through their web browser settings.
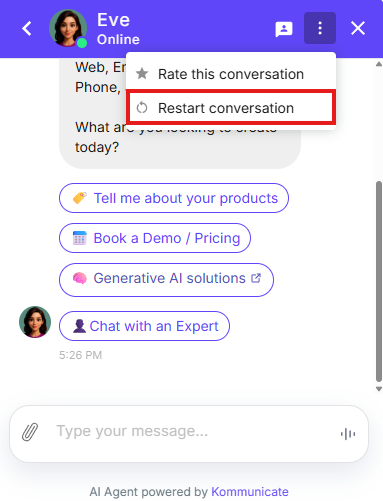
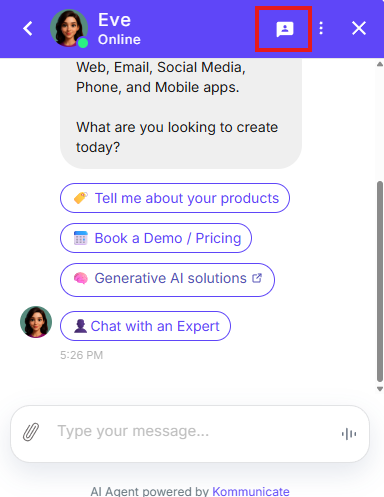
chat widget Menu
The users have an option to include Human handover, Restart, 'TTS,' and 'CSAT' buttons on the chat widget. In the chat widget, only one icon, for e.g., 'Restart' or 'CSAT,' will be displayed at a time. The remaining options will be placed under three dots.
To enable this option in the chat widget, users have to configure the option through the install script.
Here are the steps to implement this feature:
Restart Conversation
Insert the Kommunicate install script with primaryCTA: 'RESTART_CONVERSATION’ and "restartConversationByUser":true
When the primaryCTA is set to 'RESTART_CONVERSATION', the RESTART_CONVERSATION icon will be integrated into the chat widget. Clicking on this icon will restart the conversation.

Human Handover
With the help of this icon, the chat can be transferred to a human at the click of a button. Use the variable "TALK_TO_HUMAN": true in the script.
(function(d, m){
        var kommunicateSettings =
            {"appId":"REPLACE_YOUR_APPID_HERE","popupWidget":true,"automaticChatOpenOnNavigation":true,
            "talkToHuman": true, primaryCTA:"TALK_TO_HUMAN",
};
        var s = document.createElement("script"); s.type = "text/javascript"; s.async = true;
        s.src = "https://widget.kommunicate.io/kommunicate-widget-3.0.min.js";
        var h = document.getElementsByTagName("head")[0]; h.appendChild(s);
        window.kommunicate = m; m._globals = kommunicateSettings;
    })(document, window.kommunicate || {});
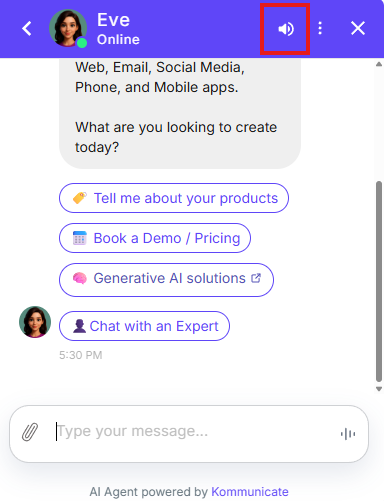
text-to-speech (TTS)
Insert the Kommunicate install script with primaryCTA: 'TTS’ and voiceOutput:true
CSAT Rating
Insert the Kommunicate install script with primaryCTA: “CSAT_RATING” and csatRating:true
If there are multiple options added in the script, only one, i.e.,'Talk to Human' or 'FAQ' will be shown as button; the rest of the options will go under three dots "..."
Note: If an incorrect or undefined value is assigned to primaryCTA, the default value will be set to FAQ, and the FAQ icon will be displayed on the chat widget.