Configuration
Overview
In this section, learn how to configure the Kommunicate SDK according to your requirements.
Note: Add these configuration codes either in AppDelegate
didFinishLaunchingWithOptionsmethod or before creating the conversation.
Attachment Selection Limit
You can restrict the photo/video selection limit inside the conversation.
Note: The maximum limit is 30.
Kommunicate.defaultConfiguration.chatBar.photosSelectionLimit = 20
Delete Conversation
You can let end user delete conversation on their end. End user can delete a conversation by long pressing on the particular conversation on conversation list screen. To implement this, you can use the provided code below.
Kommunicate.defaultConfiguration.enableDeleteConversationOnLongpress = true
Enable Text To Speech Support
By default TTS (Text To Speech) is disabled. You can enable it by using the below line.
Kommunicate.defaultConfiguration.enableTextToSpeechInConversation = true
Enable Speech to Text Support
The quality of the customer journey is everything in a product. STT will help you in enhancing the user experience and people with different learning styles prefer using these features, which is supported on iOS SDK. The Speech-to-Text feature can be enabled using the below setting:
This feature is disabled by default, to enable it, add the below script in the bottom of the Podfile and run pod install:
post_install do |installer|
  installer.pods_project.targets.each do |target|
    if target.name == 'KommunicateChatUI-iOS-SDK'
      target.build_configurations.each do |config|
        config.build_settings['SWIFT_ACTIVE_COMPILATION_CONDITIONS'] ||= ['$(inherited)']
        config.build_settings['SWIFT_ACTIVE_COMPILATION_CONDITIONS'] << 'SPEECH_REC'
      end
    end
  end
end
Also add this Speech recognition & Microphone usage entry in the project's Info.plist(open it as Source Code) file:
<key>NSSpeechRecognitionUsageDescription</key>
<string>Speech recognition will be used to determine which words you speak into the device's microphone.</string>
<key>NSMicrophoneUsageDescription</key>
<string>Allow MicroPhone</string>
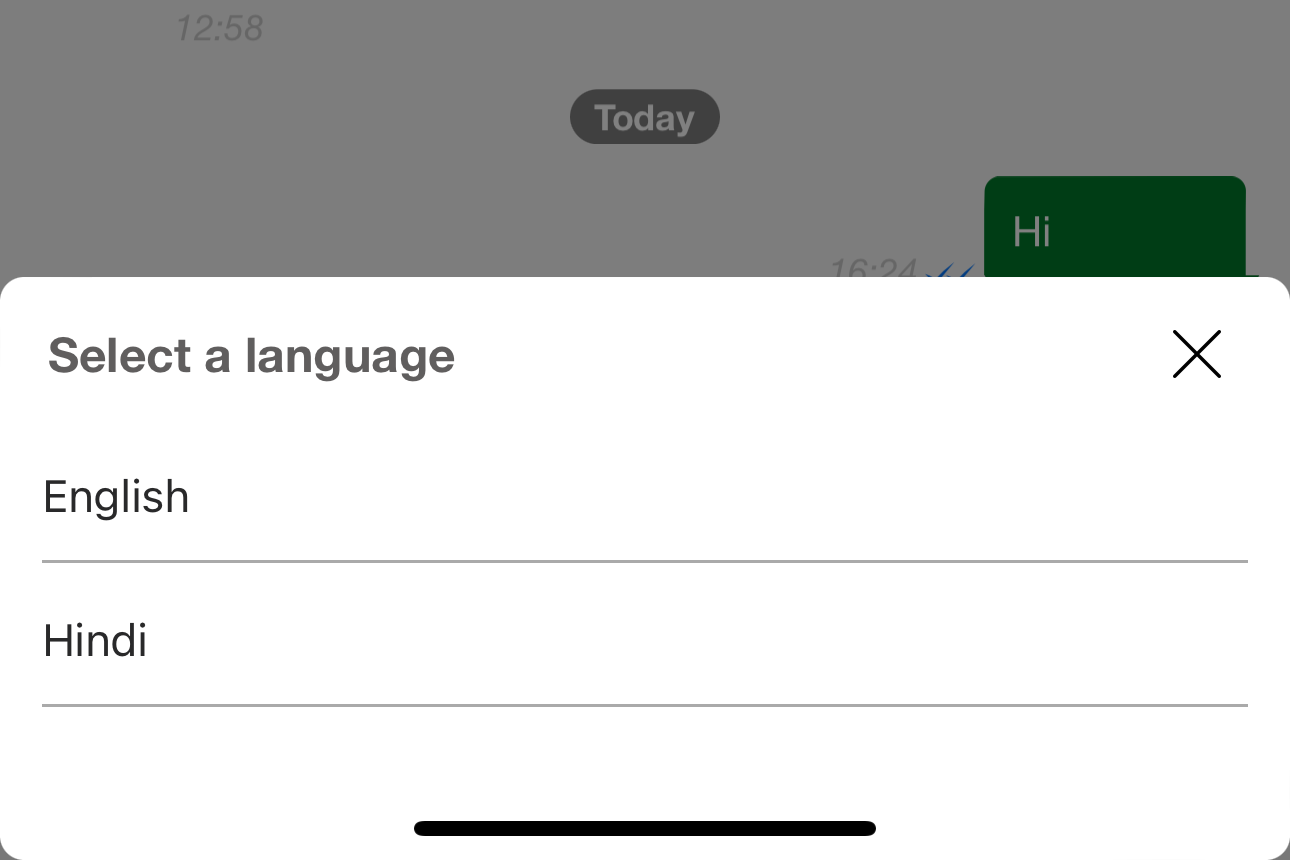
Multiple Language Support for Speech to Text
You can use the sample code below to add support for multiple languages in speech-to-text functionality. You can also trigger a specific message on change of language.
Note: Please make sure that you have enabled speech-to-text before adding multiple languges support. Import
KommunicateChatUI_iOS_SDKfor usingKMLanguage.
var languages = [KMLanguage(code: "hi", name: "Hindi", sendMessageOnClick: true, messageToSend: "handover to Hindi bot"), KMLanguage(code: "en", name: "English", sendMessageOnClick: true, messageToSend: "handover to English bot")]
Kommunicate.defaultConfiguration.languagesForSpeechToText = languages

Events
To get real time updates of user activity inside the Kommunicate SDK, Subscribe to the following events while launching the conversation:
| Event | Description |
|---|---|
| messageSend | Triggered when the message is sent by the user. |
| messageReceive | Triggered when the message is received by the user. |
| faqClick | Triggered when the FAQ button in the conversation /conversation list screen. |
| newConversation | Triggered when a new conversation gets started. |
| conversationBackPress | Triggered when a user taps a back button on converstion screen. |
| conversationListBackPress | Triggered when a user taps a back button on converstion list screen. |
| restartConversationClick | Triggered when the user clicks on the restart conversation button to restart the conversation. |
| richMessageClick | Triggered when the user clicks on rich messages in a conversation. |
| resolveConversation | Triggered when the user clicks on resolve conversation. |
| submitRatingClick | Triggered when the user submits a rating for a conversation. |
| conversationInfo | Triggered when the user clicks on conversation info view. |
How to subscribe for events
Step 1: Import the framework as shown below:
import KommunicateChatUI_iOS_SDK
import Kommunicate
import KommunicateCore_iOS_SDK
Step 2: Create a list of custom events to which you want to get real time update:
let event: [KMCustomEvent] = [.richMessageClick, .faqClick, .messageSend, .messageReceive]
Note: If you are using a Kommunicate version lower than
v7.1.7, then useCustomEventrather thanKMCustomEvent.
Step 3: Make your ViewController to inherit the protocol ALKCustomEventCallback to get the widget event callbacks.
For example:
class ViewController: UIViewController, ALKCustomEventCallback {......
The protocol will add set of callback functions. Which will give you the real time update of respective events.
    func messageSent(message: ALMessage) {}

    func messageReceived(message: ALMessage) {}

    func conversationResolved(conversationId: String) {}

    func conversationRestarted(conversationId: String) {}

    func onBackButtonClick(isConversationOpened: Bool) {}

    func faqClicked(url: String) {}

    func conversationCreated(conversationId: String) {}

    func ratingSubmitted(conversationId: String,rating:Int, comment: String) {}

    func richMessageClicked(conversationId:String,action:Any, type:String) {}

    func conversationInfoClicked() {}
Step 4: Subscribe to above list of events like below before starting the conversation:
Kommunicate.subscribeCustomEvents(events: event, callback: self)
Hiding assignee status
You can use the below code for toggling the visibility of assignee's status for a conversation. By default, it will be visible
Kommunicate.hideAssigneeStatus(true)
Make the bot multilingual
If you want to set a user's language(to get bot replies in that language), then use updateUserLanguage config as shown below:
do {
    try Kommunicate.defaultConfiguration.updateUserLanguage(tag: "fr")
} catch {
    print("Failed to update user language: ", error)
}
One Time Rating
If it is true, customers can give feedback only once for the conversation. If it’s false, the customer can give feedback whenever the conversation gets resolved. By default it will be false.
Kommunicate.defaultConfiguration.oneTimeRating = true
Pass custom data to bot platform
To pass custom data with all the messages to the bot platform, use updateChatContext config as shown below:
let messageInfo = ["custom-key": "value"]
do {
    try Kommunicate.defaultConfiguration.updateChatContext(with: messageInfo)
} catch {
    print("Failed to update chat context: ", error)
}
Restrict Pattern
You can configure a regex pattern that can be restricted when user tries to send in the conversation.This regular expression pattern that will be used to match the text that user is sending. This will be combined with the restricted words config option, which means if the text is matched with the restricted words or through this pattern, an alert will be shown. By default, it is empty.
Note: Make sure you verify this pattern before setting up here.
Kommunicate.defaultConfiguration.restrictedMessageRegexPattern = "your regular expression"
Restricted Words
To achieve this, create a file which contains a list of restricted words and mention your file name without extension like below. File extension should be text.
Kommunicate.defaultConfiguration.restrictedWordsFileName = "your file name without extension"
Rich Message Button Action
You can disable the user's actions on rich messages like Quick replies, Generic cards,lists etc.It can be useful when you want to restrict these actions for a particular list of users. By default, it is false which means it won't restrict any actions.
Kommunicate.defaultConfiguration.disableRichMessageButtonAction = true
Restrict User Input
Note: Enable this to restrict text input from users when the conversation is assigned to a bot.
To prevent the users from sending a message when a conversation is assigned to a bot. Add the below configuration option before launching the chat. The input typing field will be hidden.
Kommunicate.kmConversationViewConfiguration.restrictMessageTypingWithBots = true
Send additional metadata with messages
If you want to send additional metadata with all the messages(sent from a device) then use messageMetadata config in your AppDelegate like this:
func application(_ application: UIApplication, didFinishLaunchingWithOptions launchOptions: [UIApplication.LaunchOptionsKey: Any]?) -> Bool {

    let messageInfo = ["custom-key": "value"]
    do {
        let messageInfoData = try JSONSerialization.data(withJSONObject: messageInfo, options: .prettyPrinted)
        let messageInfoString = String(data: messageInfoData, encoding: .utf8) ?? ""

        Kommunicate.defaultConfiguration.messageMetadata = ["info": messageInfoString]
    } catch {
        print(error)
    }
    return true
}
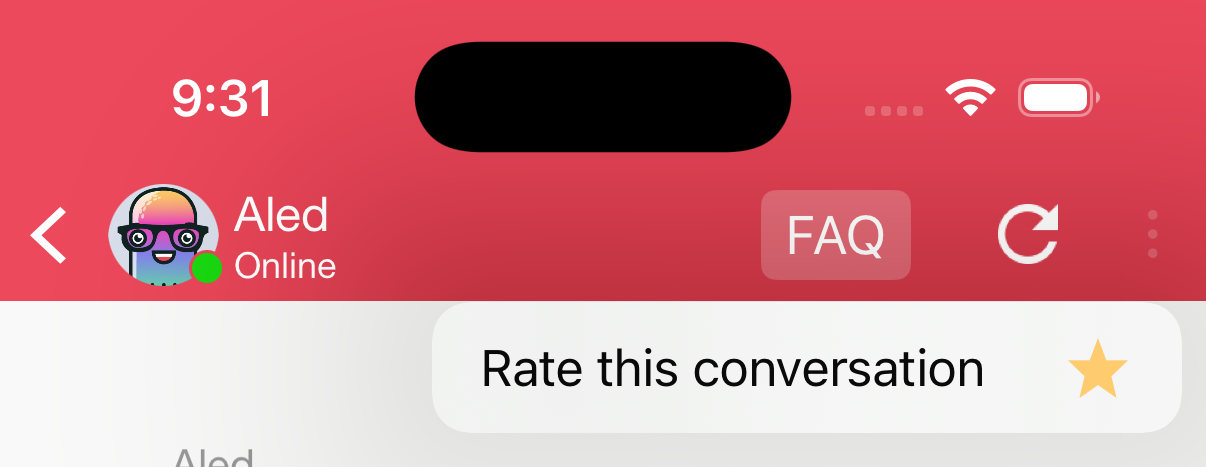
Rate Conversation
You can rate the conversation for a bot or the Human agent by clicking on Rate this conversation button. The code to add this button is given below.

Kommunicate.defaultConfiguration.rateConversationMenuOption = true
