Single Sign-On (SSO) Setup
Microsoft Azure SSO Configuration:
Single Sign-On configuration involves two parts: the first is handled on Microsoft Azure, and the second is on Kommunicate's backend. This setup ensures a smooth sign-in process.
1. Login to Azure with Admin Access
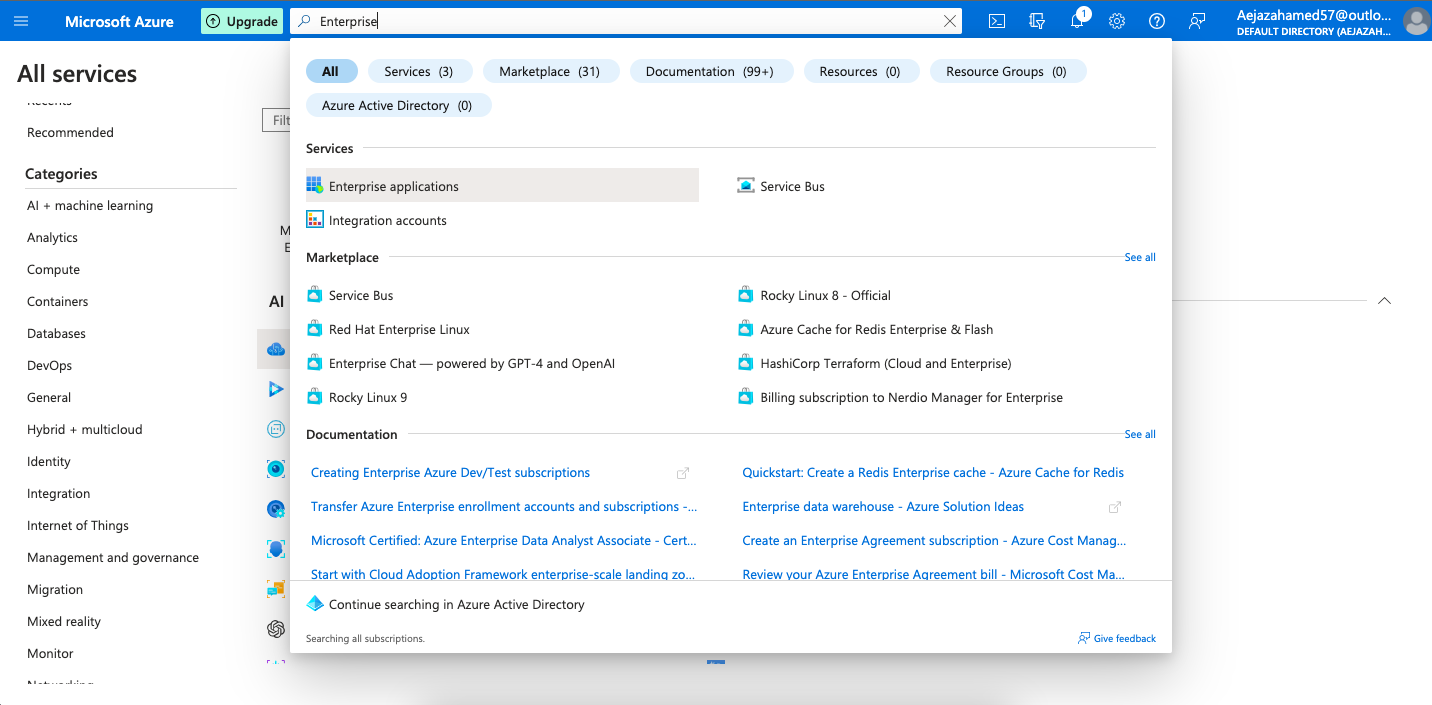
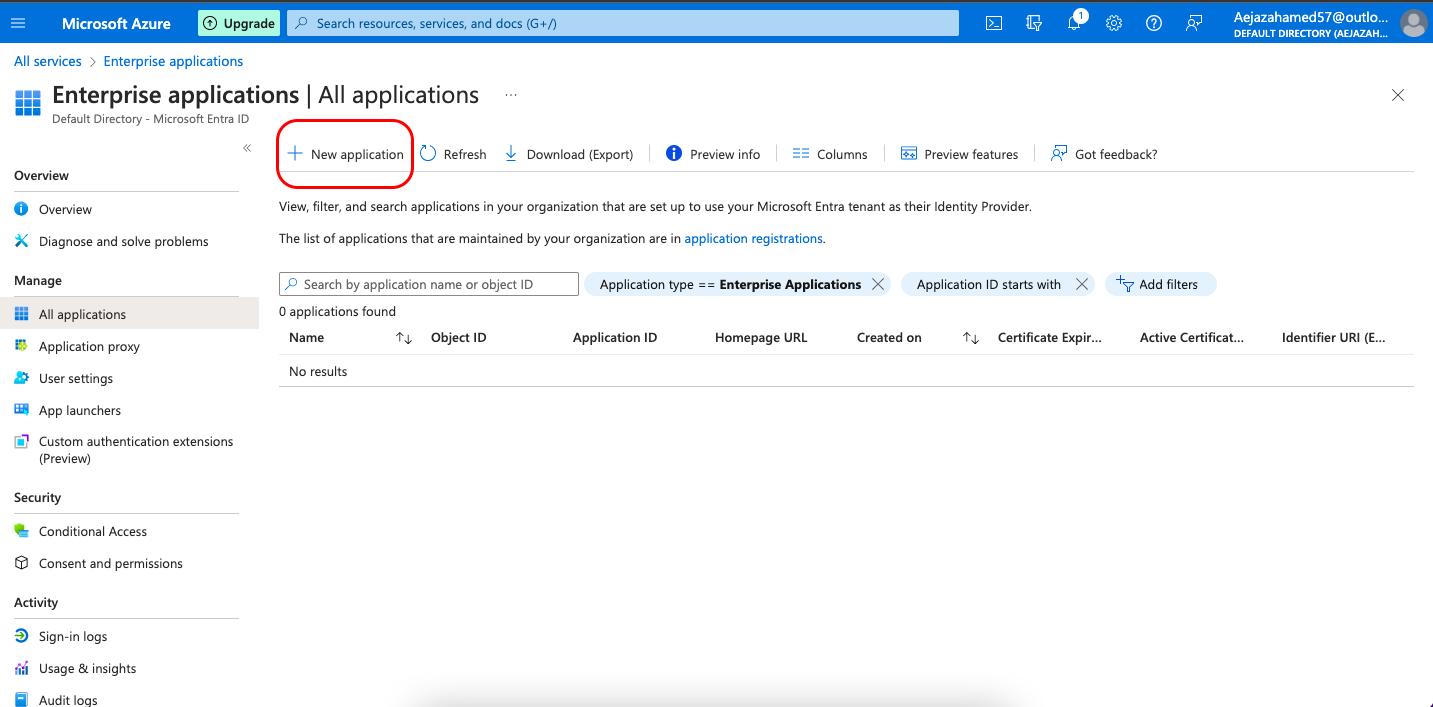
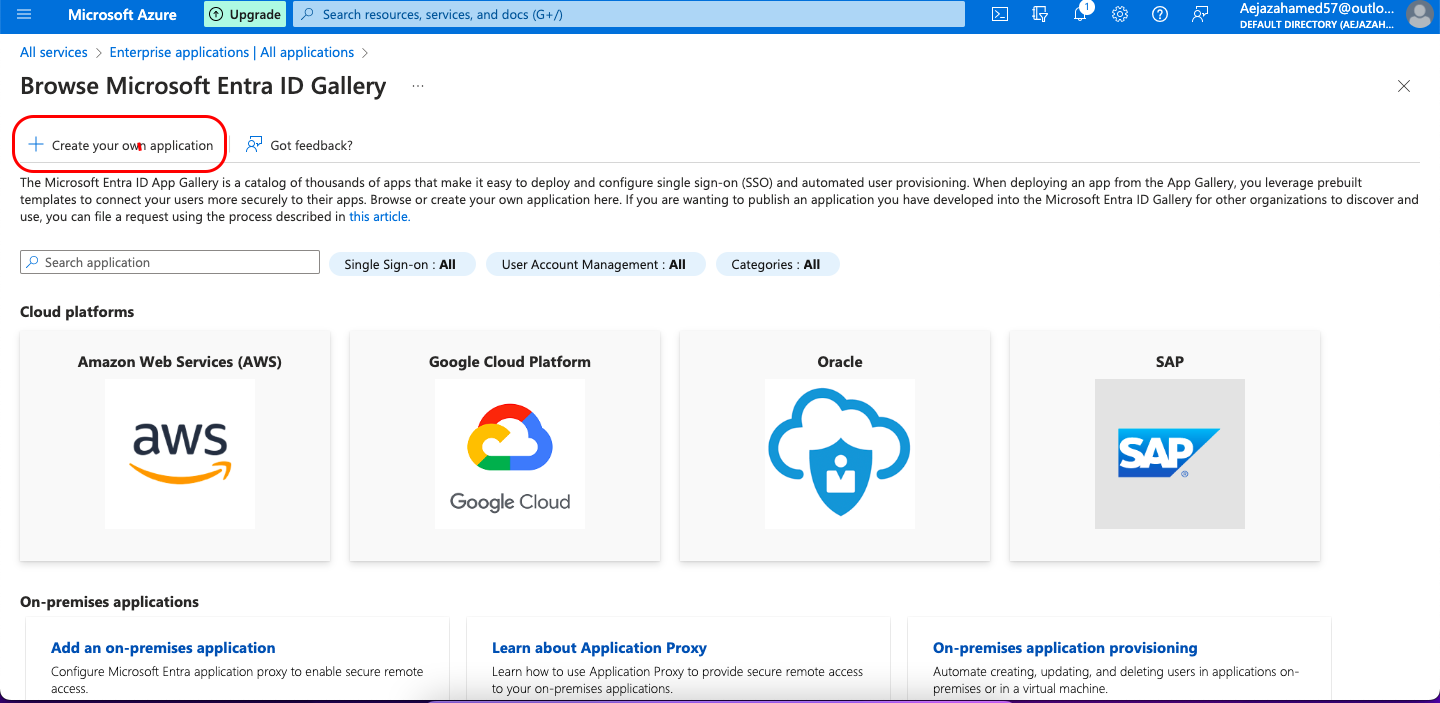
2. Open Enterprise Application, click on New Application, and Create your own application.
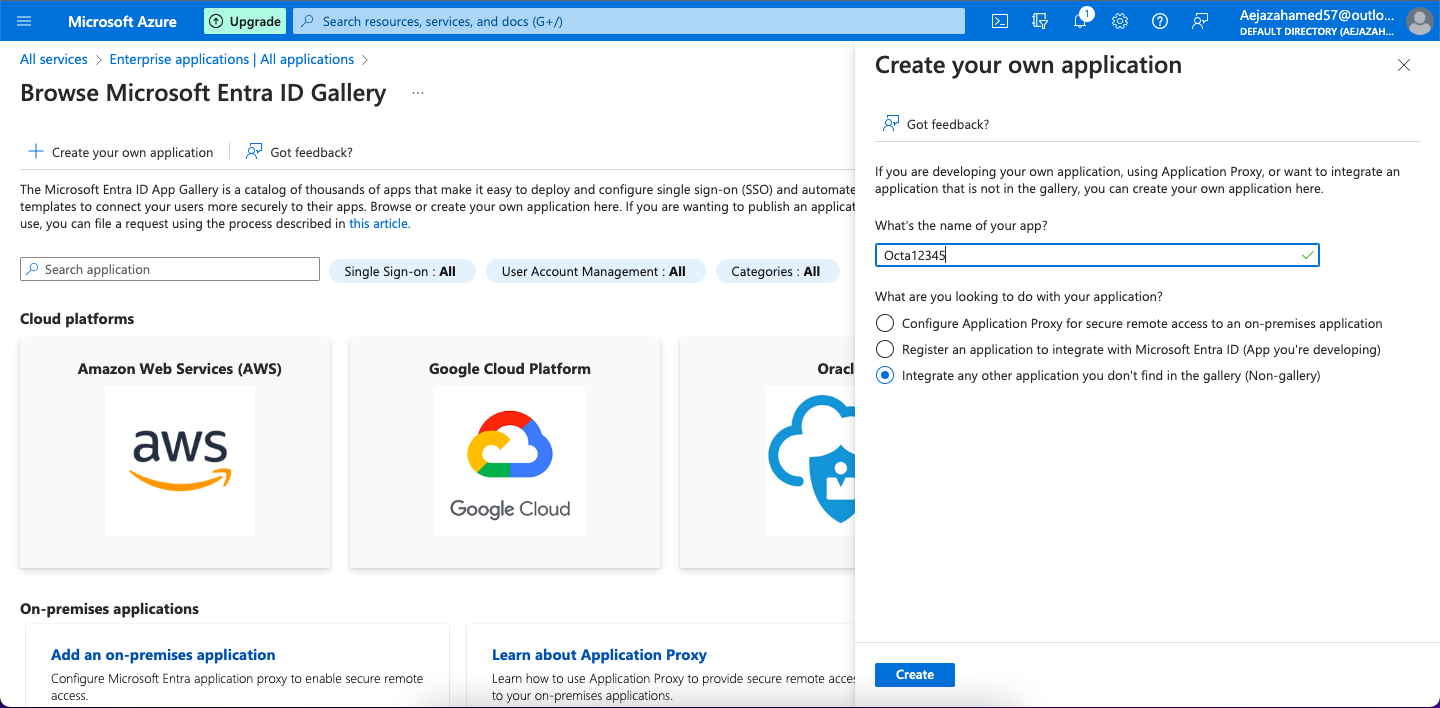
3. Add an App name (for example Kommunicate) and select Integrate any other application you don't find in the gallery (Non-gallery).
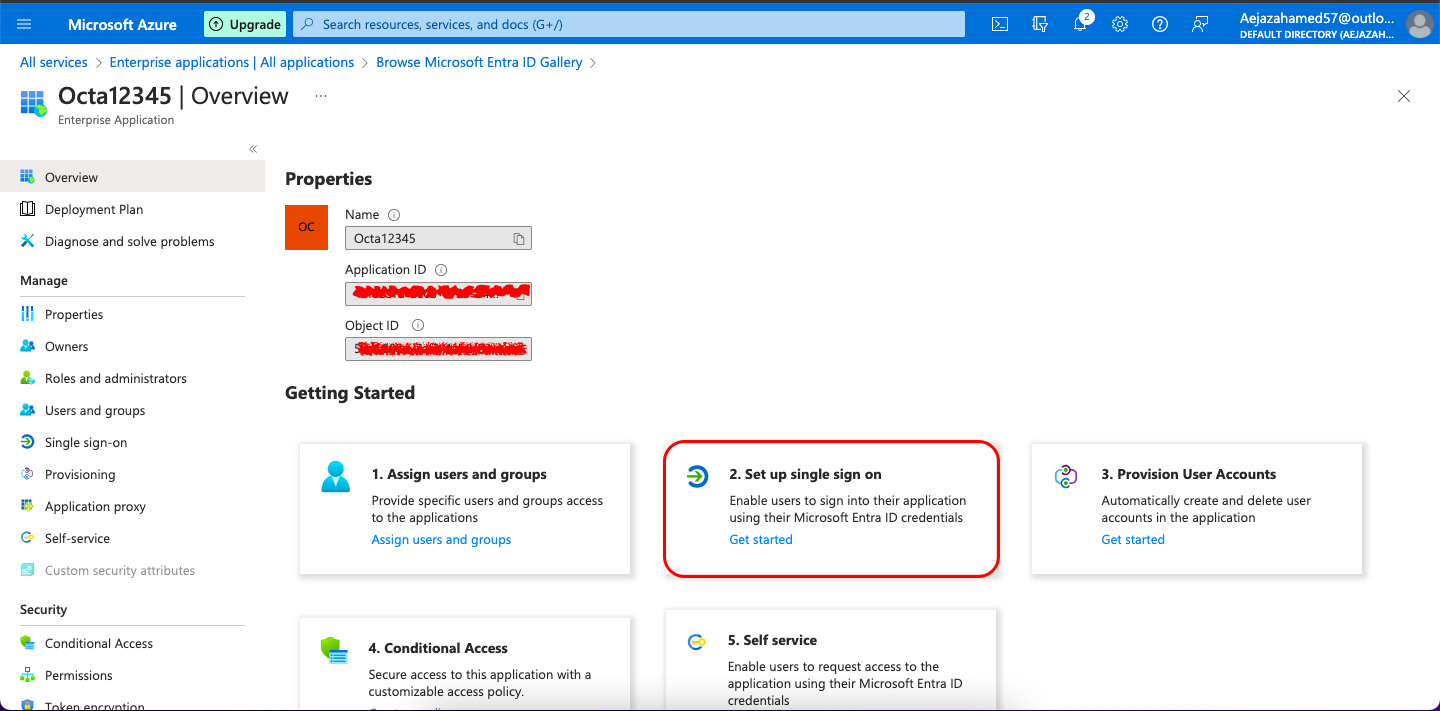
4. Once an application is created, select Set up single sign-on (Get Started)
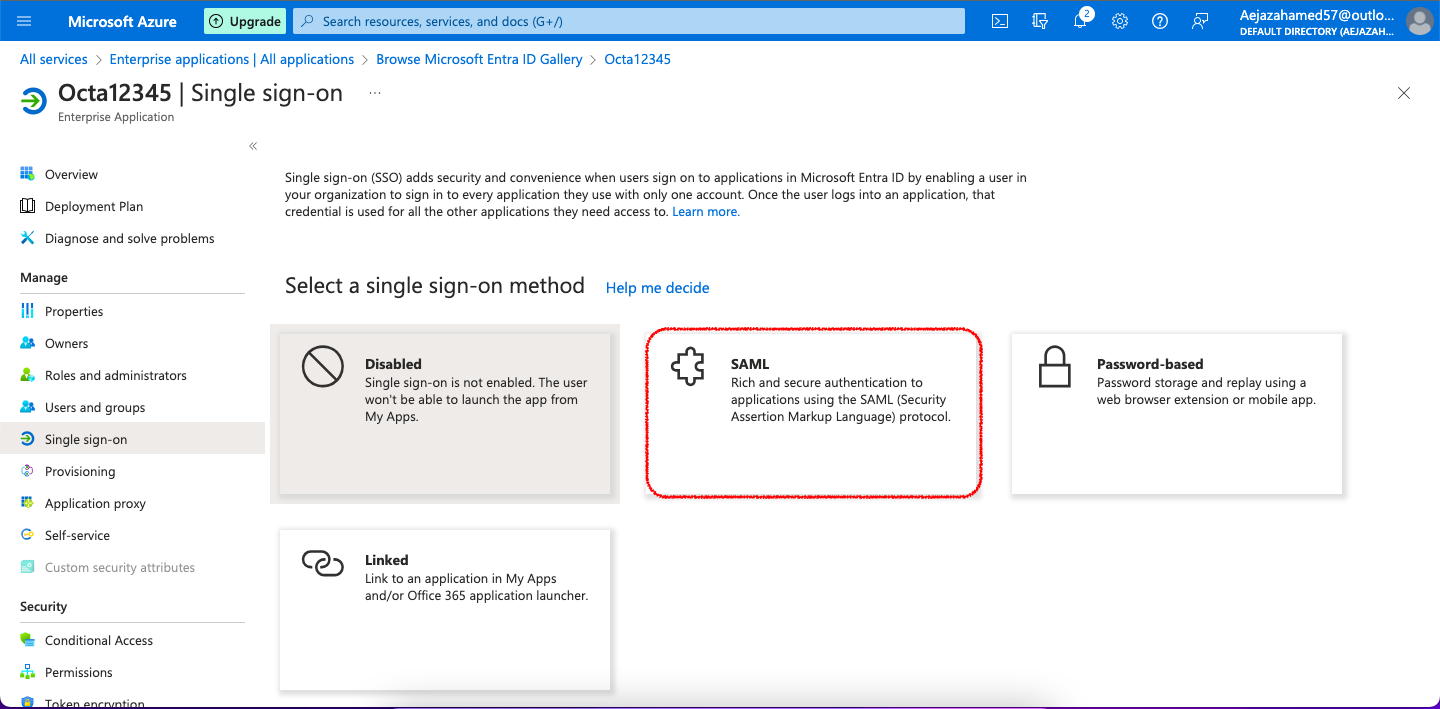
5. Select SAML method
6. On the SAML configuration page, start with Basic SAML Configuration and fill in the fields with the following details:
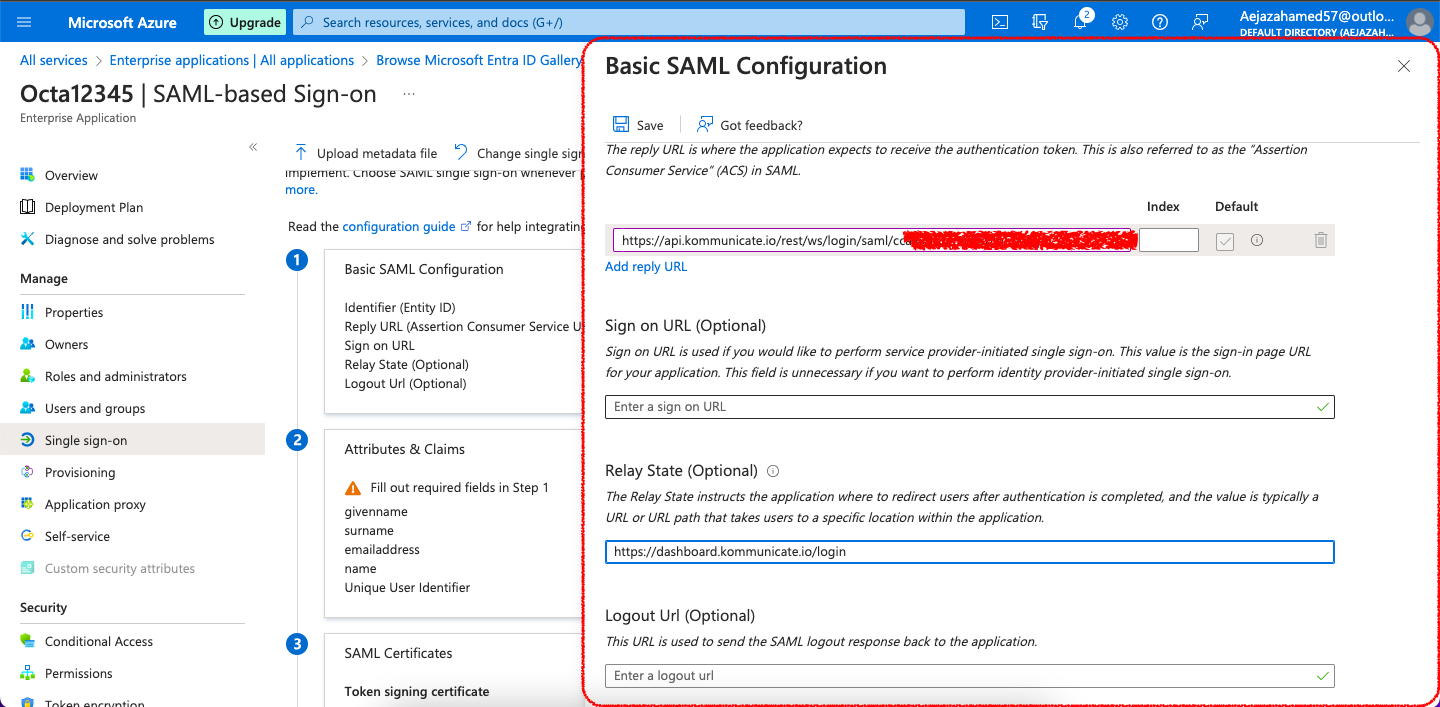
- Identifier (Entity ID): https://dashboard.kommunicate.io/login
- Reply URL (Assertion Consumer Service URL): The reply URL is where the application expects to receive the authentication token.
- Relay State: https://dashboard.kommunicate.io/login and Save it.
- Now edit Attributes & Claims and click on Unique User Identifier (Name ID). On the Manage Claim page, change the attribute to user.mail and Save it.
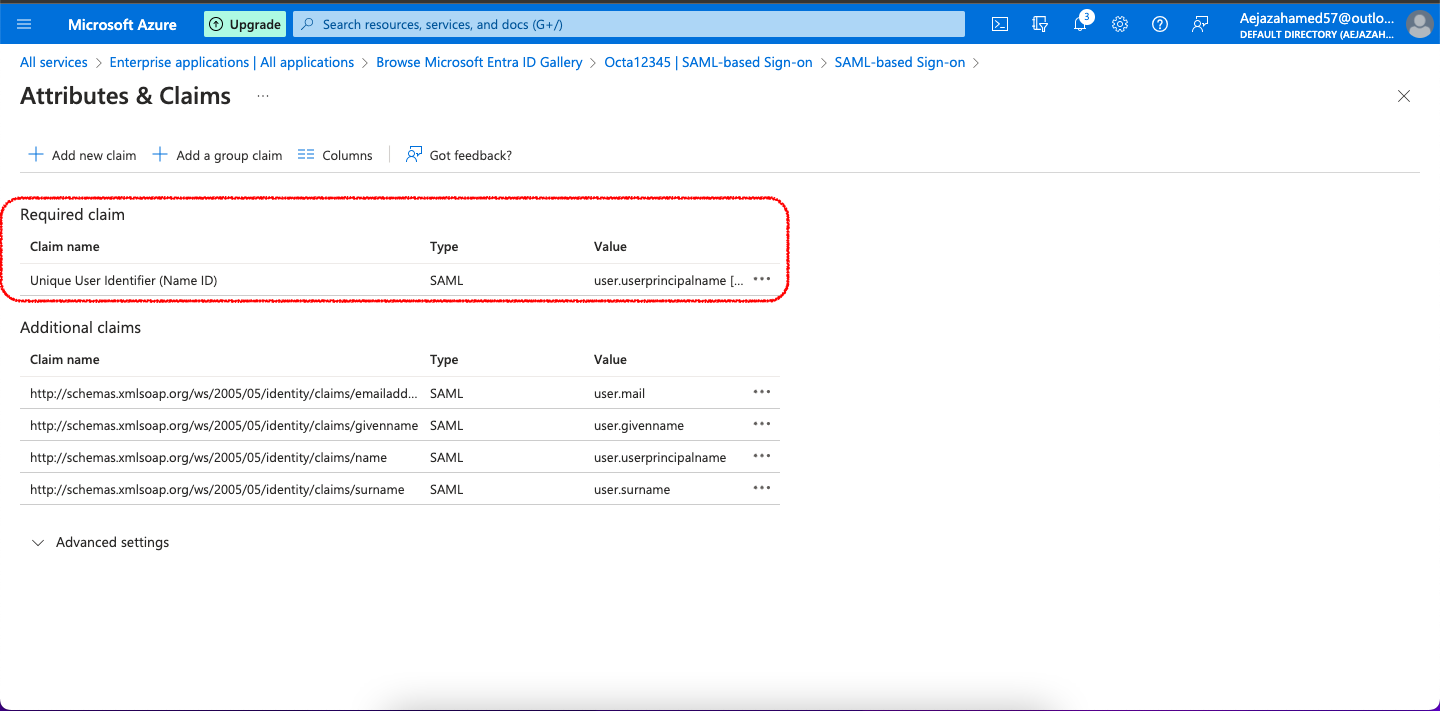
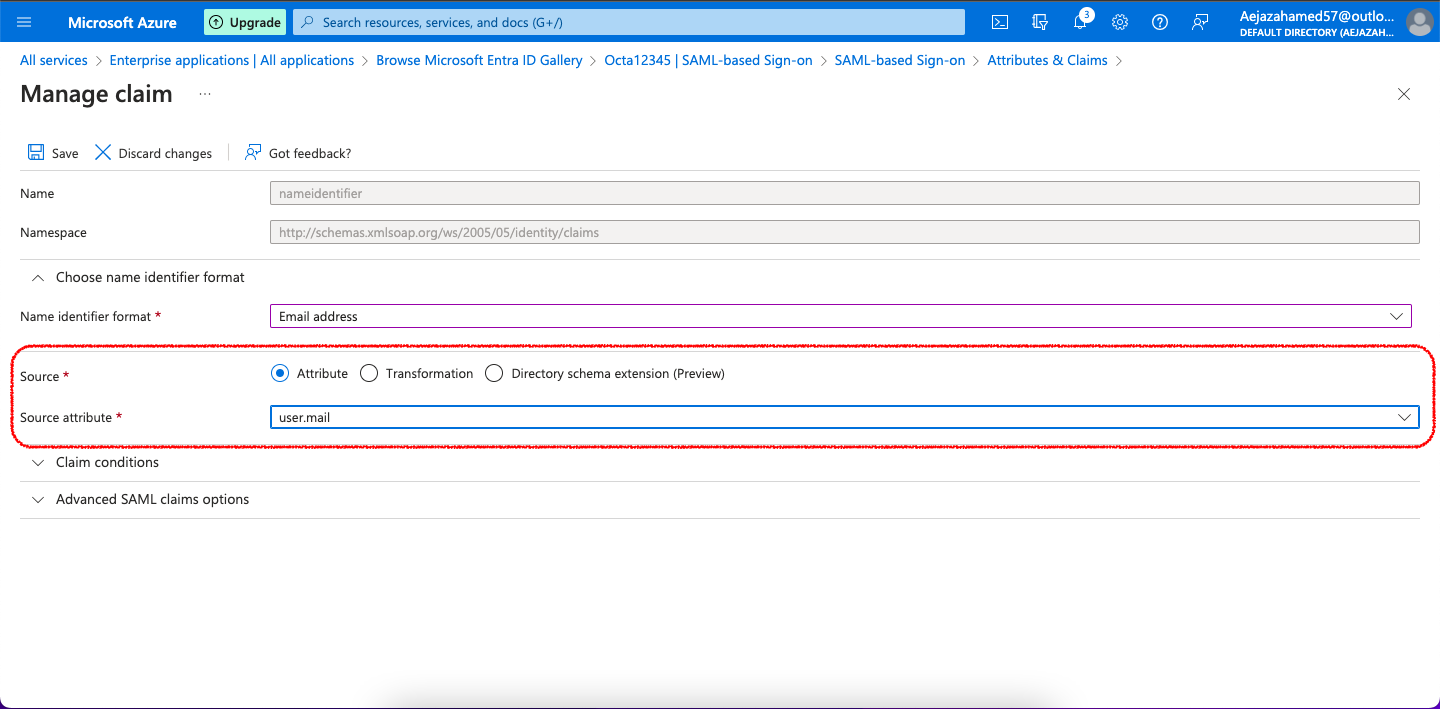
With this, the setup is completed.
As a final step, you need to provide us with the below information so that we can update the same in the backend for your application.
Your "SAML Signing Certificate" (Raw)
Login URL
Azure AD Identifier
Note: Currently this feature is only available on the Enterprise (previously Business) plan. For more information and help in this regard, get in touch with us.
