Customization
Overview
In this section, learn how to customize the Kommunicate SDK according to your requirements.
Getting started with customization
Kommunicate provides easy settings to customize different elements (such as fonts, message color, background colors) and enable or disable any particular feature.
Follow these steps:
Download the settings file from here (Right click -> Save as -> Save)
Place the downloaded
applozic-settings.jsonfile under your app/src/main/assets/ folder.
There are a lot of customization options in the file. Below are some common options available.
Change the message background colors
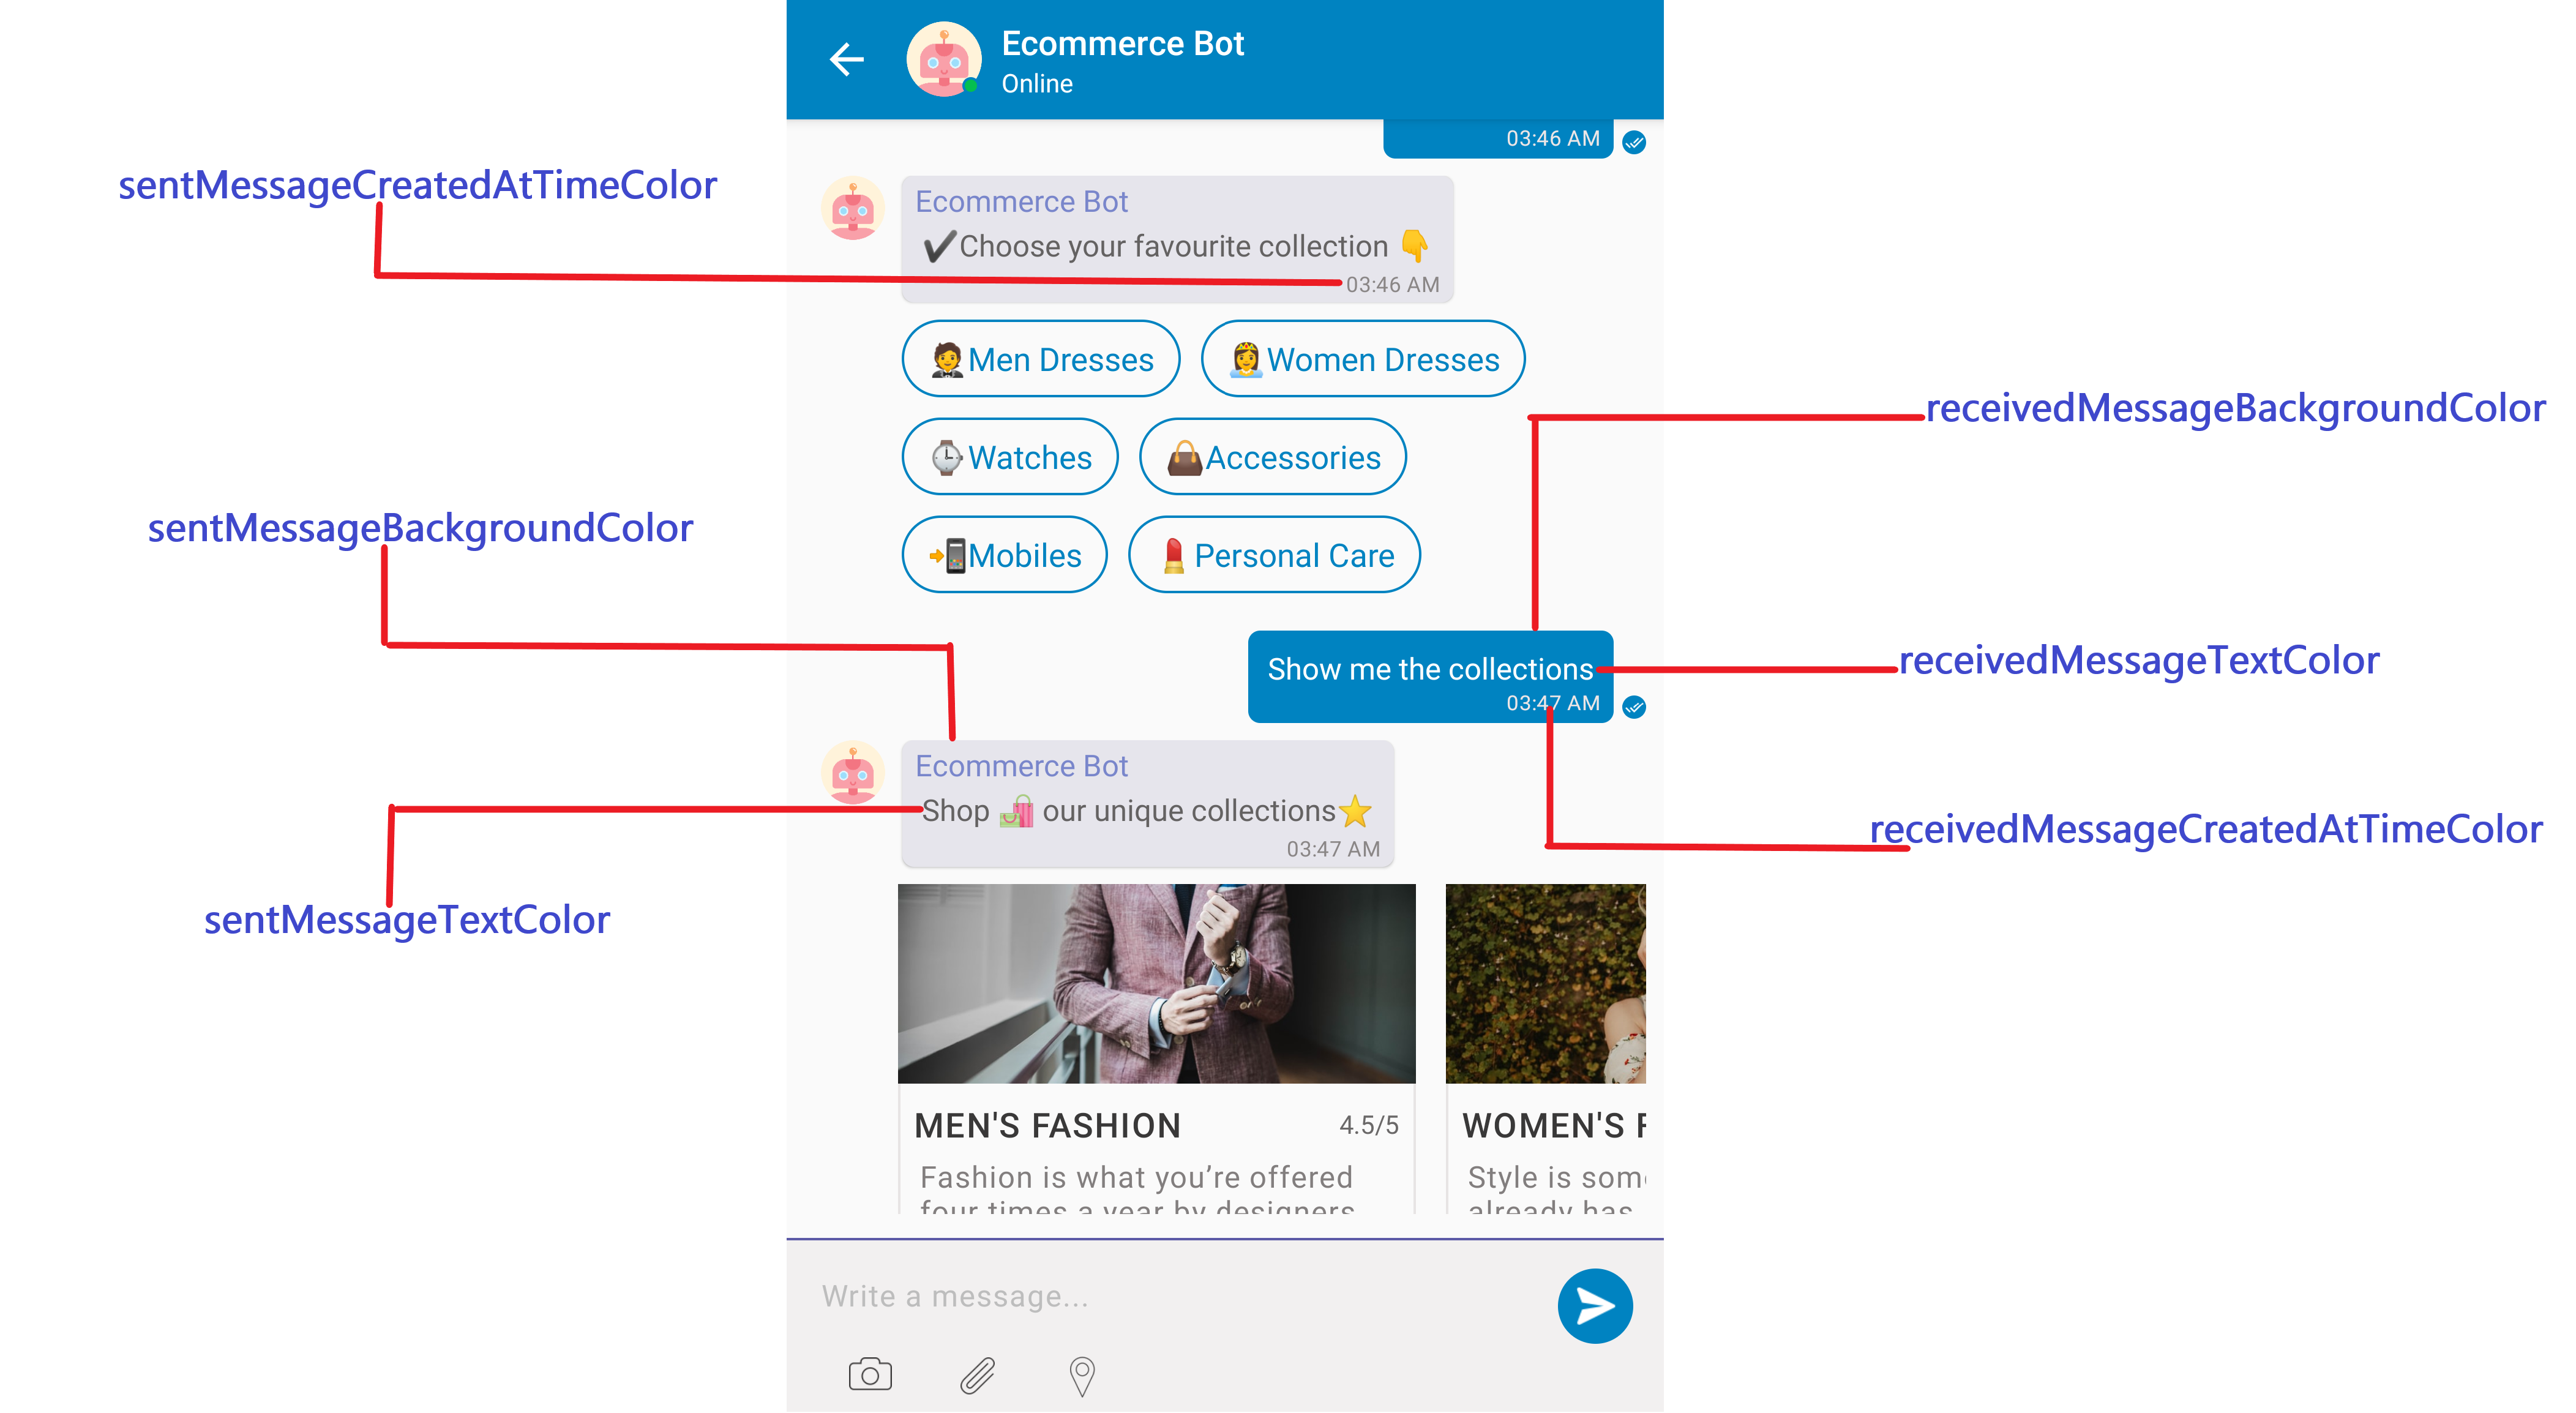
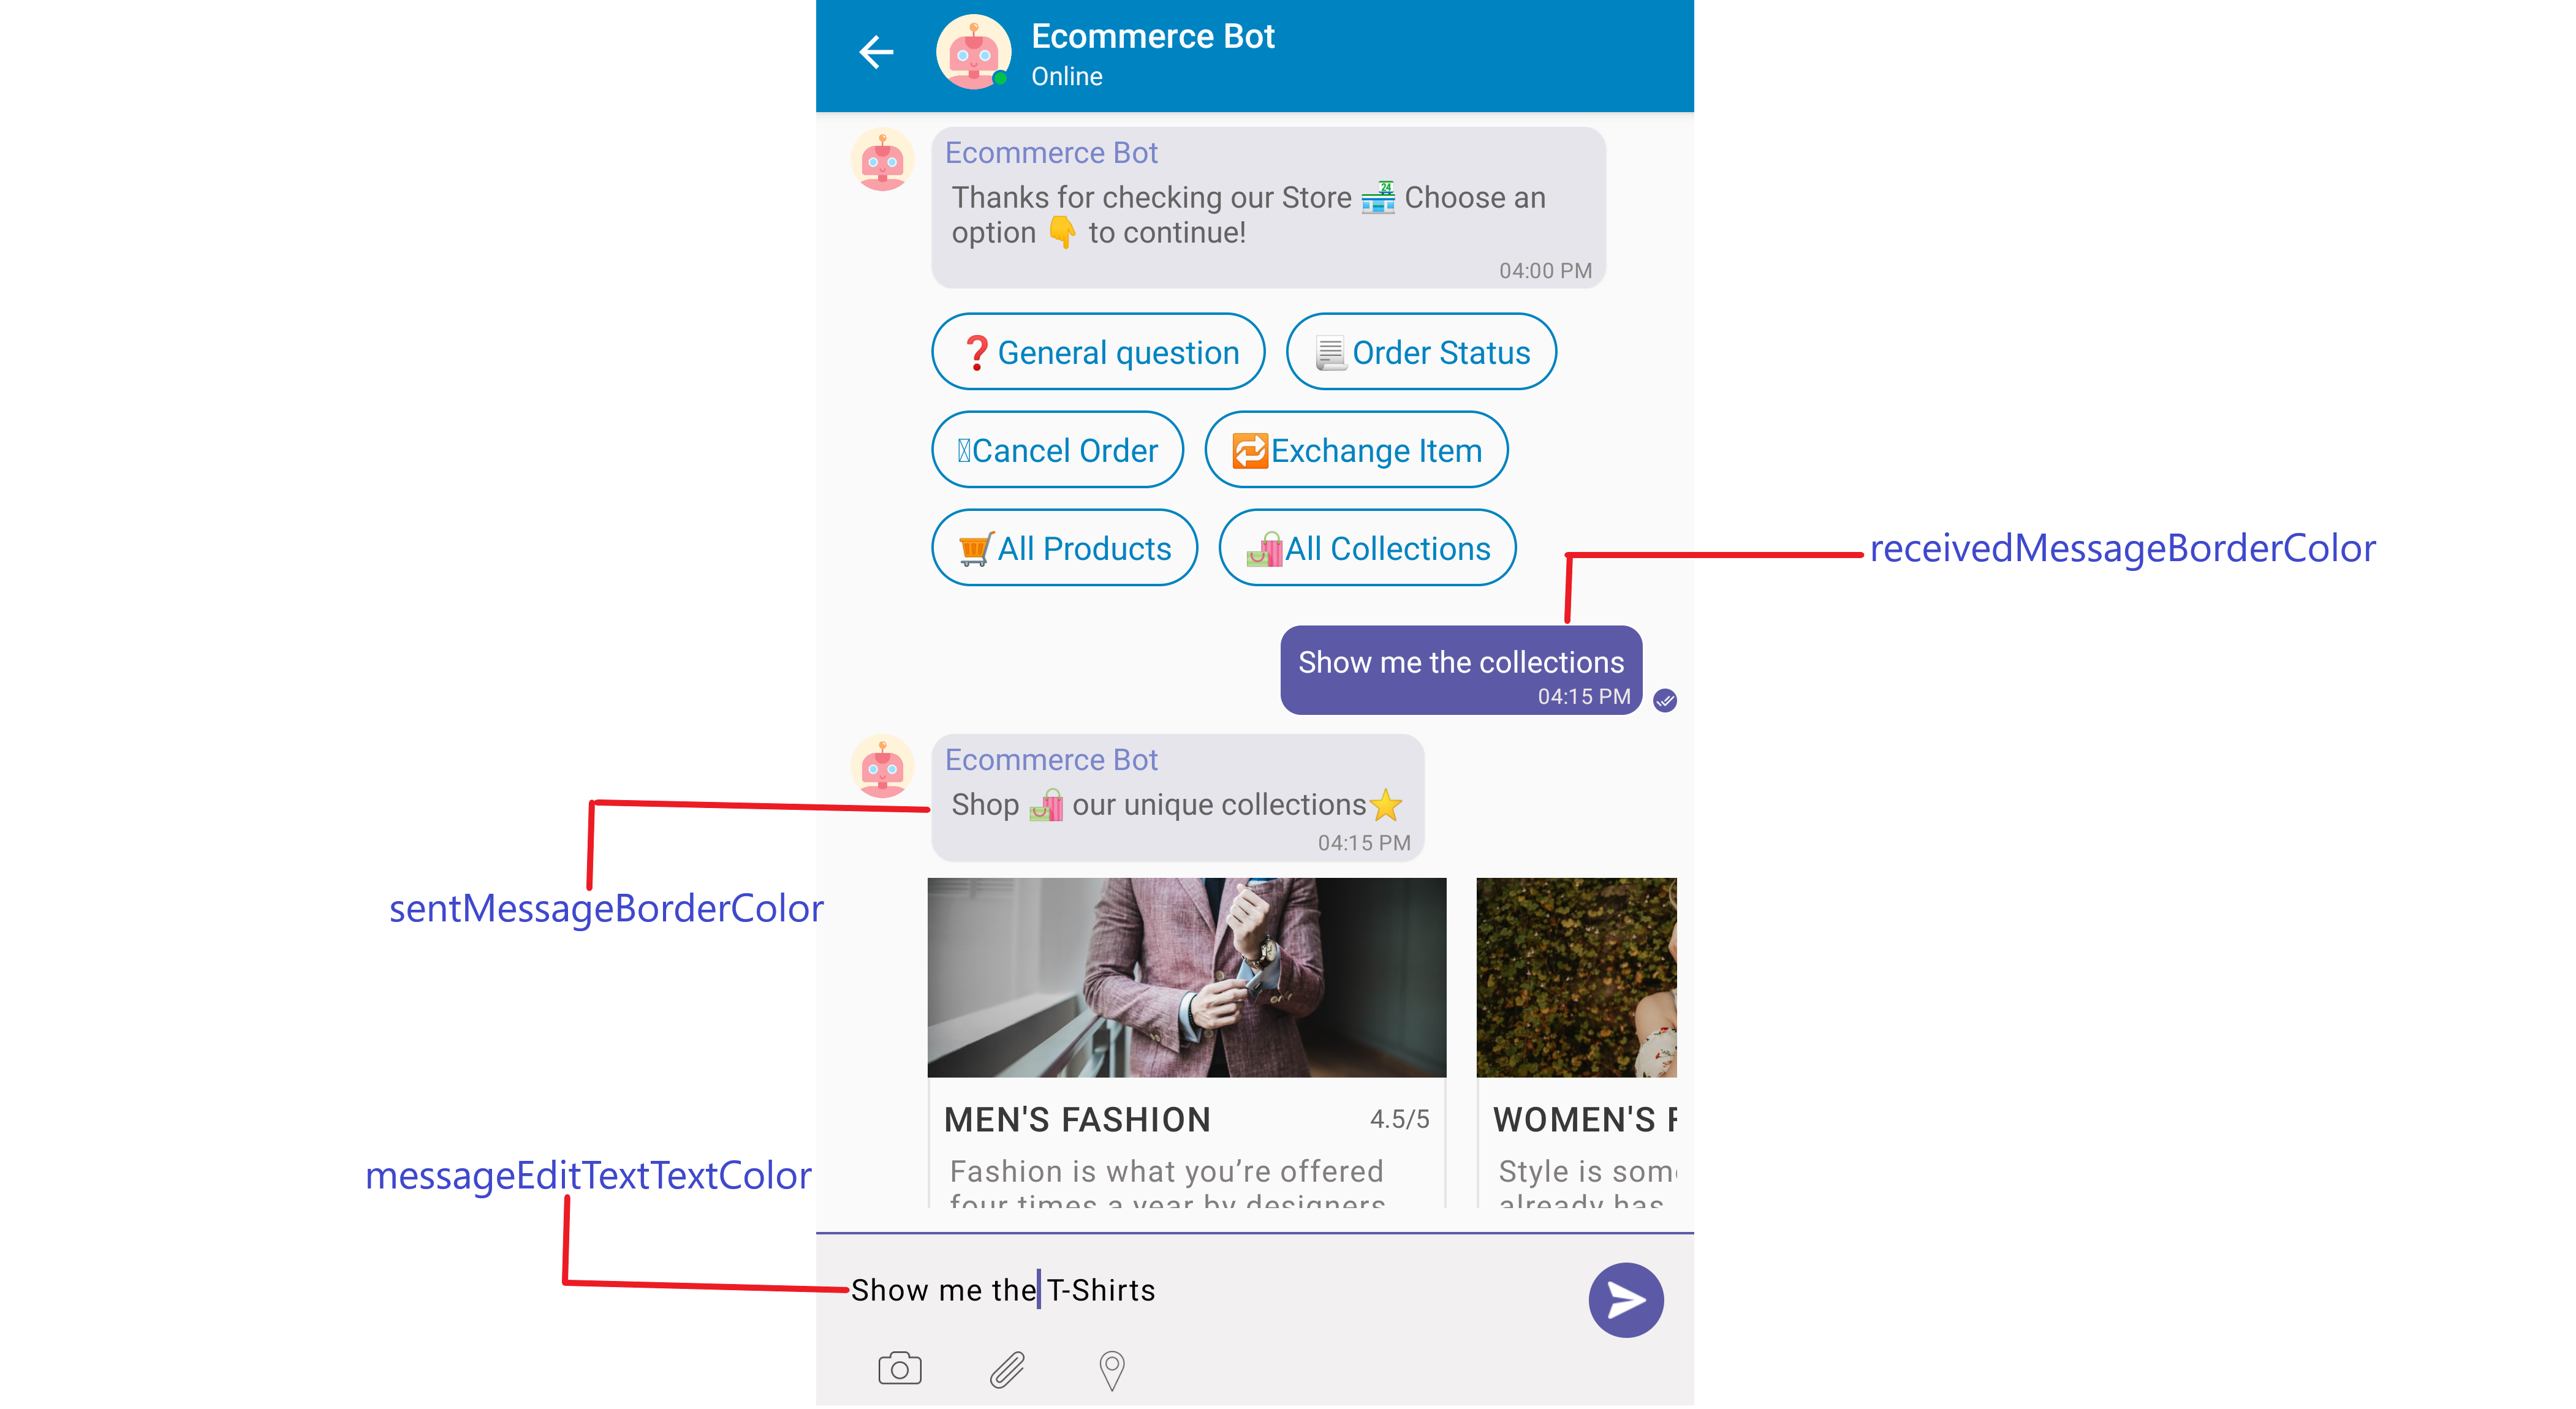
You can change the sent/received message background and text color by setting the hex color codes in the below properties in applozic-settings.json file.
"sentMessageBackgroundColor": "#5c5aa7",
"receivedMessageBackgroundColor": "#e6e5ec",
"sentMessageCreatedAtTimeColor": "#ede6e6",
"receivedMessageCreatedAtTimeColor": "#8a8686",
"sentMessageTextColor": "#FFFFFFFF",
"receivedMessageTextColor": "#646262"
Hide/Show media attachment and location sharing options
You can hide or show the media attachments options like camera, emoji, files and location sharing by changing the below values in applozic-settings.json file.
You can make any of the options 'false' if you want to hide them.
"attachmentOptions": {
    ":location": false, // Location sharing option will be disabled
    ":camera": true,
    ":file": true,
    ":audio":true
  }

If location sharing functionality is enabled
If you are enabling the location sharing option in the applozic-settings.json file, make sure to include the below permissions and geo-API key in your AndroidManifest.xml file.
Add the following permissions in your AndroidManifest.xml file:
   <uses-permission android:name="<PACKAGE_NAME>.permission.MAPS_RECEIVE" />
   <permission
        android:name="<PACKAGE_NAME>..permission.MAPS_RECEIVE"
        android:protectionLevel="signature" />
Add your geo-API_KEY in AndroidManifest.xml file:
   <meta-data
       android:name="com.google.android.geo.API_KEY"
       android:value="<your-geo-API-KEY>" />
Other properties
Below are some more properties which you can customize in the SDK:
"enableFaqOption": [         // Setting to enable/disable the FAQ button on the toolbar. Learn more about FAQs here: https://dashboard.kommunicate.io/helpcenter/content
    false,                   // Set it 'true' to enable the FAQ button on the conversation list screen (first screen)
    false                    // Set it 'true' to enable the FAQ button on the message list screen (individual chat thread)
  ],
"enableAwayMessage": false,   // Setting it 'false' will disable Away message. Learn more about Away message here: https://dashboard.kommunicate.io/settings/away-message
"logoutOption": true,        // Setting it 'true' will show the logout option in conversation list screen menu.
"logoutPackageName": "<RESOLVED_ACTIVITY_NAME>", // When logoutOption is set to true, add the activity name(resolved name) to which redirect will happen after logout is successfull. For e.g. kommunicate.io.sample.MainActivity
"showStartNewConversation" : false, // Setting it 'false' will hide the default 'Start New Conversation' button
"sentMessageCornerRadii": [  // The measurements of corner radii for 'sent message' bubbles
10,                          // Top left corner radius
10,                          // Top right corner radius
10,                          // Bottom right corner radius
10                           // Bottom left corner radius
],
"receivedMessageCornerRadii": [  // The measurements of corner radii for 'received message' bubbles . (Similar order as sentMessageCornerRadii)
10,
10,
10,
10
]
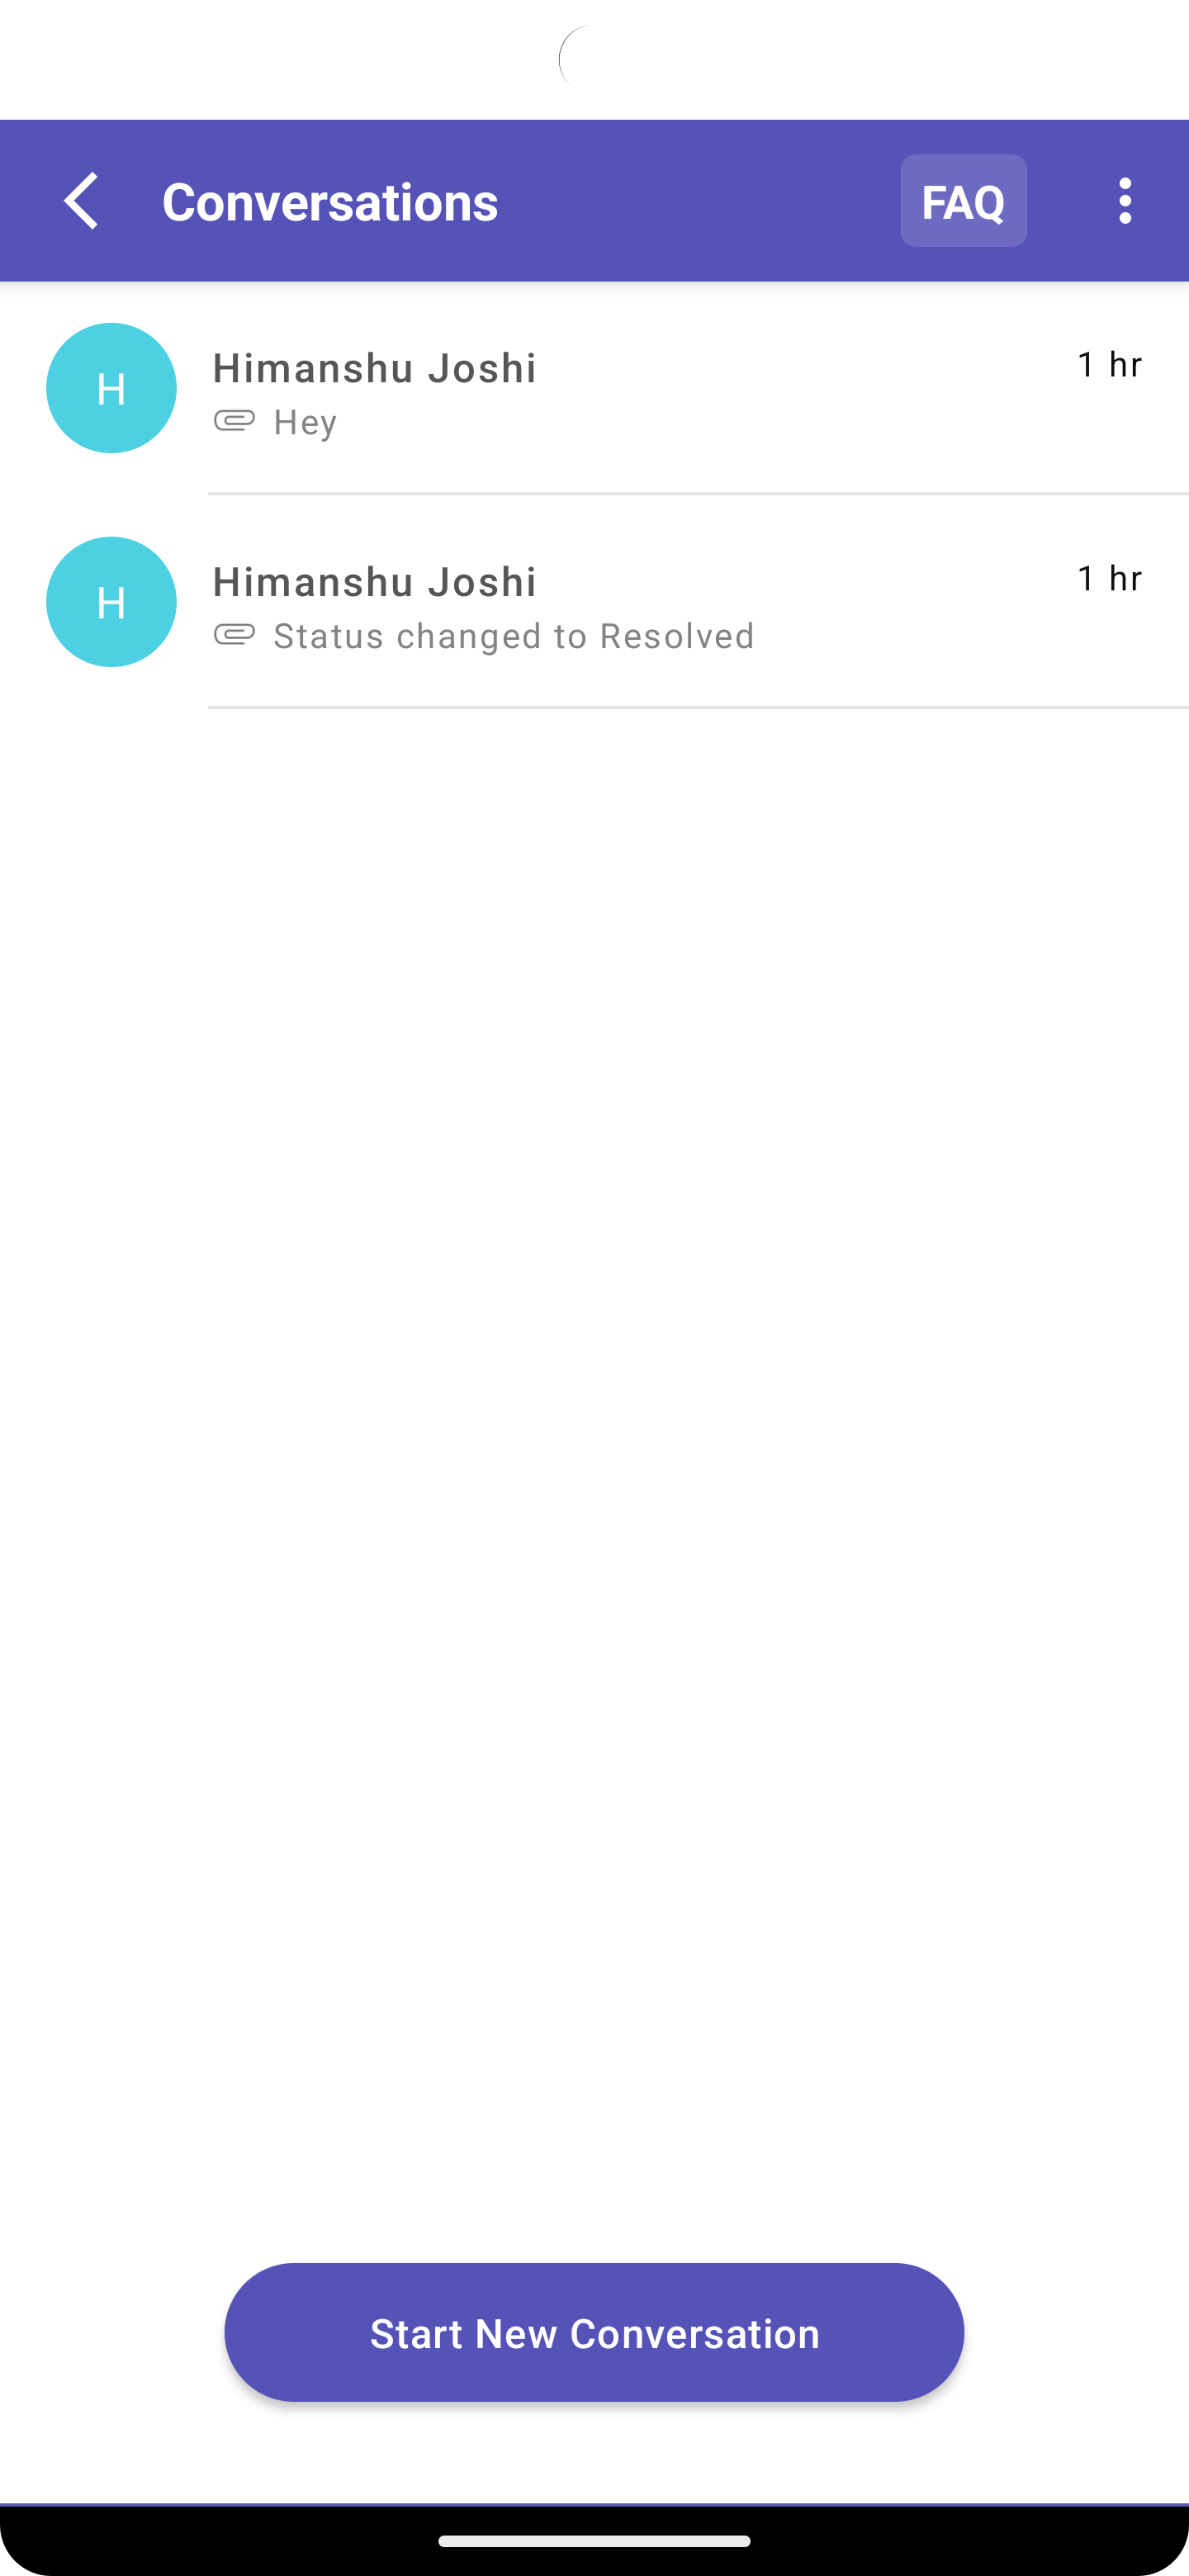
Start new conversation
To hide/show start new conversation button, just toggle this boolean flag inside applozic-settings.json
"showStartNewConversation": true
Start conversation hidden

Start conversation visible
Restart conversation
To allow the users to restart any closed conversation by their own, just toggle this boolean flag inside applozic-settings.json
"restartConversationButtonVisibility": true
Restart hidden

Restart visible

Search conversation
To hide/show search conversation button, just toggle this boolean flag inside applozic-settings.json
"messageSearchOption": false
Search hidden

Search visible

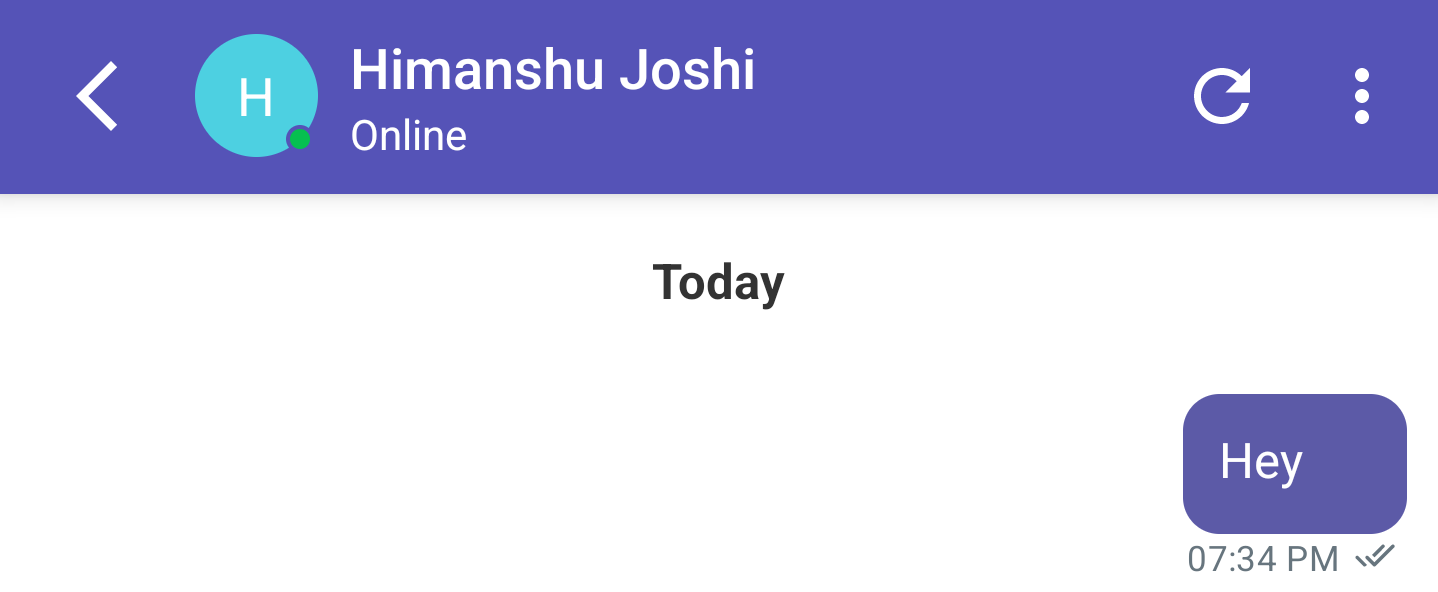
Refresh conversation
To hide/show refresh button, just toggle this boolean flag inside applozic-settings.json
"refreshOption": false
Refresh hidden
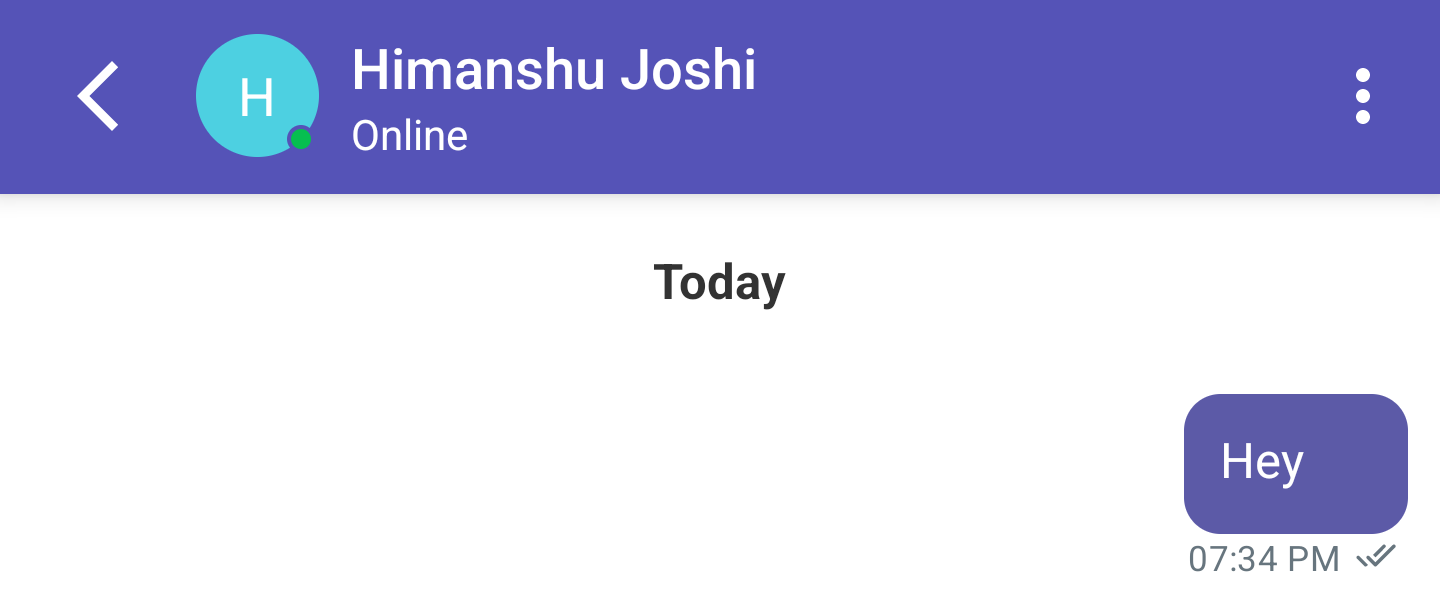
Refresh visible
Rate conversation
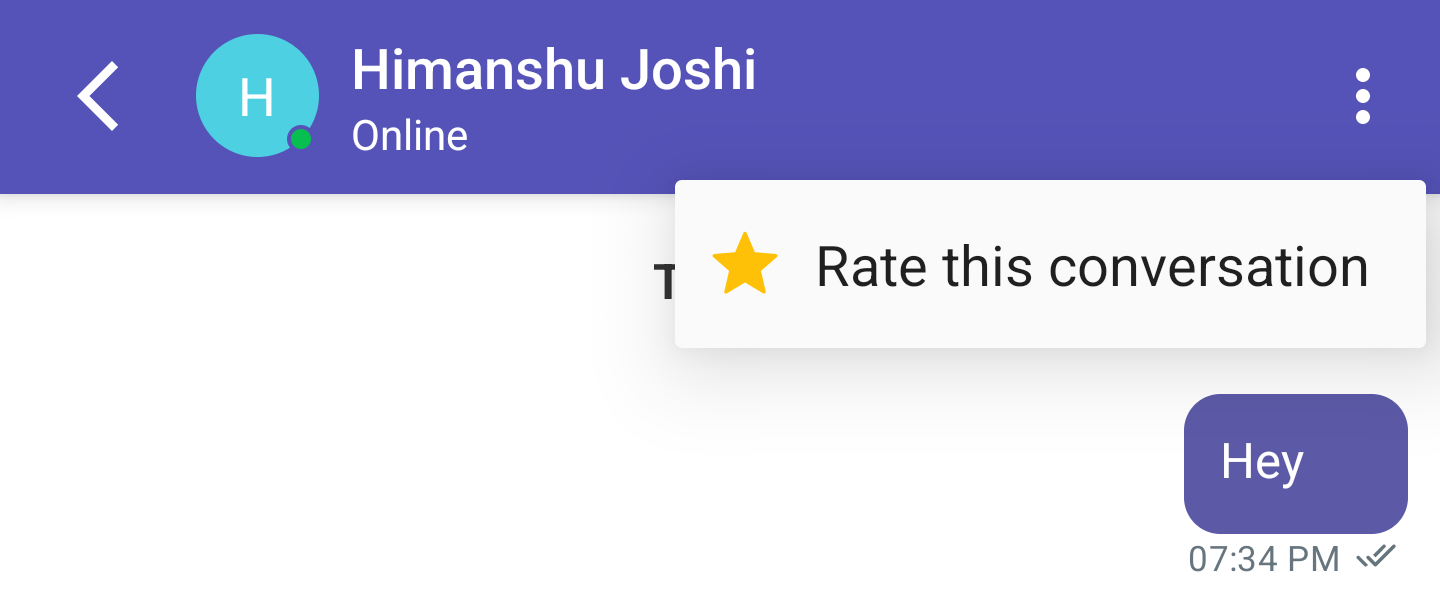
To hide/show rate conversation, just toggle this boolean flag inside applozic-settings.json
"rateConversationMenuOption": true
Rating option hidden
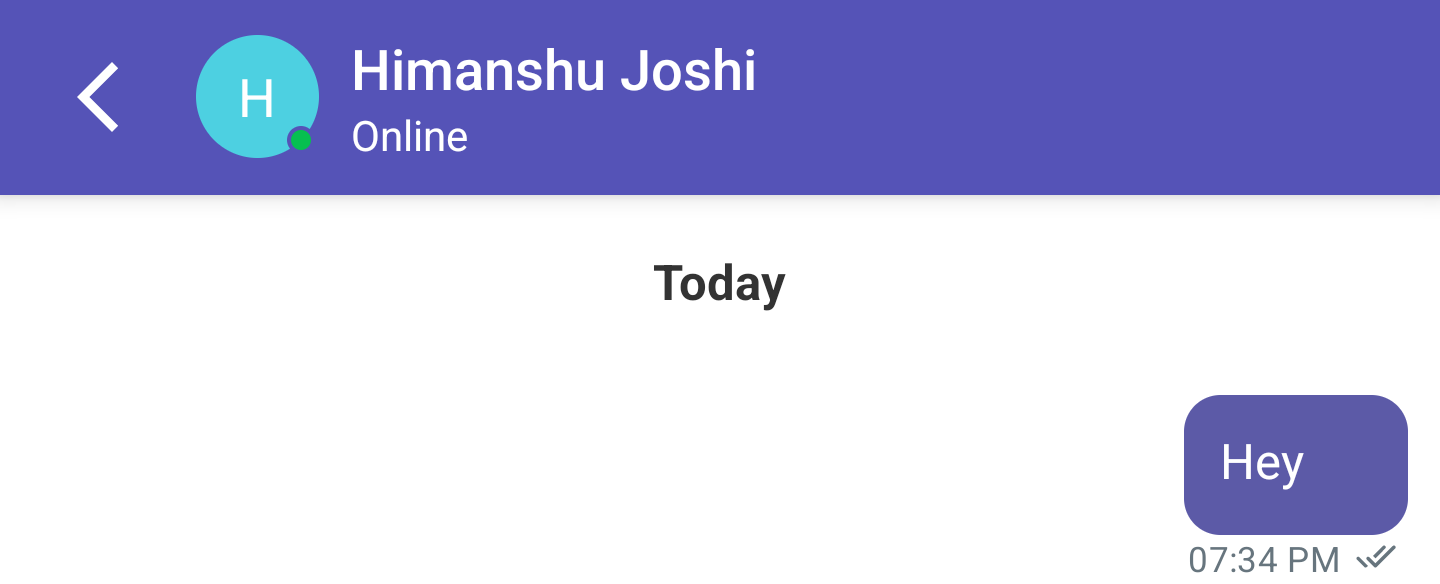
Rating option visible
Away message
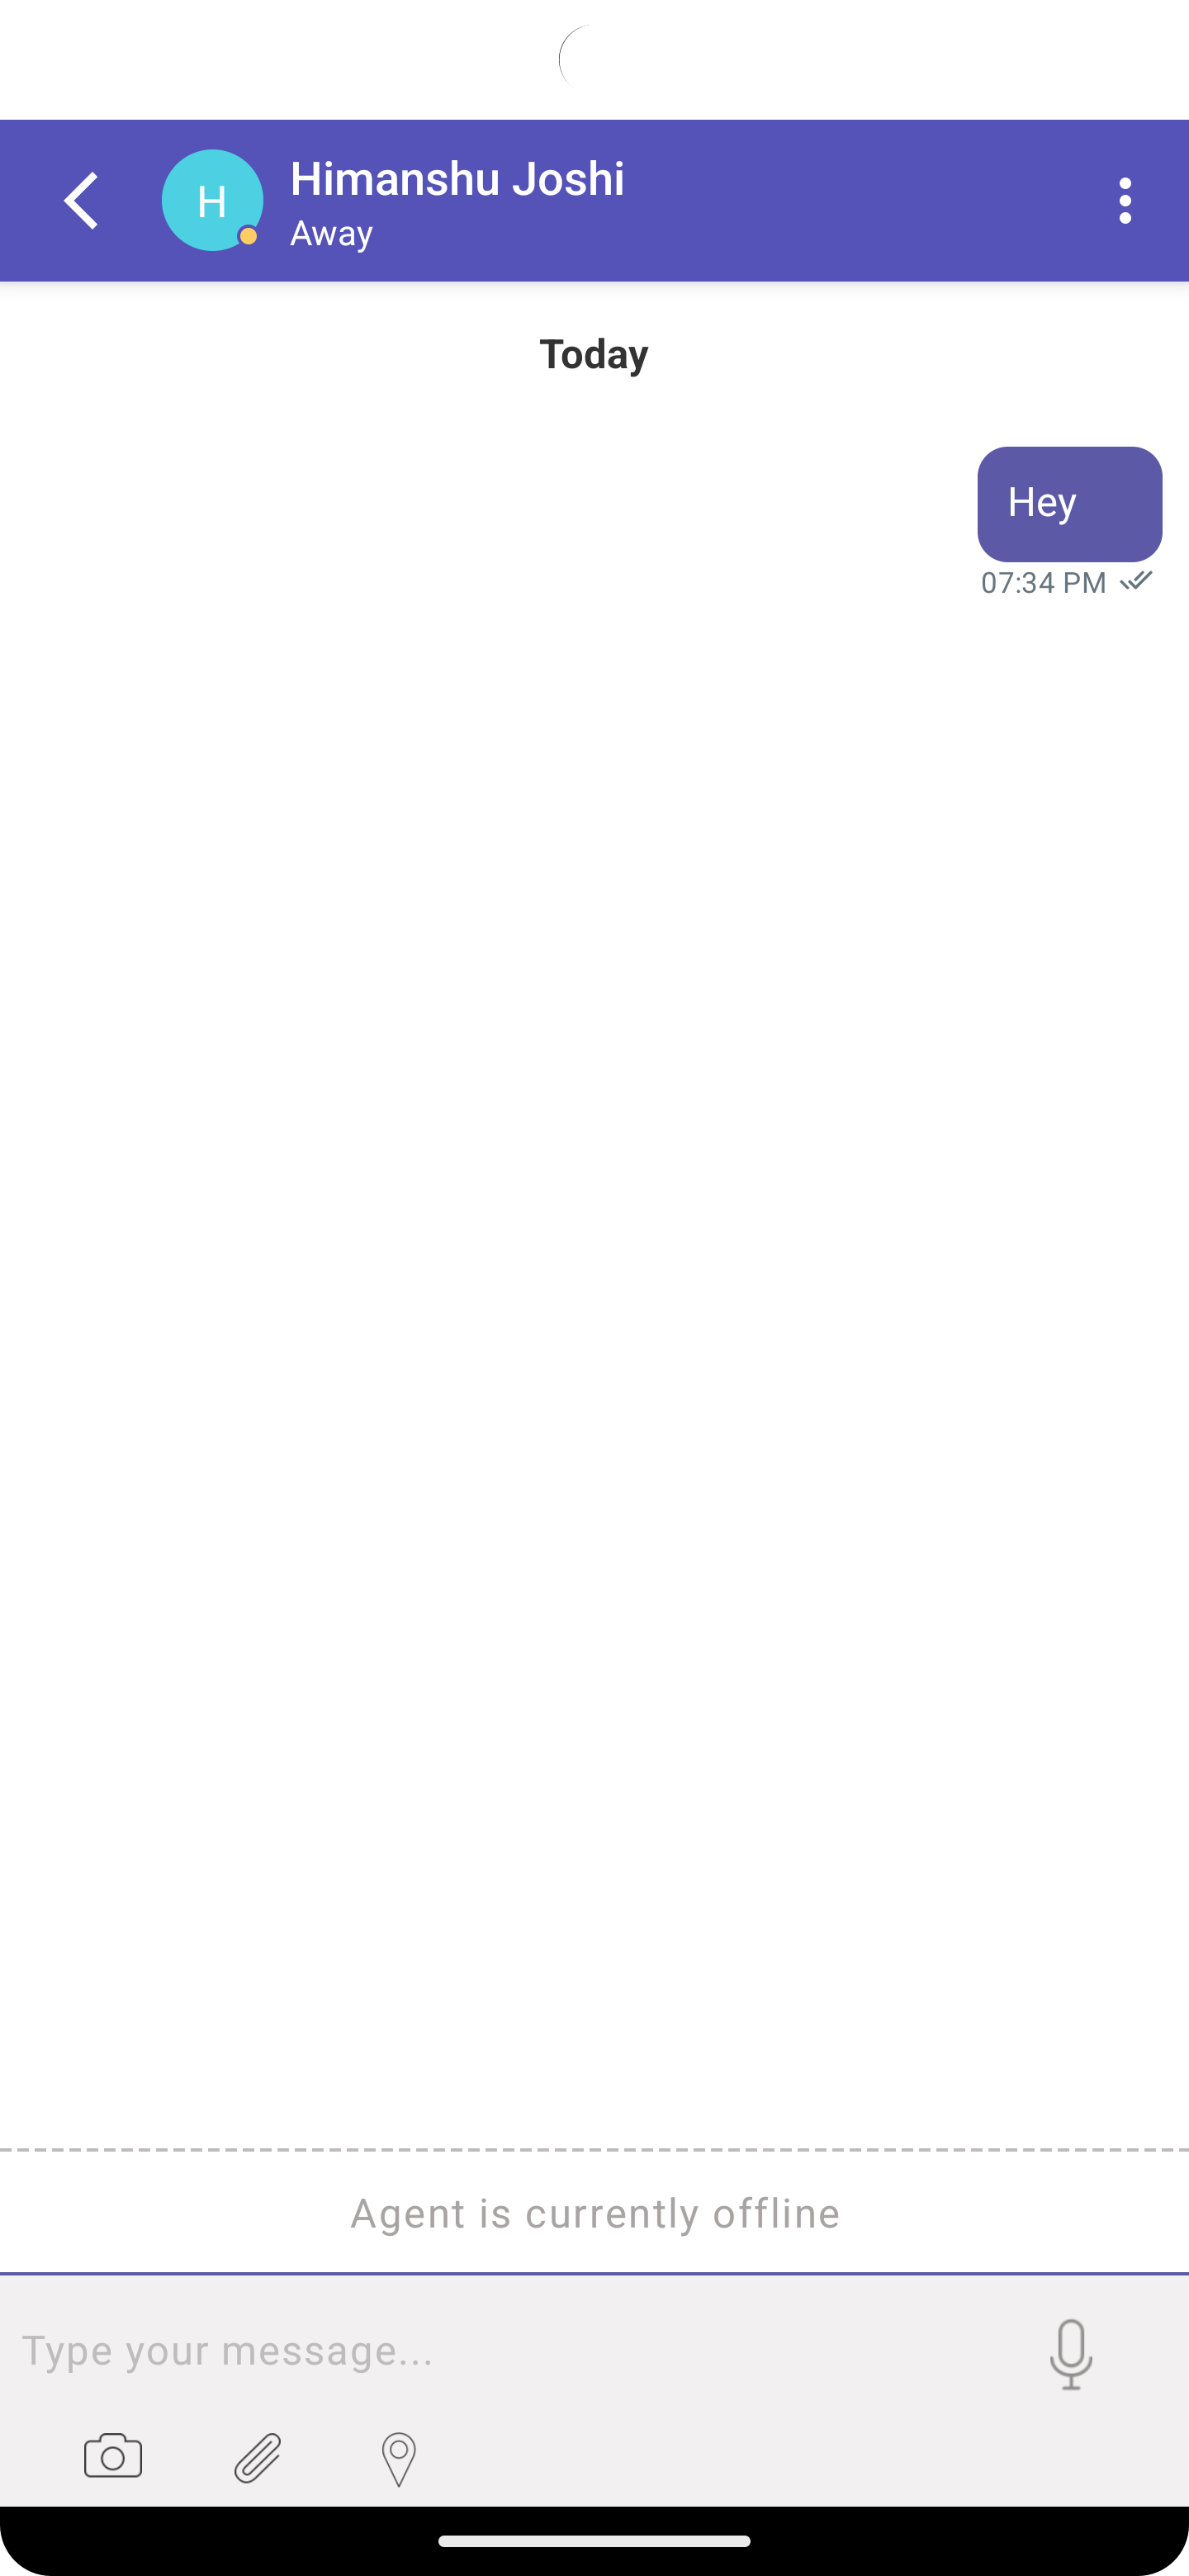
To hide/show away message, just toggle this boolean flag inside applozic-settings.json
"enableAwayMessage": true
Away message hidden
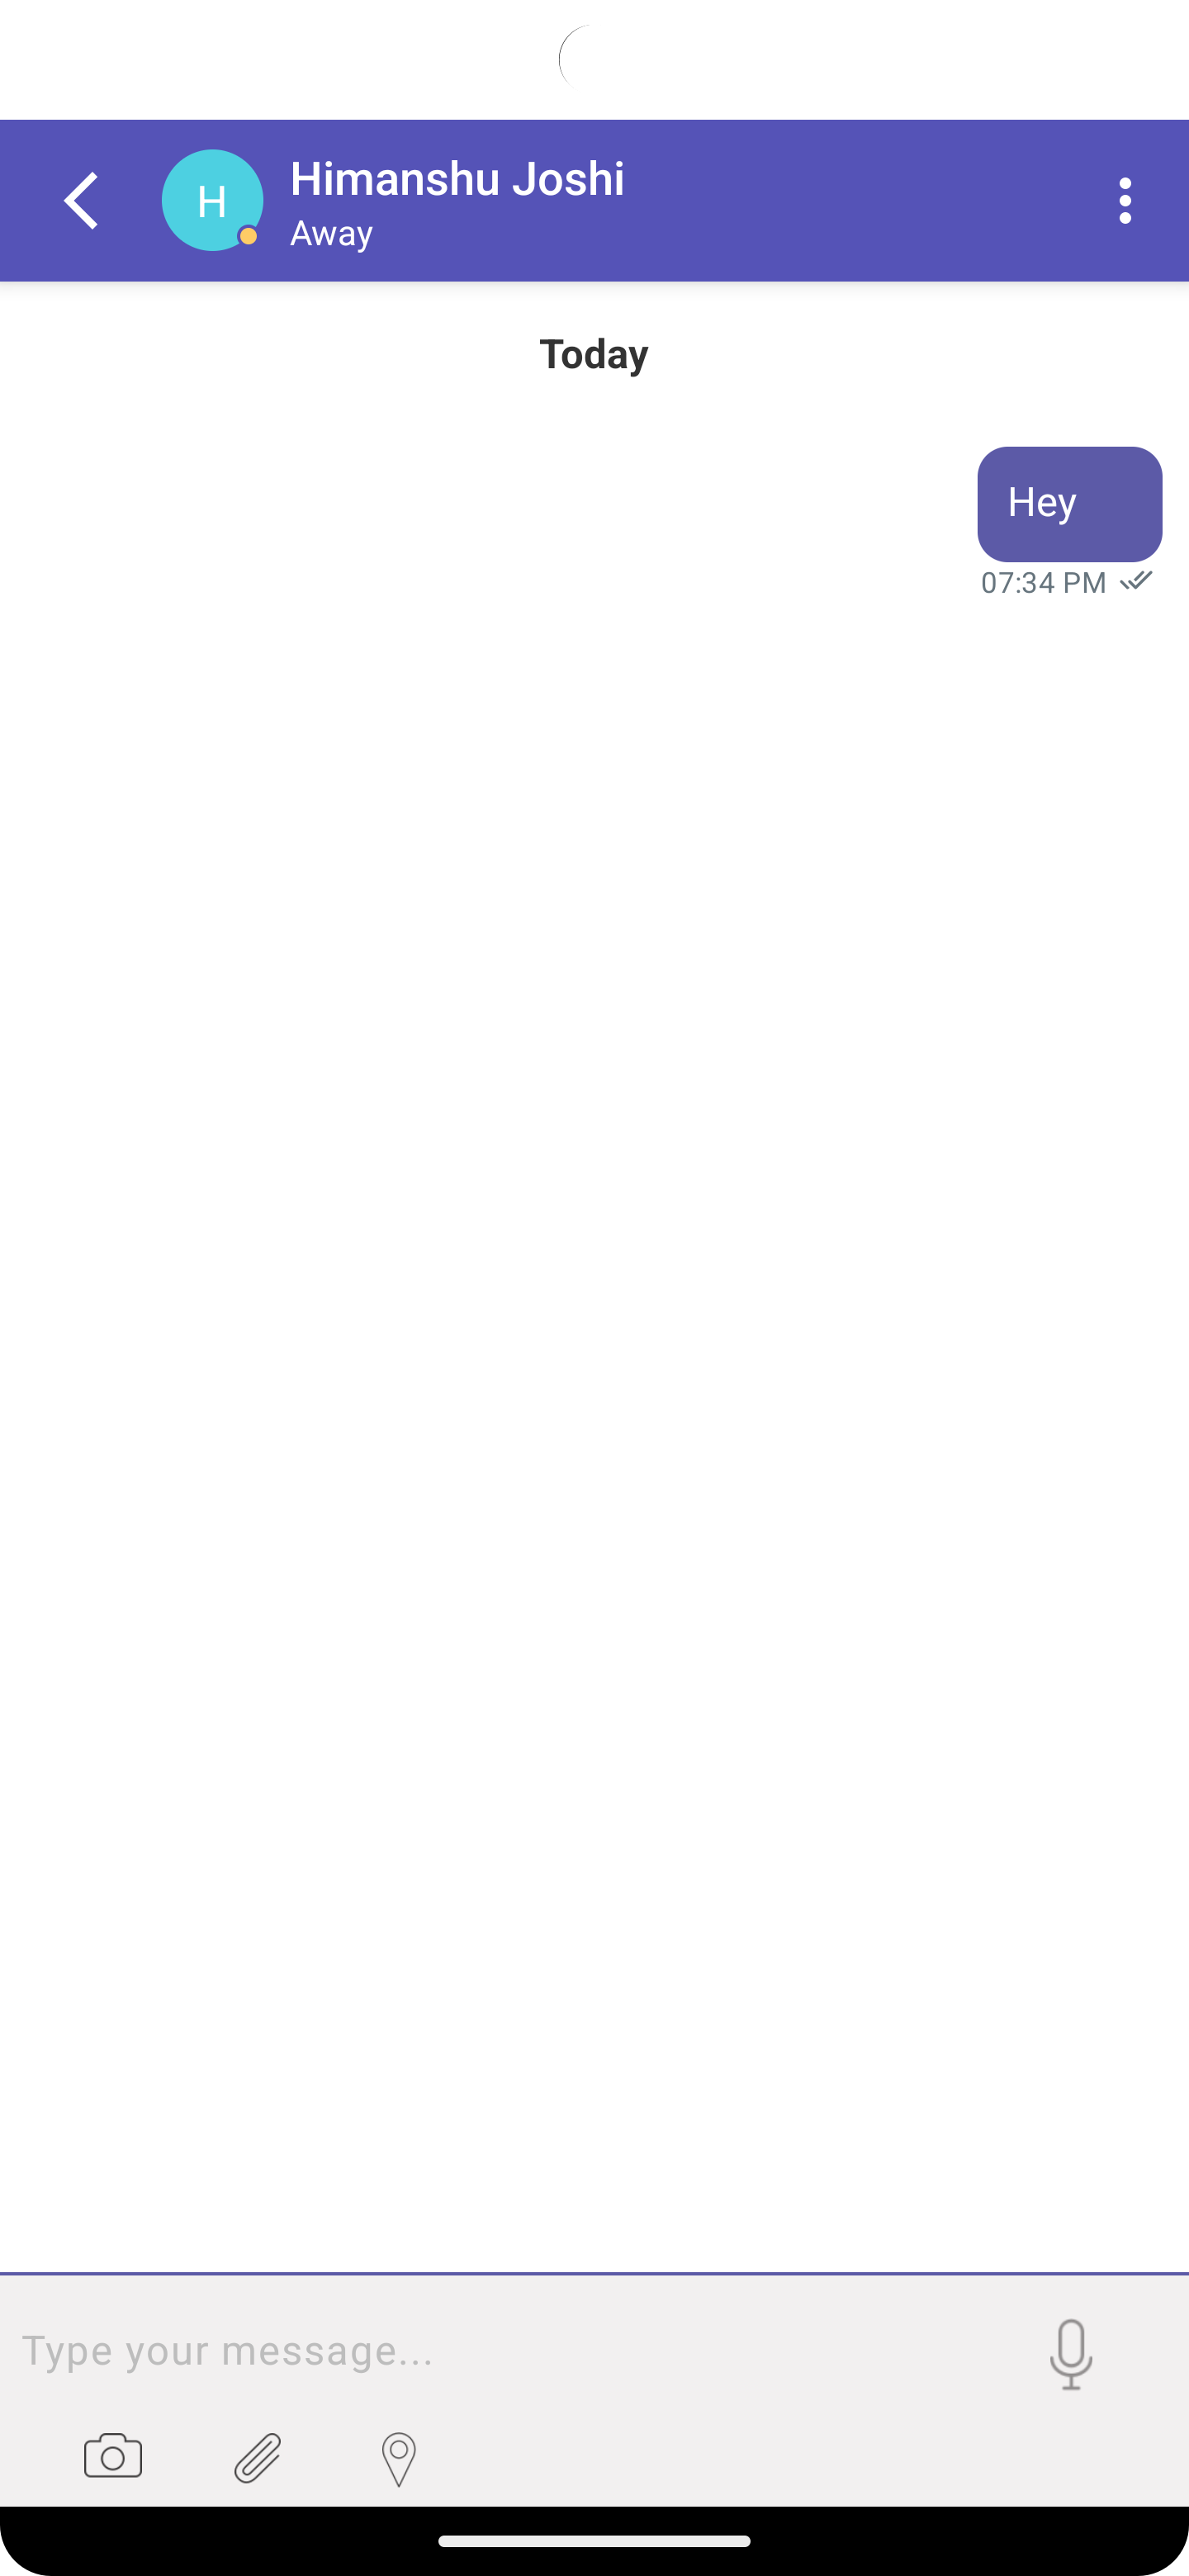
Away message visible
Change fonts
Fonts for some TextViews can be changed by setting the fonts in the applozic-settings.json file. Add the below property in applozic-settings.json file to change the fonts for the respective TextViews:
"fontModel": {
    "messageTextFont": "",  // The default font would be used if any of the font feilds is left blank
    "messageDisplayNameFont": "",
    "createdAtTimeFont": "",
    "toolbarTitleFont": "",
    "toolbarSubtitleFont": "",
    "messageEditTextFont": ""
  }
If a particular field is left blank or is not included in the above object, then default font would be used for the same. To change the font, provide either an external font file or select from the list of default android fonts. The details on how to update external or default Android fonts are given below.
Use TTF font file
To use an external font, add the TTF font file under the directory app/src/main/assets/fonts/<your-font>.ttf
Then specify the font for the specific TextView. For example, to use the above font for the toolbar title, set the path to the property toolbarTitleFont:
"fontModel": {
    "messageTextFont": "",
    "messageDisplayNameFont": "",
    "createdAtTimeFont": "",
    "toolbarTitleFont": "fonts/<YOUR_FONT>.ttf",
    "toolbarSubtitleFont": "",
    "messageEditTextFont": ""
  }
Use Android's default fonts
To use the font from the list of default android fonts, set the font name to the TextView property in the fontModel object in applozic-settings.json file. Use fonts from the below list. You can only use one font per TextView, no combinations are allowed.
normal,
bold,
italic,
bold_italic,
default,
default_bold,
monospace,
sans_serif,
serif
For example, if you want to use sans_serif font for the toolbar subtitle TextView, set the font name to the toolbarSubtitleFont property:
"fontModel": {
    "messageTextFont": "",
    "messageDisplayNameFont": "",
    "createdAtTimeFont": "",
    "toolbarTitleFont": "fonts/<your-font>.ttf", // Custom fonts are set like this
    "toolbarSubtitleFont": "sans_serif", // Android default fonts are set like this
    "messageEditTextFont": ""
  }
Theme customization
You may not be able to change all the colors from the applozic-settings.json file. There are some colors such as the status bar/toolbar color, message status icon colors (sent, delivered etc icons) which you need to override in your colors file.
Follow the below steps to override the default colors in Kommunicate:
- Add this line in your
<resourcestag in the colors.xml file
xmlns:tools="http://schemas.android.com/tools"
- Add the below colors in your
colors.xmlfile and use your own color values in them
<color name="applozic_theme_color_primary_dark" tools:override="true">#FF4081</color>Status bar color
NOTE: primary colors such as Tool bar color, message_status_icon_colors can be set from the Kommunicate dashboard
- Change Toolbar title color and the Toolbar subtitle color
To change the toolbar colors, open the file applozic-settings.json as explained here and add the following fields and mention the color you want to add.
"toolbarTitleColor": "#5c5aa7",
"toolbarSubtitleColor": "#e6e5ec",
Sample colors.xml file:
<?xml version="1.0" encoding="utf-8"?>
<resources xmlns:tools="http://schemas.android.com/tools">
    <Your other custom colors go here> // Add the specific colors you want to set here
    <color name="applozic_theme_color_primary_dark" tools:override="true">#FF4081</color>Status bar color
</resources>
Notification icon color customization
To set the notification icon color, add the below code in your Android Manifest:
<meta-data
    android:name="com.applozic.mobicomkit.notification.iconColor"
    android:resource="@color/colorPrimary">
</meta-data>
Pass Custom data to bot platform
If you need to send some additional data with all the messages sent from a device, then you need to set predefined metadata when logging in the user.
For example, if you need to send deviceInformation with all the messages sent from that device then call the below function in onSuccess of login or whichever initial method you are calling from Kommunicate:
Kotlin
If you are using Kotlin:
val metadata = mapOf(
    "deviceId" to "Current Device ID",
    "deviceManufacturer" to "Some manufacturer"
)
KmSettings.updateChatContext(context, metadata)
Java
If you are using Java:
 Map<String, String> metadata = new HashMap<>();
 metadata.put("deviceId", "Current Device ID");
 metadata.put("deviceManufaturer", "Some manufacturer");
 KmSettings.updateChatContext(context, metadata);
This data will be sent with all the messages sent from the device.
Set parent activity to the ConversationActivity dynamically
If you have a use case where the conversation is launched from multiple activities, then you can set the parent activity to the conversation activity so that the user navigates back to the parent activity when the app is launched from chat notification. Use the below code to set the parentActivity dynamically:
Kotlin
If you are using Kotlin:
KommunicateSetting.getInstance(getContext()).setParentActivity("<COMPLETE-RESOLVED-PATH-OF-THE-ACTIVITY>")
// resolved path e.g: kommunicate.io.sample.MainActivity
Java
If you are using Java:
KommunicateSetting.getInstance(getContext()).setParentActivity("<COMPLETE-RESOLVED-PATH-OF-THE-ACTIVITY>");
  //resolved path e.g: kommunicate.io.sample.MainActivity
Speech-to-Text and Text-to-Speech support
The quality of the customer journey is everything in a product. STT and TTS will help you in enhancing the user experience and people with different learning styles prefer using these features, hence we have decided to help our clients in this way and added the support for this.
Note : Add below code to enable Speech-to-Text or Text-to-Speech before launching a conversation.
import com.applozic.mobicomkit.uiwidgets.kommunicate.KmPrefSettings;
You can enable the Speech-to-Text and Text-to-Speech using the below setting:
Kotlin
If you are using Kotlin:
KmPrefSettings.getInstance(context).apply {
   enableSpeechToText(true) // if true, enables speech to text feature in the SDK.
   enableTextToSpeech(true) // if true, enables text to speech feature. All the messages received will be spoken when the chat screen is open
   setSendMessageOnSpeechEnd(true) // if true, the speech will automatically be sent as a message without clicking the send message button.
   speechToTextLanguage = "zh-TW" // set the language code for speech recognition. Default is en-US.
   textToSpeechLanguage = "zh-TW" // set the language code for text to speech. Default is en-US
}
Java
If you are using Java:
KmPrefSettings.getInstance(SplashScreenActivity.this)
                     .enableSpeechToText(true) // if true, enables speech to text feature in the SDK.
                     .enableTextToSpeech(true) // if true, enables text to speech feature. All the messages received will be spoken when the chat screen is open.
                     .setSendMessageOnSpeechEnd(true) //if true, the speech will automatically be sent as a message without clicking the send message button.
                     .setSpeechToTextLanguage("zh-TW") // set the laguage code for speech recognition. Default is en-US.
                     .setTextToSpeechLanguage("zh-TW"); // set the language code for text to speech. Default is en-US
Text to speech: Works only when the conversation is open and a new message is received within the conversation.
Speech to text: The mic button used to record and send audio will function as STT starter. Just click the button once and the device will start listening. To cancel an ongoing listening, click on the button again. The audio button will scale animate depending on the input voice amplitude. The partial results will be set on the message edit text but the send message button will only be enabled once the complete speech is received. When isSendOnSpeechEnd = true, the message will be sent automatically once the text is received.
To Integrate your own STT or TTS service, replace the KmSpeechToText and KmTextToSpeech implementation with your service.
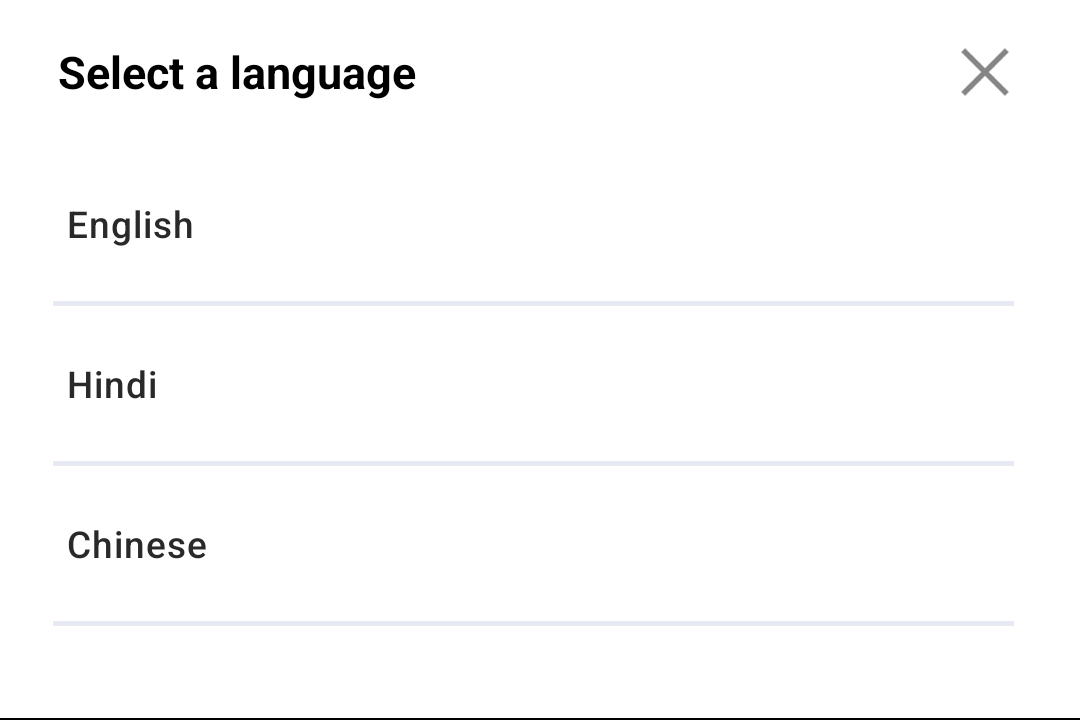
Multiple language support for speech to text
To enable multiple language support for speech to text you can use the following code.
Kotlin
If you are using Kotlin:
val m1 = KmSpeechToTextModel(
   code ="en",
   name = "English",
   messageToSend = "Change language to English",
   sendMessageOnClick = true
)
val m2 = KmSpeechToTextModel(
   code = "hi",
   name = "Hindi",
   messageToSend = "Change language to Hindi",
   sendMessageOnClick = true
)
val m3 = KmSpeechToTextModel(
   code = "zh",
   name = "Chinese",
   messageToSend = "Change language to Chinese",
   sendMessageOnClick = true
)
val list = listOf(m1, m2, m3)


KmSpeechToTextSetting.getInstance(context).apply {
   speechToTextList = list
   isMultipleSpeechToTextEnabled = true
   isSendMessageOnSpeechEnd = true
   isShowLanguageCode = false
}
Java
If you are using Java:
KmSpeechToTextModel m1 = new KmSpeechToTextModel("en", "English", "Change language to English", true);
KmSpeechToTextModel m2 = new KmSpeechToTextModel("hi", "Hindi", "Change language to Hindi", true);
KmSpeechToTextModel m3 = new KmSpeechToTextModel("zh", "Chinese", "Change language to Chinse", true);
list.add(m1);
list.add(m2);
list.add(m3);
KmSpeechToTextSetting.getInstance(this)
                     .setSpeechToTextList(list)
                     .enableMultipleSpeechToText(true)
                     .sendMessageOnSpeechEnd(true)
                     .showLanguageCode(false);
Set FAQ Page name
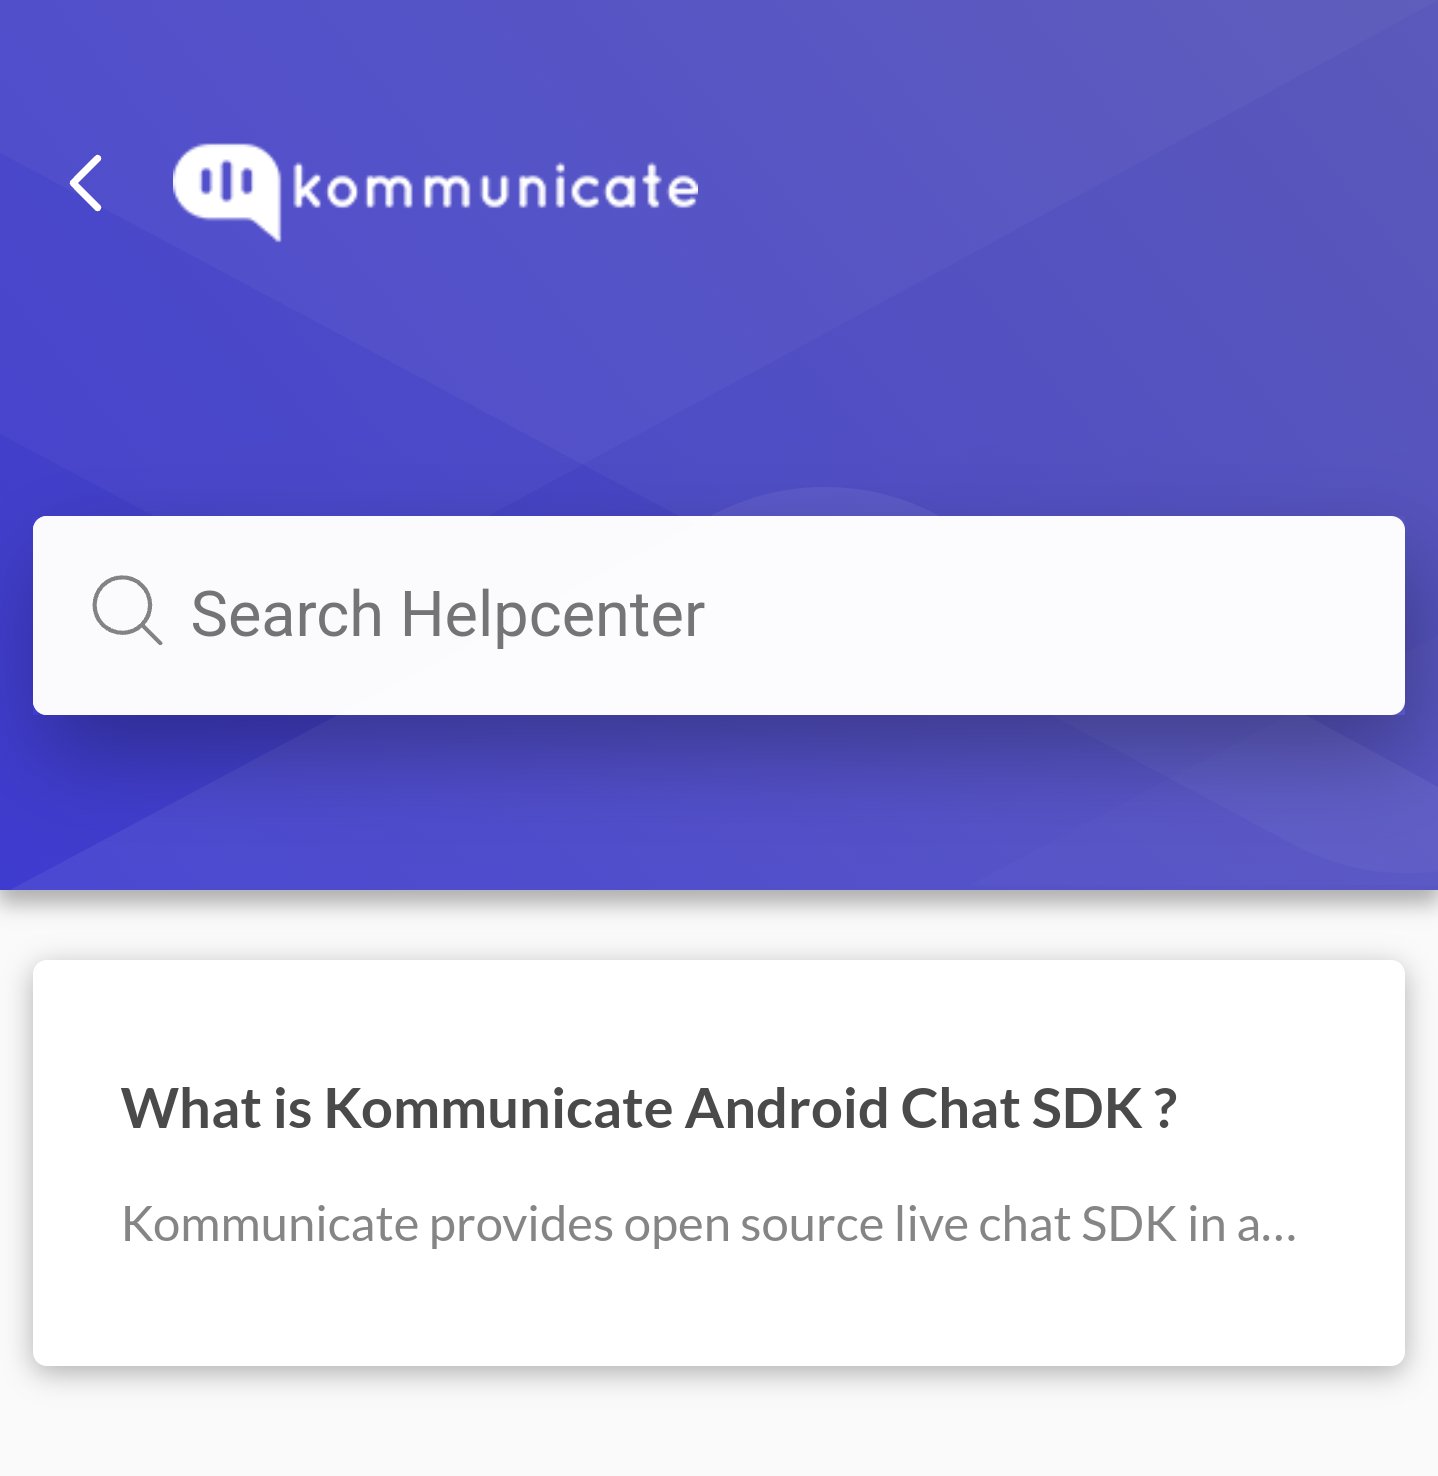
Refer to the following code to set your FAQ Page name. You can create FAQ articles from here.
Kotlin
If you are using Kotlin:
Kommunicate.setFaqPageName(String faqPageName)
Java
If you are using Java:
Kommunicate.setFaqPageName(String faqPageName)
Set prefilled text on chatBar
Refer to the following code to set prefilled text on chatBar
Kotlin
If you are using Kotlin:
Kommunicate.setChatText(context, text)
Java
If you are using Java:
Kommunicate.setChatText(Context context, String text);

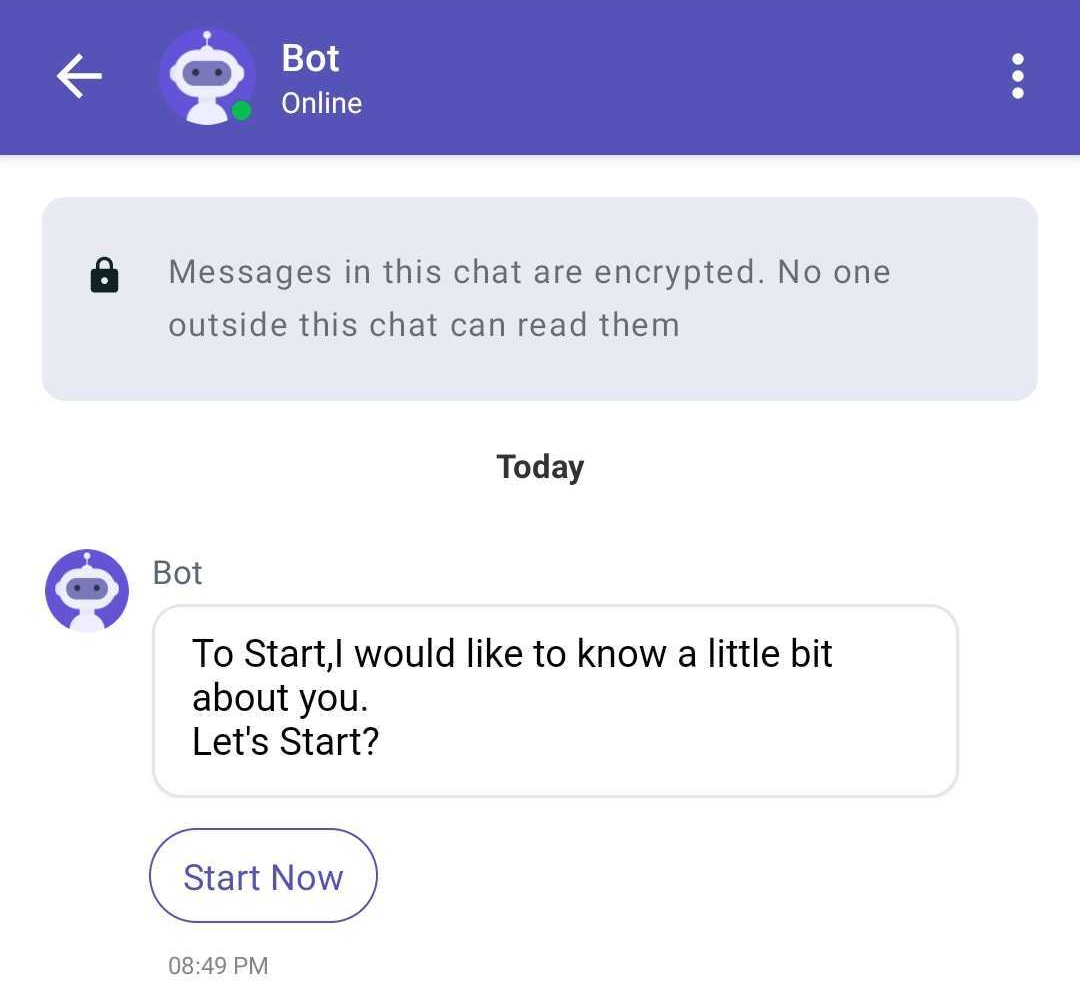
Add a static top message
To add a static top message, open the file applozic-settings.json and add the following fields to always show a message with a icon on the top of the messages list.
"staticTopMessage": "Messages in this chat are encrypted. No one outside this chat can read them",
"staticTopIcon": "km_lock"
Restrict pattern
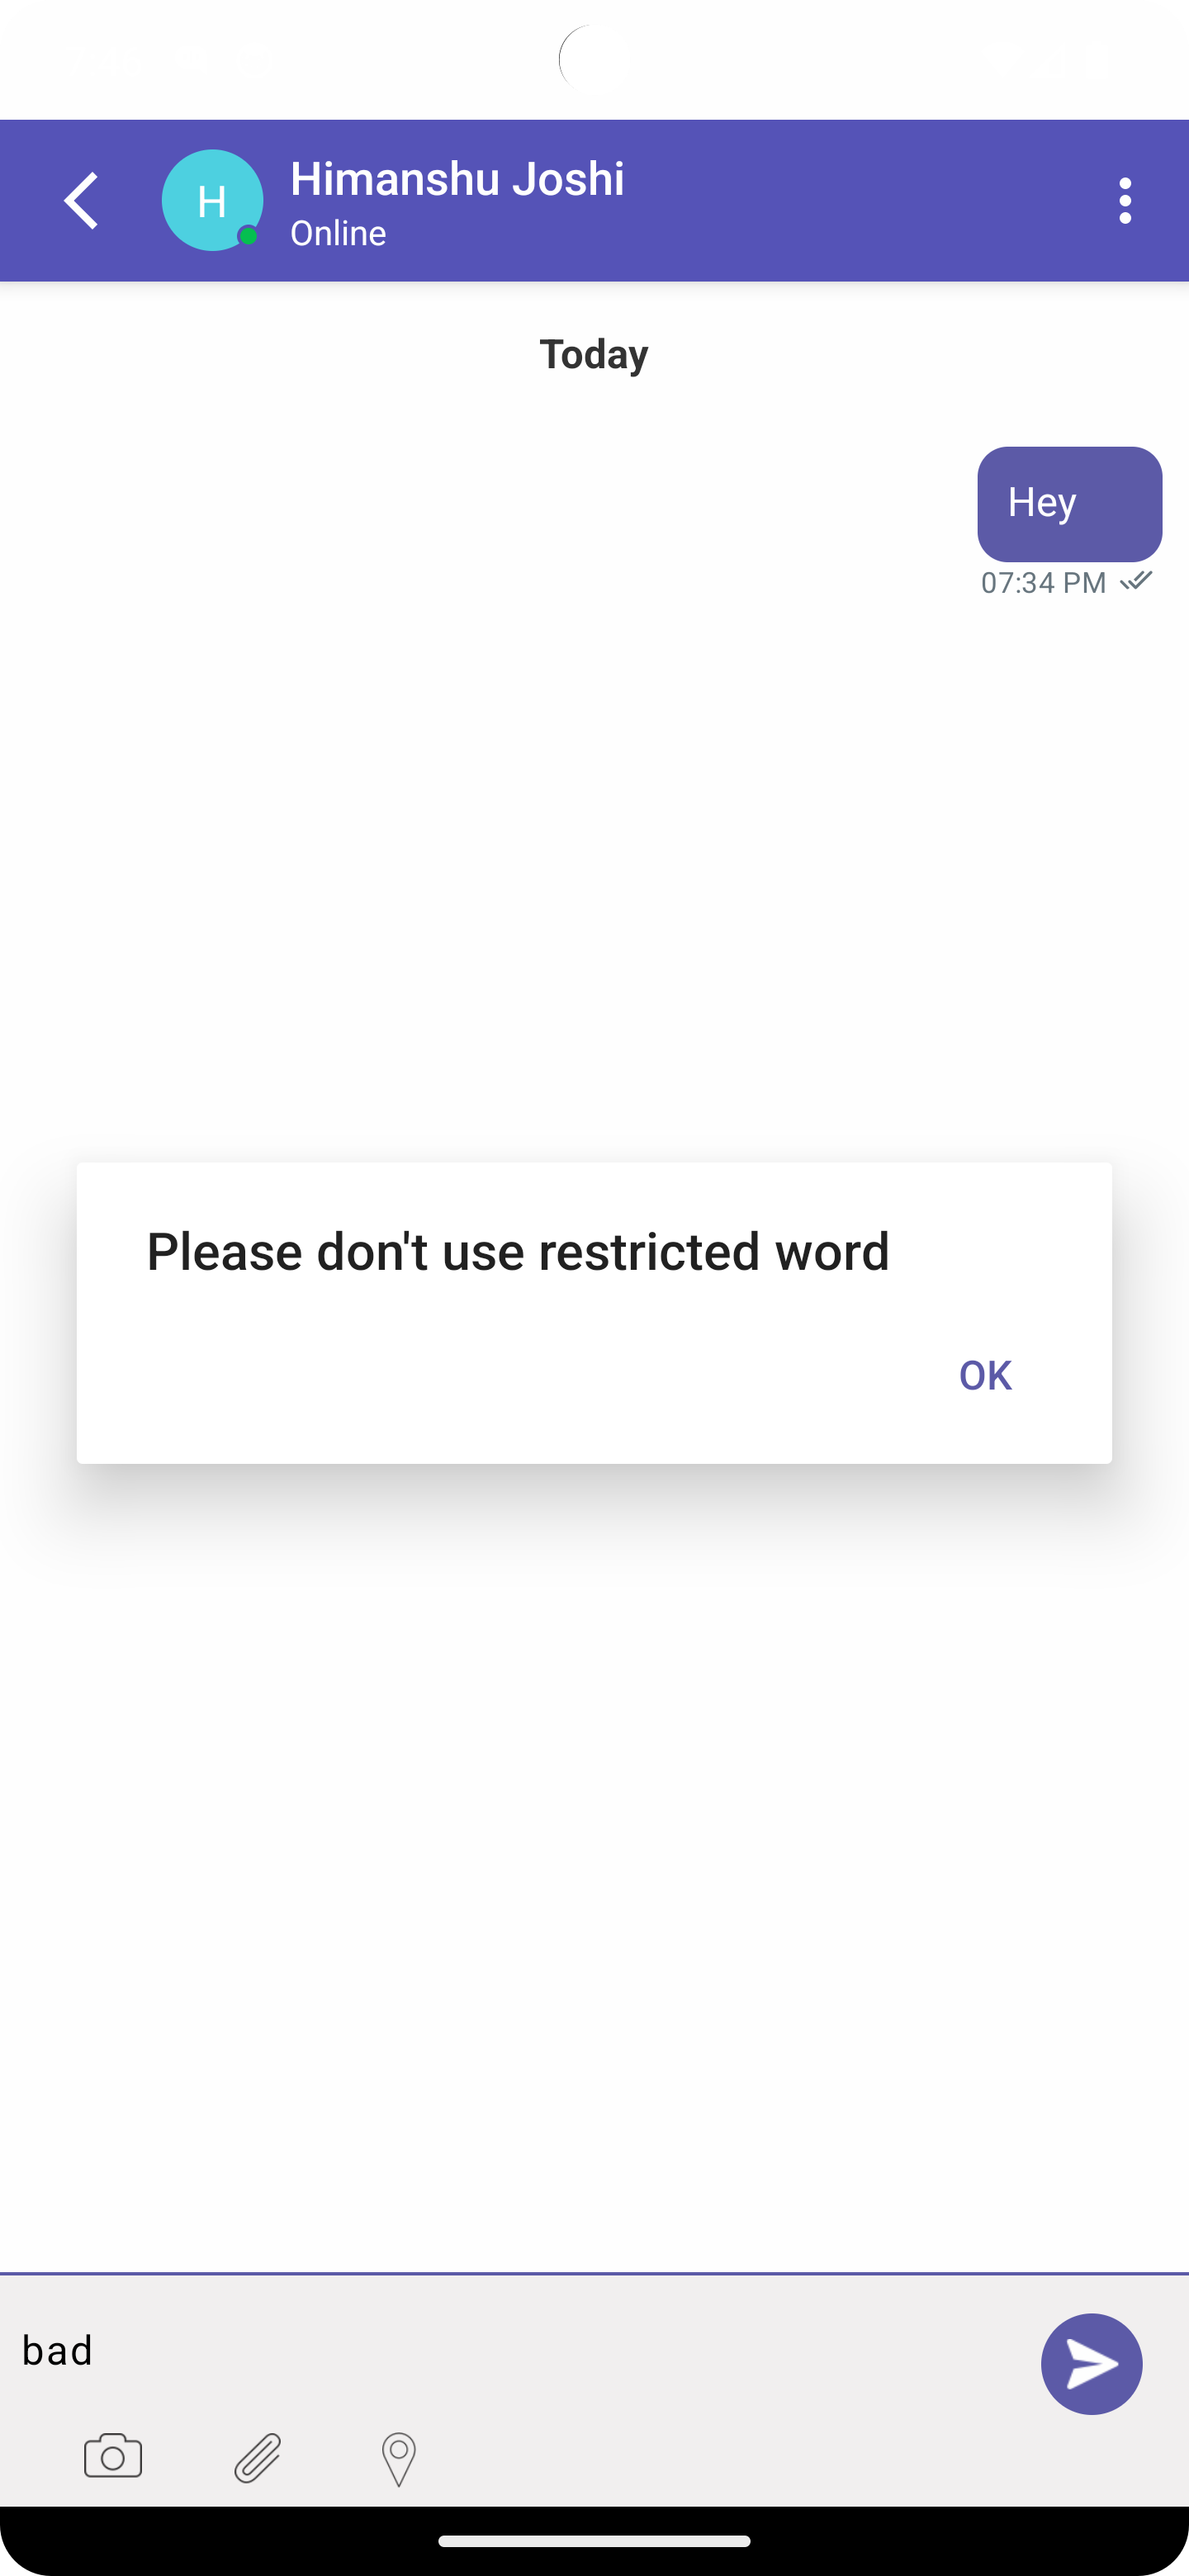
You can configure a regex pattern that can be restricted when user tries to send in the conversation.This regular expression pattern that will be used to match the text that user is sending. If the text is matched with the through this pattern, an alert will be shown. By default, it is empty.
Note: Make sure you verify this pattern before setting up here.
"restrictedWordMessage": "Please don't use restricted word",
"restrictedWordRegex": "bad",
One time rating
If it is true, customers can give feedback only once for the conversation. If it’s false, the customer can give feedback whenever the conversation gets resolved.
"oneTimeRating": true
Logout package name
You can specify an activity to which the app navigates after logout is triggered.
"logoutPackageName": "kommunicate.io.sample.MainActivity"
Events
To get real time updates of user's activity on Kommunicate chat widget subscribe following events:
| Event | Description |
|---|---|
| onPluginLaunch | Triggered when the chat screen is opened. |
| onPluginDismiss | Triggered when the chat screen is closed. |
| onConversationResolved | Triggered when the Conversation is resolved. |
| onConversationRestarted | Triggered when the Conversation is restarted. |
| onRichMessageButtonClick | Triggered when the Rich message button is clicked. |
| onStartNewConversation | Triggered when a new conversation is started. |
| onSubmitRatingClick | Triggered when the rating submit button is clicked. |
| onMessageSent | Triggered when a message is sent. |
| onMessageReceived | Triggered when a message is received. |
| onBackButtonClicked | Triggered when the back button is clicked. |
| onAttachmentClick | Triggered when the attachment button is clicked. |
| onFaqClick | Triggered when the FAQ button is clicked. |
| onLocationClick | Triggered when the location button is clicked. |
| onNotificationClick | Triggered when the notification is clicked. |
| onVoiceButtonClick | Triggered when the voice button ( mic shaped ) is clicked. |
| onRatingEmoticonsClick | Triggered when the emojis of feedback fragment is clicked. |
| onRateConversationClick | Triggered when the feedback fragment pops up. |
Note : To register for events, 'implement KmPluginEventListener' in your activity, then register for the event.
How to register for events:
Kotlin
If you are using Kotlin:
AlEventManager.getInstance().registerPluginEventListener(activity)
Java
If you are using Java:
AlEventManager.getInstance().registerPluginEventListener(<pass activity>);
How to unregister for events:
AlEventManager.getInstance().unregisterPluginEventListener();
Sample code which implements KmPluginEventListener in a different class named PluginListenerClass
To register for this, we need to call
AlEventManager.getInstance().registerPluginEventListener(PluginListenerClass.class);
Kotlin
If you are using Kotlin:
class PluginListenerClass : KmPluginEventListener {

    fun register() {
        AlEventManager.getInstance().registerPluginEventListener(this)
    }

    fun unregister() {
        AlEventManager.getInstance().unregisterPluginEventListener()
    }

    override fun onPluginLaunch() {
    }

    override fun onPluginDismiss() {
    }

    override fun onConversationResolved(conversationId: Int?) {
    }

    override fun onConversationRestarted(conversationId: Int?) {
    }

    override fun onRichMessageButtonClick(conversationId: Int?, actionType: String?, action: Any?) {
    }

    override fun onStartNewConversation(conversationId: Int?) {
    }

    override fun onSubmitRatingClick(conversationId: Int?, rating: Int?, feedback: String?) {
    }

    override fun onMessageSent(message: Message?) {
    }

    override fun onMessageReceived(message: Message?) {
    }

    override fun onBackButtonClicked(isConversationOpened: Boolean) {
    }

    override fun onAttachmentClick(attachmentType: String?) {
    }

    override fun onFaqClick(faqUrl: String?) {
    }

    override fun onLocationClick() {
    }

    override fun onNotificationClick(message: Message?) {
    }

    override fun onVoiceButtonClick(action: String?) {
    }

    override fun onRatingEmoticonsClick(ratingValue: Int?) {
    }

    override fun onRateConversationClick() {
    }
}
Java
If you are using Java:
public class PluginListenerClass implements KmPluginEventListener {

public void register() {
    AlEventManager.getInstance().registerPluginEventListener(this);
}

public void unregister() {
    AlEventManager.getInstance().unregisterPluginEventListener();
}
@Override
public void onPluginLaunch() {
}

@Override
public void onPluginDismiss() {
}

@Override
public void onConversationResolved(Integer conversationId) {
}

@Override
public void onConversationRestarted(Integer conversationId) {
}

@Override
public void onRichMessageButtonClick(Integer conversationId, String actionType, Object action) {
}

@Override
public void onPluginLaunch(){
}

@Override
public void onPluginDismiss(){
}

@Override
public void onConversationResolved(Integer conversationId){
}

@Override
public void onConversationRestarted(Integer conversationId){
}

@Override
public void onRichMessageButtonClick(Integer conversationId, String actionType, Object action){
}

@Override
public void onStartNewConversation(Integer conversationId){
}

@Override
public void onSubmitRatingClick(Integer conversationId, Integer rating, String feedback){
}

@Override
public void onMessageSent(Message message){
}

@Override
public void onMessageReceived(Message message){
}

@Override
public void onBackButtonClicked(boolean isConversationOpened){
}

@Override
public void onAttachmentClick(String attachmentType){
}

@Override
public void onFaqClick(String FaqUrl){
}

@Override
public void onLocationClick(){
}

@Override
public void onNotificationClick(Message message){
}

@Override
public void onVoiceButtonClick(String action){
}

@Override
public void onRatingEmoticonsClick(Integer ratingValue){
}

@Override
public void onRateConversationClick(){
}
}
Refresh , Delete , Block , Mute , LogOut button
You can enable/disable the following options on the navigation bar of conversation Screen . By default , they are as follows
"refreshOption": false,
"deleteOption": false,
"blockOption": true,
"muteOption": true,
"logoutOptionFromConversation": false,
Change message background color
You can change the message background as per your app design and flow.
"receiverNameTextColor": "#5C6677",
Attachment limits
You can set the limit on the attachment that a particular user can send. It helps in avods spaming of messages to the agent.
"maxAttachmentAllowed": 10, // at max number of attachments allowed
"maxAttachmentSizeAllowed": 30, // maximum attachment size in Mb
Restrict Pattern
You can configure a regex pattern that can be restricted when user tries to send in the conversation. This regular expression pattern will be used to match the text that user is sending. If the text is matched with this pattern, an alert will be shown. By default, it is empty.
"restrictedWordMessage": " Please don't use restricted word", // alert message text when restricted word is used
"restrictedWordRegex": "", // regex patternO
One time rating
If it is true, customers can give feedback only once for the conversation. If it’s false, the customer can give feedback whenever the conversation gets resolved. By default, it will be false.
"oneTimeRating": true
Message template
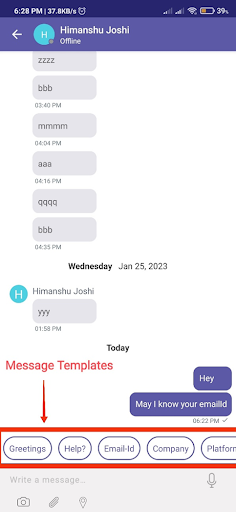
If it is true , customers will get some default templates . By default it is disabled.
"messageTemplate": {
  "isEnabled": false,
  "borderColor": "#5c5aa7",
  "backgroundColor": "#FFFFFF",
  "hideOnSend": false,
  "sendMessageOnClick": true,
  "cornerRadius": 30,
  "textColor": "#5c5aa7",
  "messageList": {
    "Greetings": "Hey",
    "Help?": "How may I help you?",
    "Email-Id": "May I know your emailId",
    "Company": "May I know your company name?",
    "Platform?": "Is this related to Android, iOS, or web?",
    "Doc?": "Did you follow our doc?"
  }
Filter Gallery
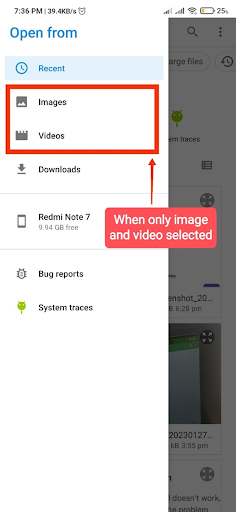
With this filter , you can customize what types of attachment a user can send . By default only "ALL_FILES" is true others are false.
"filterGallery": {
  "ALL_FILES": false, // allows all files
  "IMAGE_VIDEO": true, // allows only images and videos
  "IMAGE_ONLY": false, // allows only images
  "AUDIO_ONLY": false, // allows only audio
  "VIDEO_ONLY": false // allows only video
}
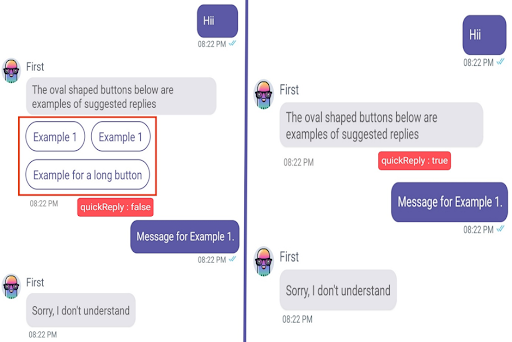
Hide Post Call To Action
If it is true , it hides the corresponding rich message after a user performs a different action in the chat . By default all are false.
"hidePostCTA": {
  "submit": false, // for hiding submit button
  "link": false, // for hiding link button
  "quickReply": false // for hiding suggested replies
}
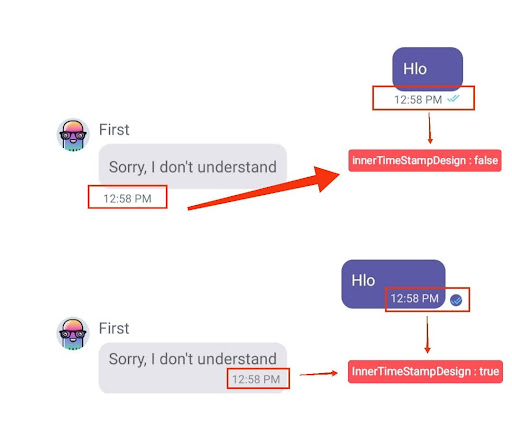
InnerTimeStampDesign
If it is true , it wraps the timestamp of chat inside the chat bubble . By default it is false .
"innerTimestampDesign": false,
