Push Notification
Overview
You can set up push notifications to notify your end users for incoming chat messages.
Setting up Push Notification
For managing push notifications, you must have a Firebase account.
- Once you have created a Firebase account, setup Firebase in your project.
- When you have setup Firebase in your project, you can setup Firebase Cloud Messaging client app on Android by following the official Firebase documentation.
Obtain private json file from firebase
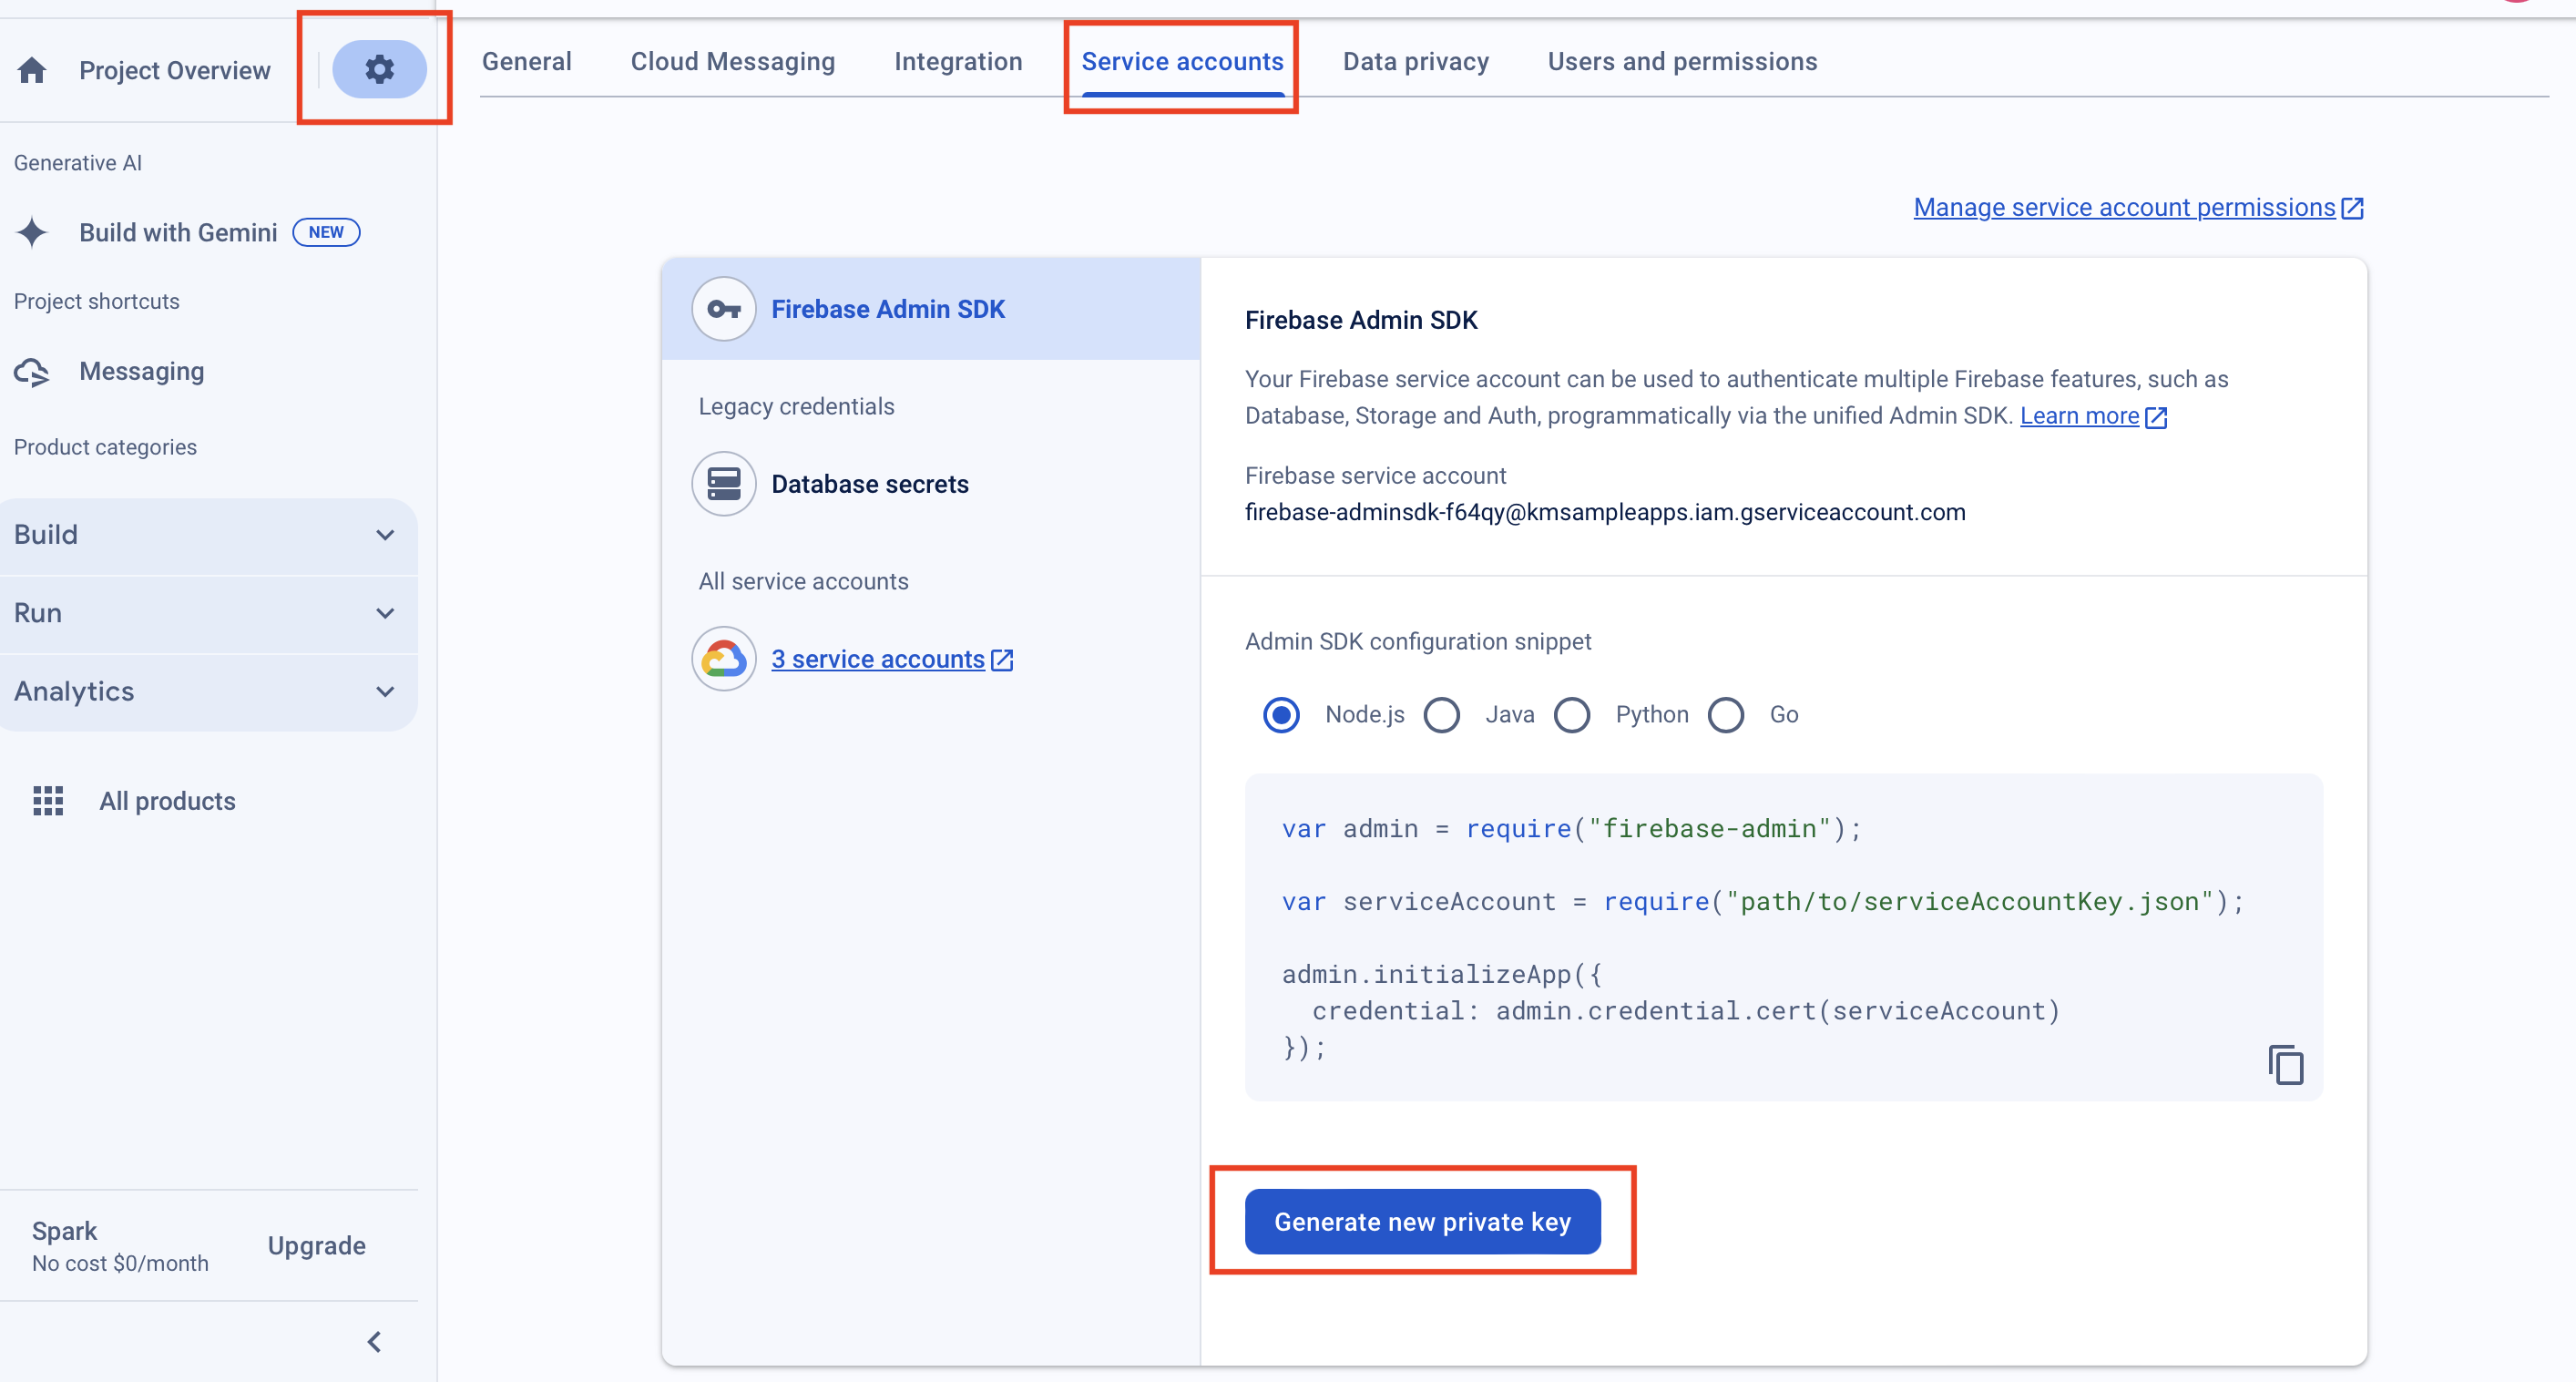
From Firebase console, click Settings icon -> Project settings
Once you click project settings select the Service Accounts tab under Settings.
Now click the Generate new private key button. This will download a .json file. Store the private file safe.

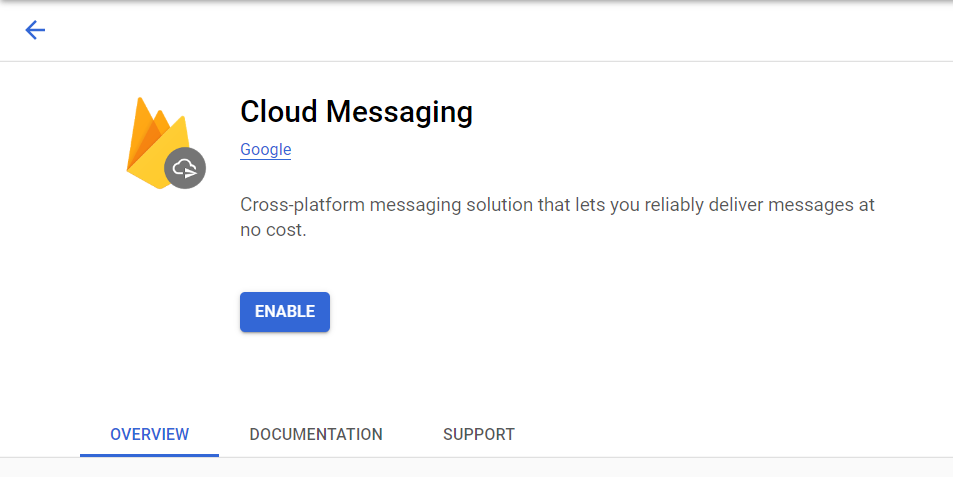
- If Firebase Cloud Messaging API is not enabled for the firebase project, Please enable it on cloud console first.

Add your private json file to Kommunicate
Go to Push notification section in Kommunicate dashboard and upload the the json file(was downloaded in step 3) under Android Section.
Send the device token to Kommunicate
If your Firebase Messaging setup is done, the next step would be to send the deviceToken to Kommunicate. This needs to be done in onNewToken method of your FirebaseMessagingService subclass. The onNewToken method is called whenever firebase updates the deviceToken on that device.
Note:
onNewTokenmethod providestoken, this is the deviceToken.
Use the below code to send the token to Kommunicate.
Kotlin
If you are using Kotlin:
override fun onNewToken(token: String) {
        super.onNewToken(registrationId)
        Log.d(TAG, "Refreshed token: $token")
        Kommunicate.updateDeviceToken(context, token)
}
Java
If you are using Java:
@Override
public void onNewToken(String token) {
    super.onNewToken(registrationId);
    Log.d(TAG, "Refreshed token: " + token);
    Kommunicate.updateDeviceToken(context, token);
}
Receive push notifications
Using the device token, Kommunicate will send the message to the device.
For Receiving FCM Notifications in your app, add the following code in your FirebaseMessagingService class.
Kotlin
If you are using Kotlin:
override fun onMessageReceived(remoteMessage: RemoteMessage) {
    Log.i(TAG, "FCM notification processing...")

    if (Kommunicate.isKmNotification(context, remoteMessage.data)) {
        return
    }
    super.onMessageReceived(remoteMessage)
}
Java
If you are using Java:
@Override
public void onMessageReceived(RemoteMessage remoteMessage) {
    Log.i(TAG, "FCM notification processing...");

    if (Kommunicate.isKmNotification(this, remoteMessage.getData())) {
        return;
    }
    super.onMessageReceived(remoteMessage);
}
Enabling Background Notifications for Killed Apps
To receive notifications even when the app is not running, add the Firebase RECEIVE permission to your AndroidManifest.xml file.
- Open your AndroidManifest.xml file and add the following permission:
<uses-permission android:name="com.google.android.c2dm.permission.RECEIVE" />
Set notification small icon
To set the notification small icon, place the below metadata in your AndroidManifest.xml file under </application> tag :
 <meta-data
    android:name="com.applozic.mobicomkit.notification.smallIcon"
    android:resource="<YOUR_LAUNCHER_SMALL_ICON>" /> <!-- Replace this with a valid resource name for Launcher white Icon -->
Note: Android version 6.0 onwards, android automatically converts the small icon color to monochrome. While some custom ROM devices do show colored icons, it is recommended that you use a shaped icon with some transparent background instead of round solid icons as a small icon.
